CLOUZ HOUZ DESIGN GUIDES - What’s your style?
TAKE THE QUIZ
Design

My Top Five Tips for Styling Your Shelves

Photo Credit for styling shelves: Zee Wendell

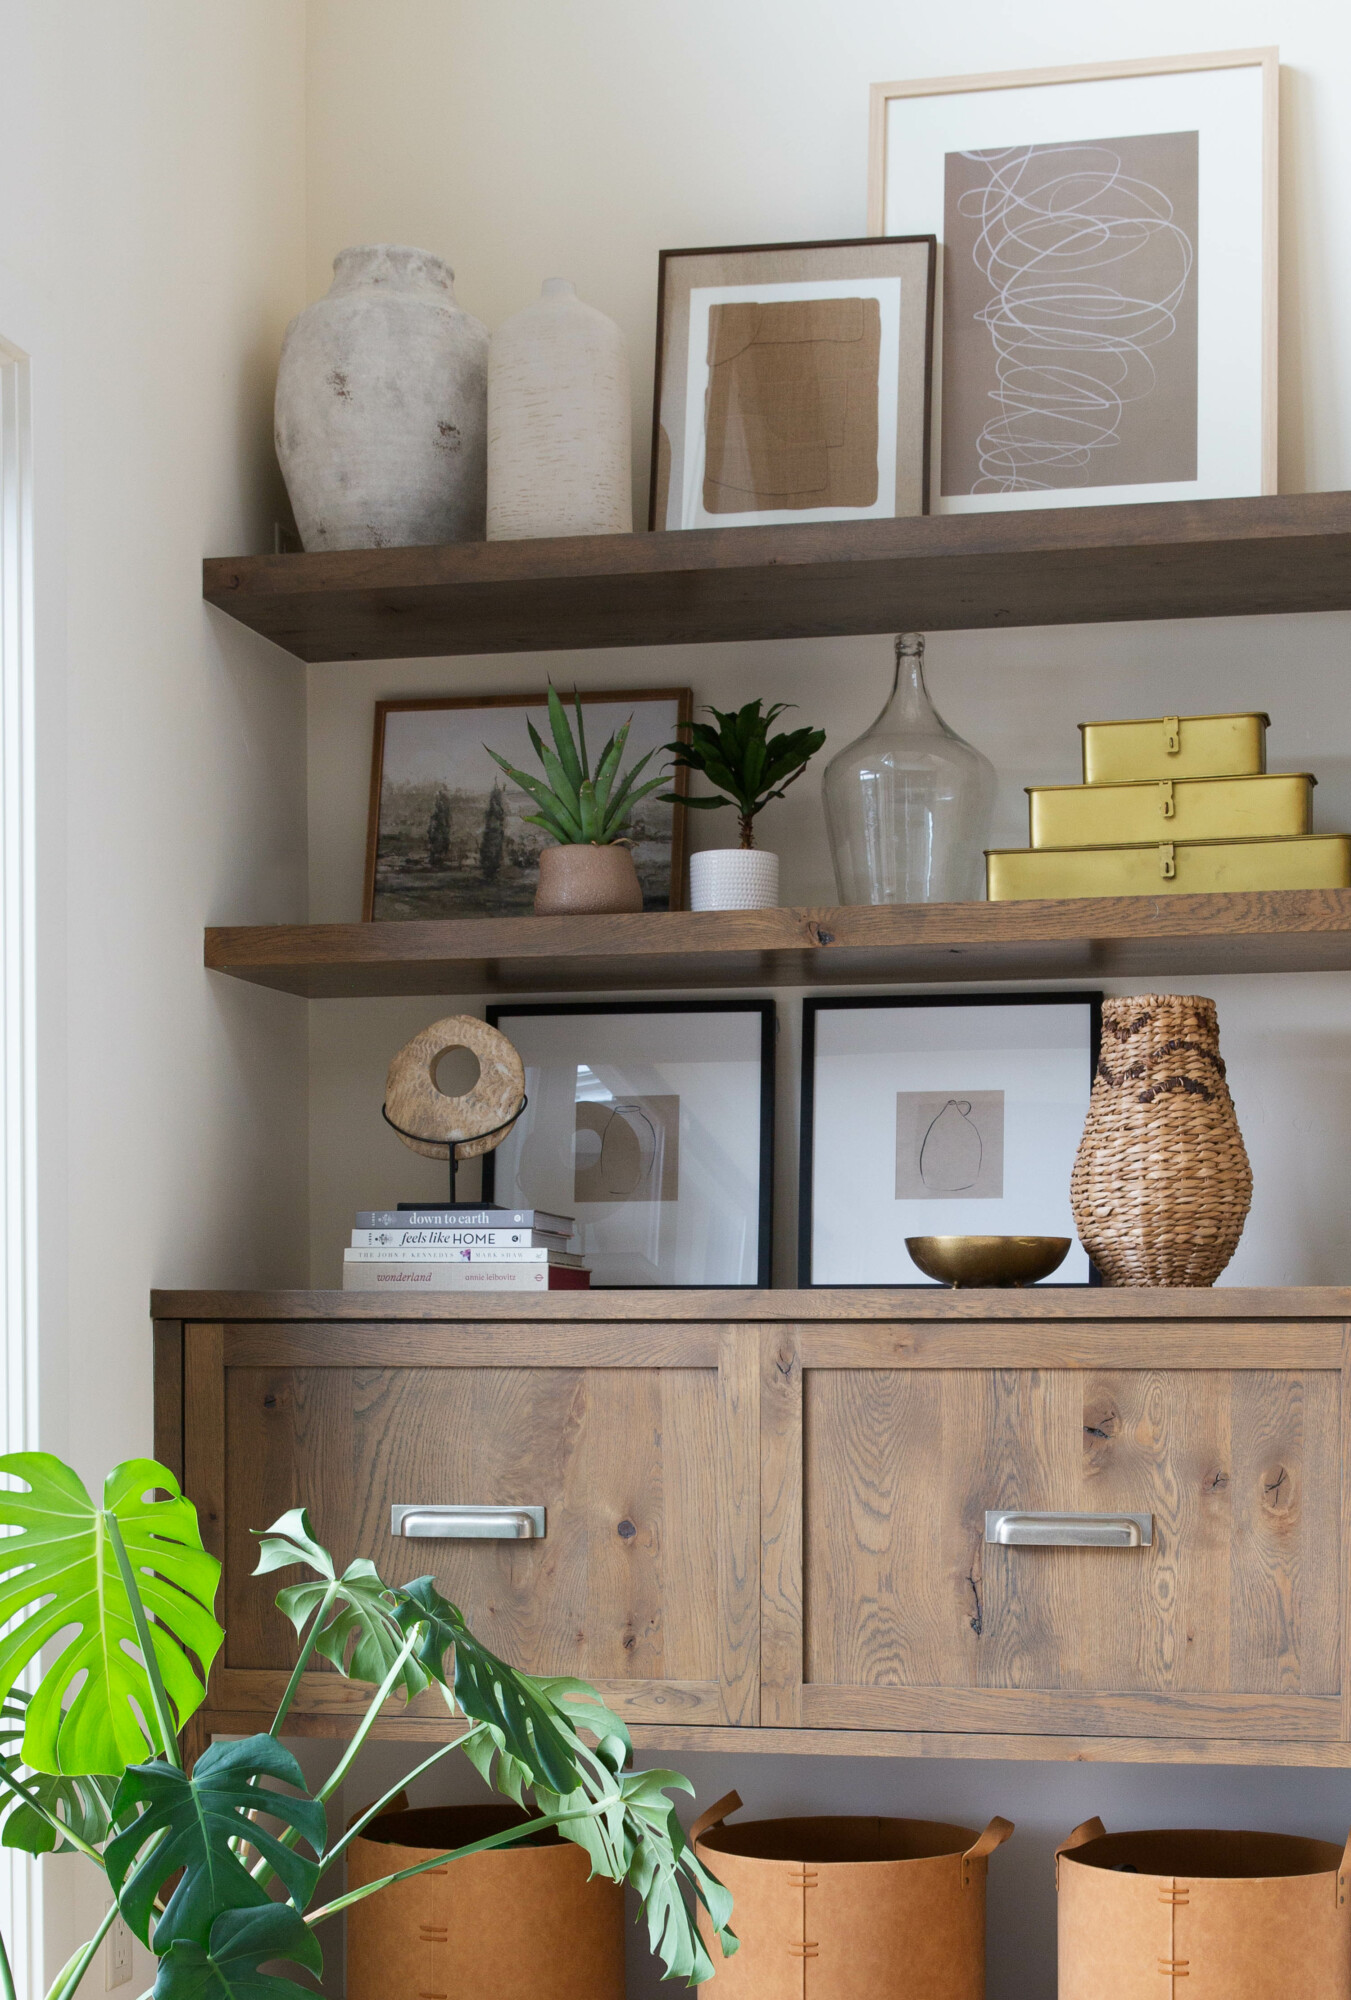
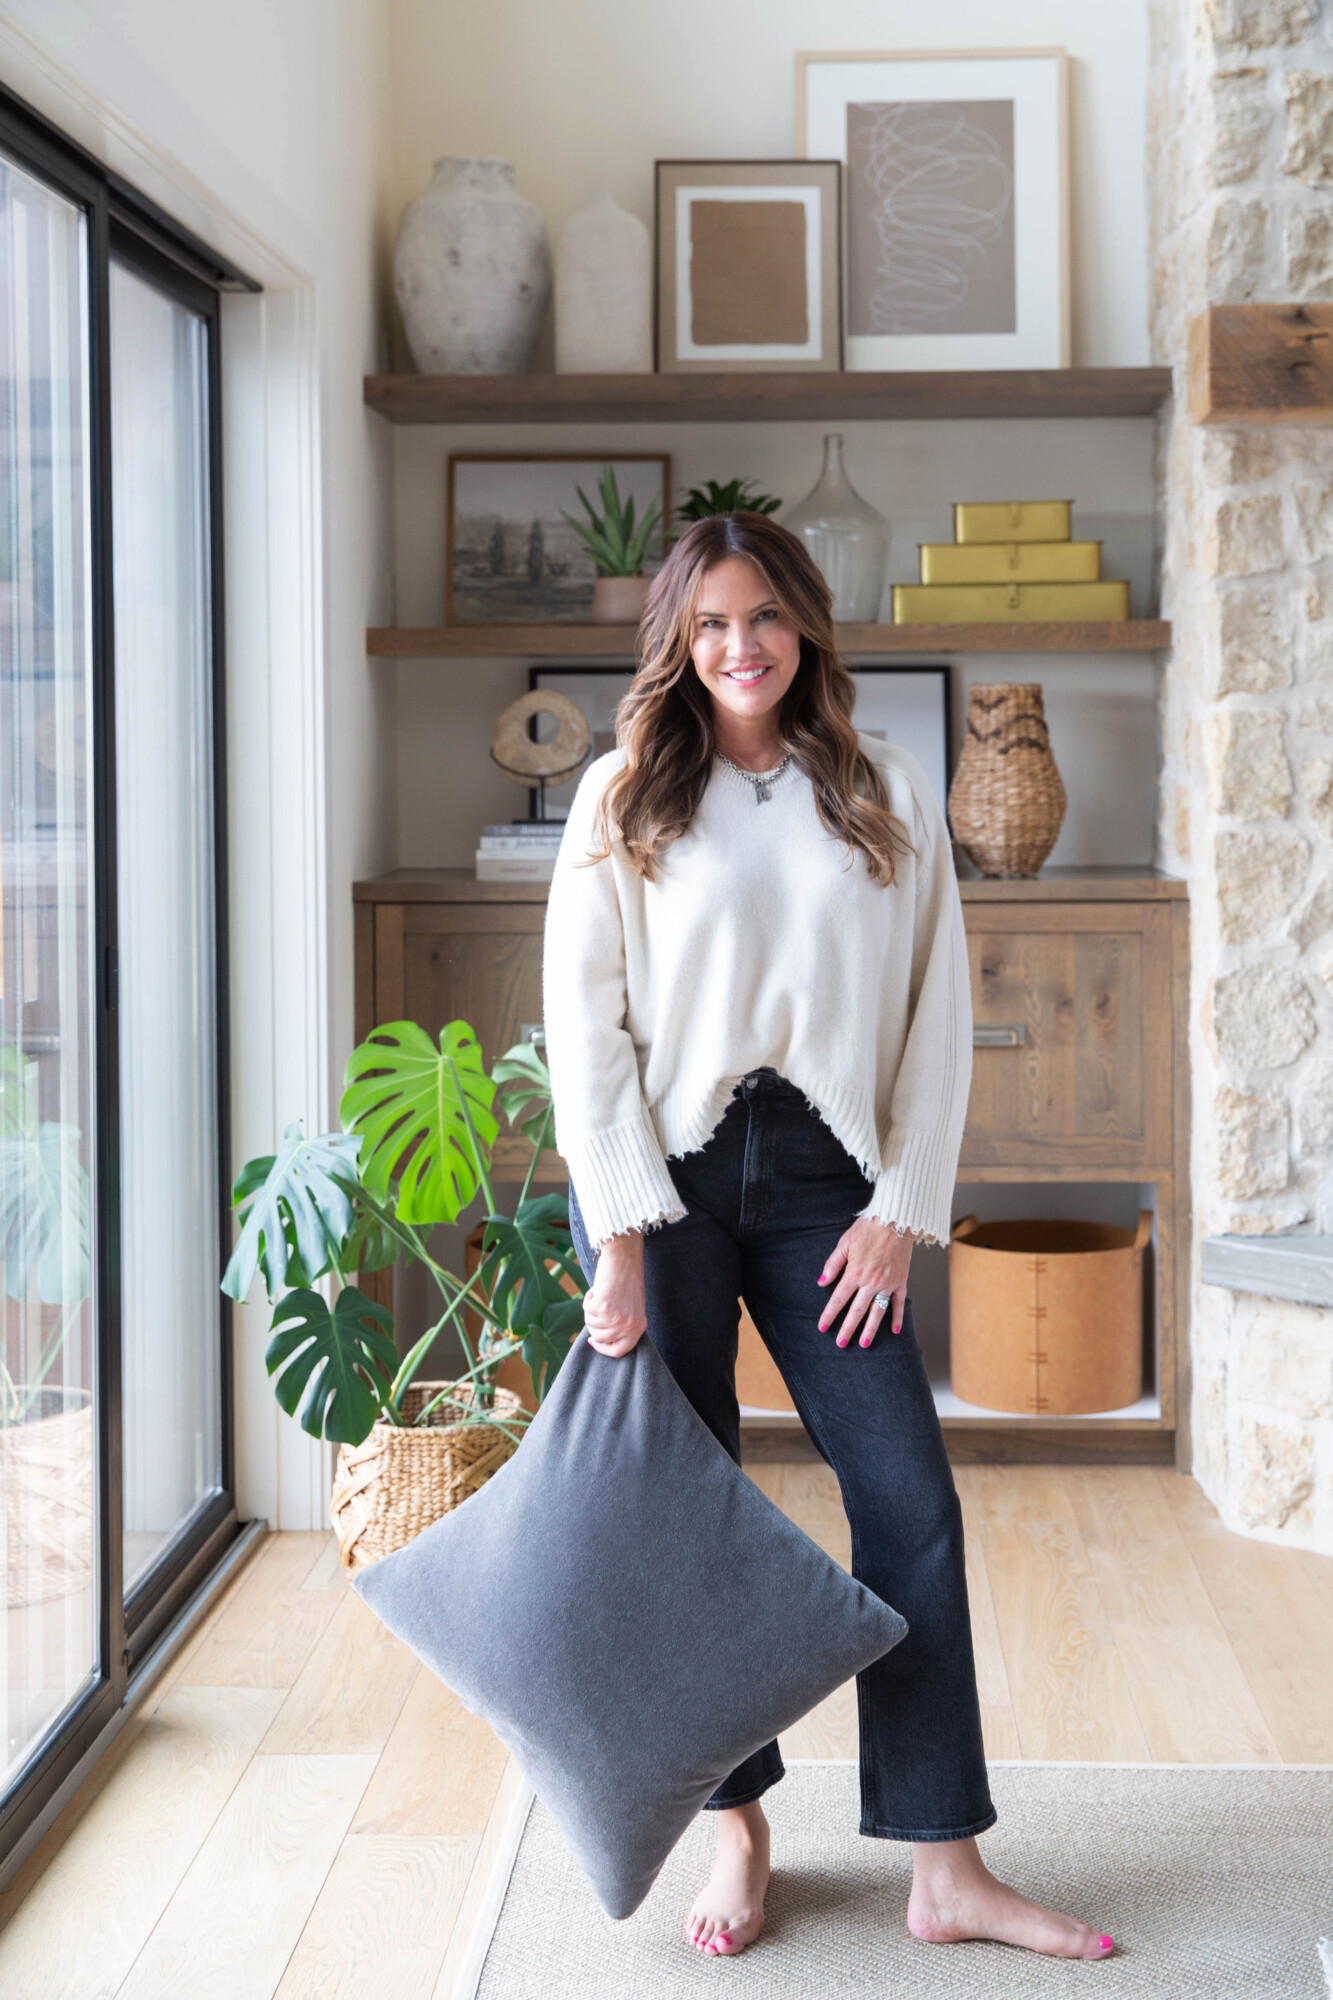
It’s almost spring! That means time to clean and refresh 🙂 Today’s post is short and sweet. I’m giving you my top five tips for styling your shelves! Our goal is always to make things simple for you. We’re excited to show you how easy it is to give your home a stylish, new look this season. We wanted to share a fun little project we just completed, where we helped our clients style some shelves in their gorgeous living room. Studio McGee for Target’s Spring collection was our primary source for décor.

With the sun starting to make a regular appearance, what better way to start transitioning into spring than by sprucing up your shelves with some fun, new accessories? By mixing natural materials, modern silhouettes and contrasting colors, I gave these show-stopping shelves some personality. Layering is KEY to making large shelves look intentional and not an afterthought. You want to tell a story with your shelves — a collection of personal items that have a cohesive look and just make you … happy! 

Here are My Simple Go-To Steps for Styling Shelves


STEP ONE

Start with larger items, such as baskets or larger pieces of art or prints, and display them on shelves in a zigzag pattern (top shelf: large piece is on left, middle shelf: large piece is on the right, and lower shelf: it’s back on the left). This way, your eye flows smoothly from shelf to shelf. With this technique, you’re able to give the area a cohesive look. This technique grounds each shelf as well — if that makes sense? Ha!

STEP TWO

Speaking of smaller items, I think that vases are beautiful for filling in the gaps. (Style tip: for larger shelves, I typically like to pair vases — either two identical ones, or one big and one small). They give the shelves another ‘layer’ to the larger pieces. Try experimenting with different arrangements of sizes, shapes, and colors/textures to decide which suits your style best, while also adding a contrasting element. 

STEP THREE

Books! Large cocktail books are your friend when it comes to styling bigger shelves. They are particularly effective when it comes to these types of shelves because their size simply speaks for themselves. Plus, the bold colors and beautiful covers can make the space a bit more vibrant and interesting. Not to mention, they can be great conversation starters! 

STEP FOUR

Go for the greens! Whether faux or real (my personal favorite), bring any room to life with some succulents or pots of moss. But let me warn you, potted plants can be a full-time responsibility. For those who have trouble keeping them alive, I recommend some dainty dried flowers to add in your vases. There are also many good faux stems to try. Check Alfloral — I’ve been very impressed by the quality of their faux flowers and greenery. 
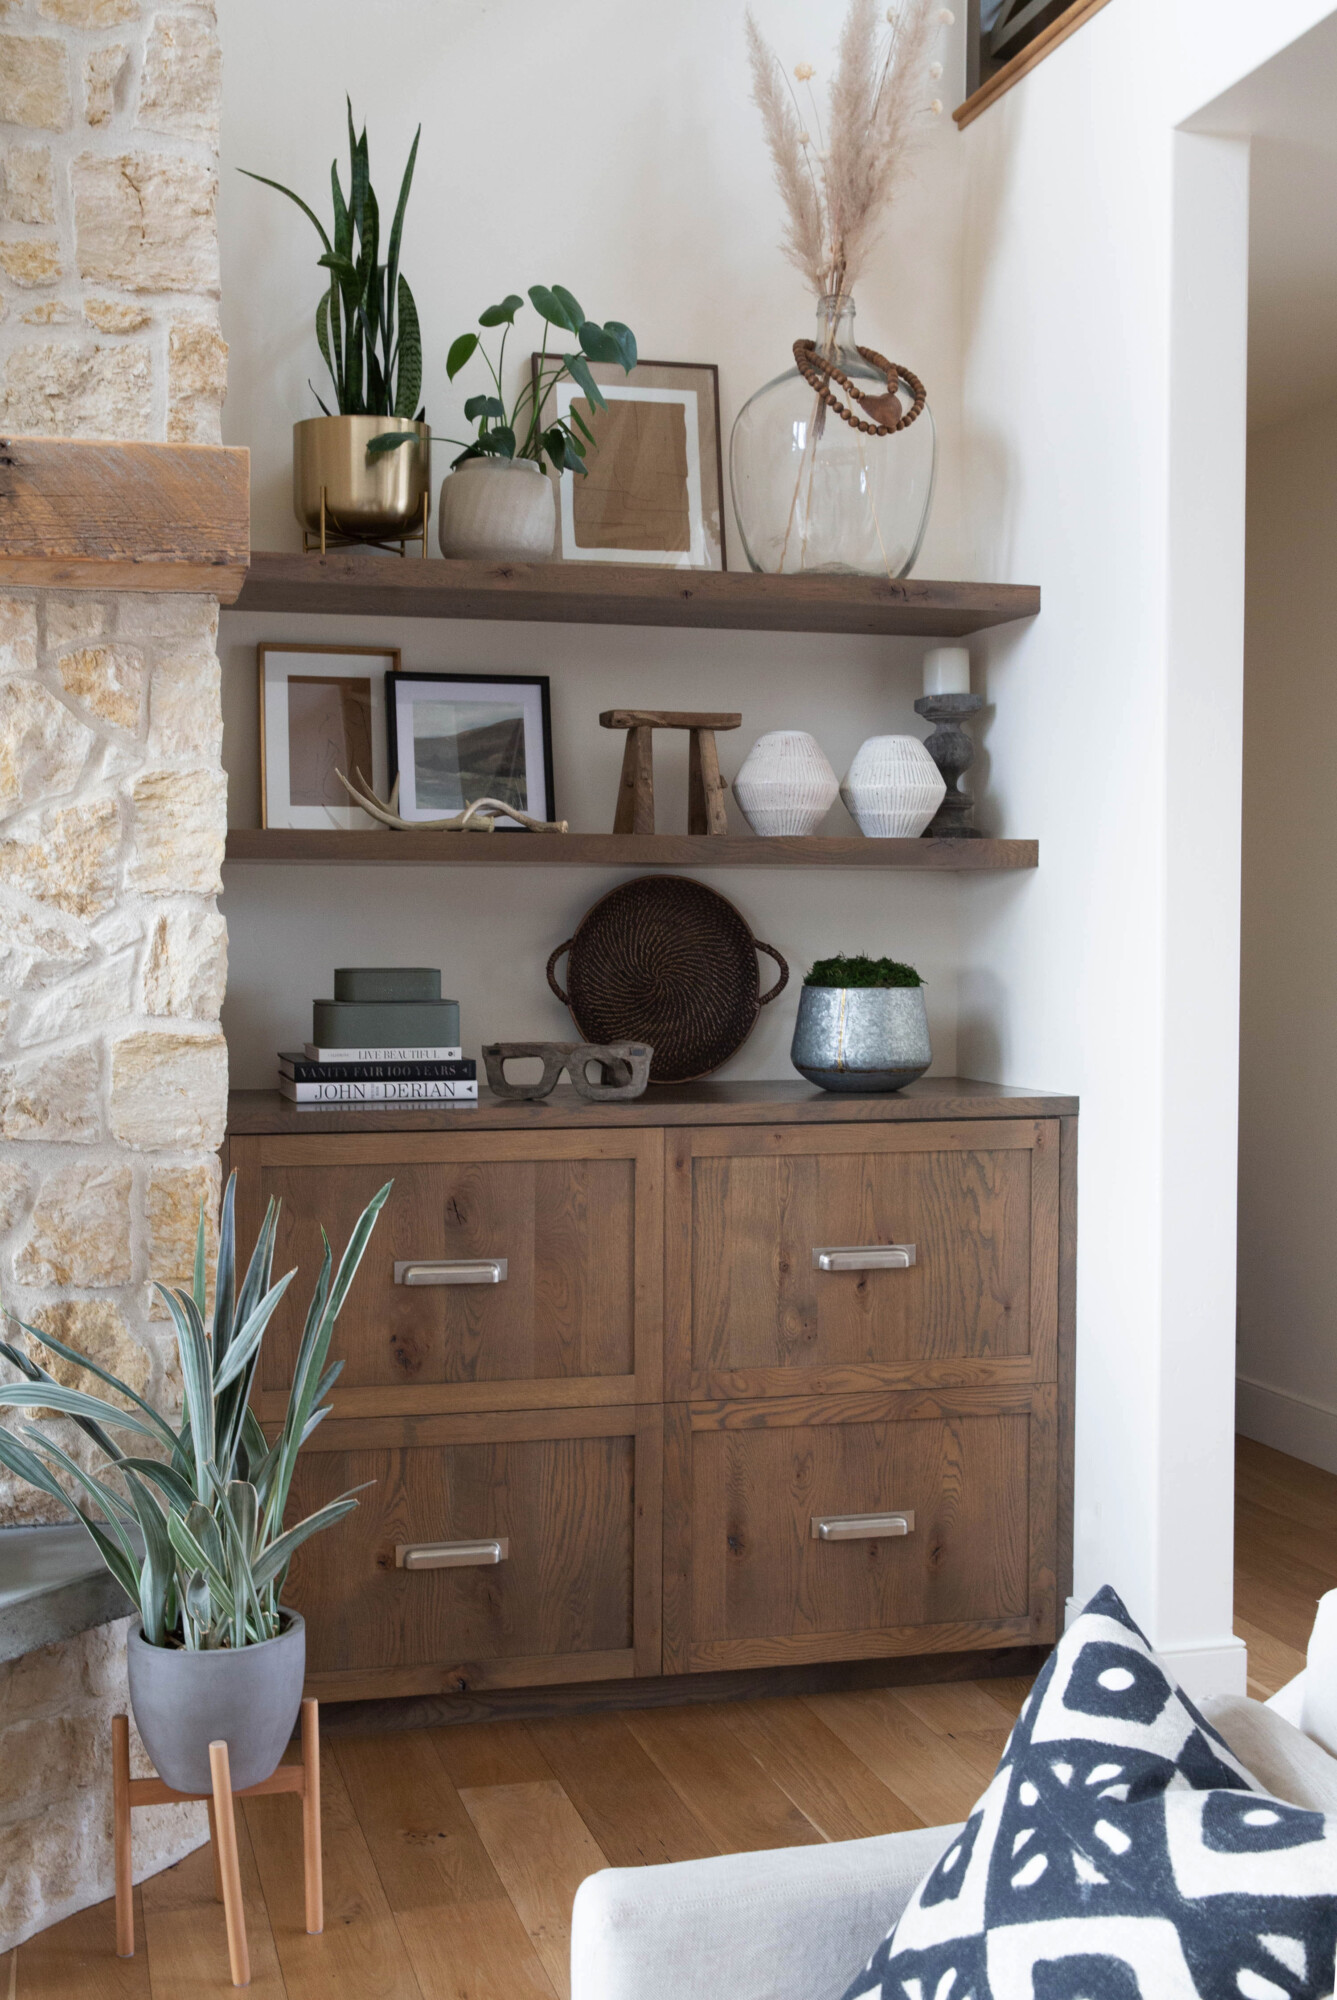

Photo Credit: Zee Wendell


Photo Credit: Zee Wendell

STEP FIVE

Lastly, add small architectural elements like antlers, favorite kids’ pottery projects, book ends and/or small vintage ornaments. These are perfect for stacking on top of books, and they complete the shelving ensemble. They also help give the space a more unique and personalized charm. Checkout your local antique store or flea markets to find great second-hand steals.

CLOUZ HOUZ TIP: Organize the clutter! Add some baskets or decorative containers for holding remotes, blankets, pet toys, and other miscellaneous items. This idea pulled the shelves all together and made the room feel more cozy. Consider it a life hack for tricking your guests into believing you are always this tidy! 


OK, so there you have it! Whether you’re looking for a few statement pieces or just a couple of small accessories, you can find all the items you need to create your perfect look. We hope this helps inspire you and get your creative juices flowing. Below is a list of items that we used for styling this project. Happy shopping, and tag us if you style something utilizing these tips — we want to see your handiwork! 

1

Pair of Vase Drawings

I am thoroughly impressed with the quality of these prints! They were the perfect backdrop for these beautiful white oak shelves. They're neutral, yet add a graphic punch. If you're in need of smaller prints to use at the rear of your shelves like we did here, you won't be disappointed with these.
Pair of Vase Drawings
2

Carved Cream Vase

These vases are simple and elegant. I purchased a pair since these shelves were too large in scale to use just one. This is a favorite hack when I want something to feel 'heavier' than a stand alone. The ridge design gives texture to the shelves, and I absolutely love the color. There is a slight fleck in them that gives off a great vintage vibe.
Large Carved Cream Vase
3

Large & Small Faux Shagreen Lidded Box

These boxes are the most beautiful color, and they are a steal for the price! Real shagreen would be at least four times the expense. I love to stack boxes on top of each other, and these would also work well for hiding remote controls, keys, etc.
4

Woman Figural Sketch

Again, what can I say? I'm amazed at the quality of these prints! This neutral sketch was the perfect compliment to this neutral palette, but it would be equally attractive with a colorful palette to help neutralize the look.
Woman Figural Sketch
5

Rattan Woven Serving Tray

This could be used as a styling piece on a countertop, but I loved it at the rear of the shelves to give more texture. Treat basket trays such as these like artwork!
Rattan Woven Serving Tray
6

Faux Camel Leather Storage Bin

This is from the Hearth & Hand Collection at Target. We used three in the large size at the base of the cabinet. This was originally designed to hold firewood. But, the clients decided they didn't want the mess, or bugs inside from real wood -- so there was a void. By adding the bins, we incorporated some color with the rich leather. They hold blankets and puppy toys, and are a great look that makes the space feel intentional for storage.
Faux Camel Leather Storage Bin
7

Brass Footed Bowl

This is on the smaller size, so it's perfect for adding in at the end phase of your styling project. It looks great in front of a print, or stacked on top of some gorgeous cocktail table books!
Brass Footed Bowl
Join the Conversation

get inspired
#clouzhouz
follow along
@clouz_houz
Soaking in every little moment from our Santa Monica trip last week 🌴 As a mom, spending one on one time with each child is always good for the soul. I made this a tradition with each of our kids after graduation and I can’t recommend sneaking away- whether that’s in your city for a staycation or jumping on a plane for a little weekend adventure. Quality time with my kids always fills me up and reminds me the “why” I do what I do in this crazy thing called life.
We talked about things we never talk about. We laughed. A lot. We had tough conversations about missing school life. He told me about his dreams... ones I didn’t realize. What he values in friendships. What he doesn’t need in his life. We reminisced about the family road trip to Yosemite in a RV that was falling apart as we travelled (ie. I had to lean out the passenger window to tell D when he could change lanes since we lost a side mirror amongst other mishaps 😂). We decided our new favorite summer cocktail was the Pina Calabra at @propersantamonica rooftop pool and pasta @giorgiobaldi_ristorante is the BEST summer meal.
I’m sharing a full recap on the blog: what we did, where we ate, and all the little details I want to remember forever. Part travel guide, part journal entry.
Comment ‘LA’ and we’ll send you the link to read the full post!
Step inside the Lake Oswego Bungalow Lookbook🤎
This project already had such good bones, an absolute gem of a cottage in one of the most charming Lake Oswego neighborhoods. We weren’t here to renovate; this one was all about bringing in warmth, comfort, and character through furniture, styling, and a few cosmetic touches like wallpaper and lighting updates.
If you ask me what is one way to update your home without a lot of renovating, it’s furniture and styling! 100%!! We furnished the entry, living room, family room, primary suite, office den, and a few guest spaces. It was truly a full home furnishings project, and I can’t wait to dive into the details of what we did in each of these rooms. This is just a little peek behind the curtain!
Some of our favorite projects are the ones where we get to come in and reimagine the layout and feel of a space through furniture and accents. A fresh start without the full remodel-just the right edits to make your home feel like you.
We’re currently accepting clients for Q4 (aka the perfect time to get going once the kids are back in school and you’re ready to reset for the new year). Message us if you’re thinking about starting a project-we’d love to bring your space to life.
Comment ‘STYLE’ and I’ll DM you the link to explore all five. You can also find them in our LTK shop under product collections anytime.
I created these Design Guides because I know firsthand that design help can feel out of reach. If I weren’t a designer, I’m not sure I could afford to hire one myself-and that’s exactly why this mattered so much to me.
I believe your home should feel beautiful, personal, and pulled together without needing a huge budget or endless time to figure it all out. These guides are here to be your roadmap. And although I can’t say it completely replaces a designer, it’s a great tool to help those who are designing on their own. These guides are complete with curated furniture picks, paint palettes, styling tips, and layouts designed to take the guesswork out of the process.
They’re not just moodboards-they’re permission to start. Direction when you’re stuck. And support when you want your space to reflect you.
If you’ve ever stood in your living room and said, “I just wish someone would tell me what works”... I made these for you.
And if you still feel like you’re stuck or unsure what’s next, that’s okay too. We offer 1-hour consults, Designer for a Day sessions, and more—so you never have to navigate it alone. Head to the link in bio to learn more about our services and see how we can support you further
Summer Cherry Panzanella 🍒
I love a panzanella salad in the summer… but this one is even better by adding cherries! Never would I have thought to include them but they give a delicious twist to this classic! And the hot honey champagne vinaigrette? She pulls it all together with just the right balance of sweet heat and acidity. And of course, my personal fave, creamy burrata- I can’t get enough!! 
Make sure you save this + here’s how to make it:
Ingredients:
For the salad:
• 2 slices sourdough bread, cut into 1” cubes (about 2 cups)
• 1 tbsp olive oil
• 2 cloves garlic, minced
• 1 ½ cups halved cherries
• 1 cup thinly sliced cucumbers
• ½ cup watermelon radishes, quartered and thinly sliced
• 1 ¼ cup cherry or grape tomatoes, halved
• 1 small shallot, thinly sliced
• ¼ cup thinly sliced basil
• 1 ½ tbsp roughly chopped mint
• 4–6 oz burrata
• Optional: a pinch of aleppo pepper or crushed red pepper
For the dressing:
• 2 ½ tbsp champagne vinegar
• 2 ½ tbsp olive oil
• ½ tsp Dijon mustard
• ½ tsp hot honey (or regular honey)
• Pinch of salt and pepper
How to Make It-
1. Preheat your oven to 375°F. On a parchment-lined sheet, toss your sourdough cubes with olive oil, minced garlic. Bake for about 10 minutes, or until golden and crisp on the outside but still a little soft inside.
2. In a large bowl, gently toss together the toasted bread, cherries, cucumbers, radishes, tomatoes, shallots, basil, and mint.
3. In a small jar or bowl, whisk the champagne vinegar, olive oil, Dijon, hot honey, salt, and pepper until smooth and emulsified.
4. Transfer the salad to a serving platter, tear the burrata over the top, drizzle with vinaigrette, and finish with a sprinkle of aleppo or red pepper if you’re into a little kick.
We accepted an offer on our home 🥹 feeling all the feels over here!! So grateful-but also, wow, that happened FAST.
Every kind comment and bit of feedback during the listing made me smile, seriously. This house has been so good to us... and now it’s on to its next chapter.
I hope the new owners love it as much as we did, and fill it with their own special little moments like we got to.
This reel is just a few memories from our time here— so many sweet ones tucked into every corner.💛