CLOUZ HOUZ DESIGN GUIDES - What’s your style?
TAKE THE QUIZ
Design

My Top Five Tips for Styling Your Shelves

Photo Credit for styling shelves: Zee Wendell

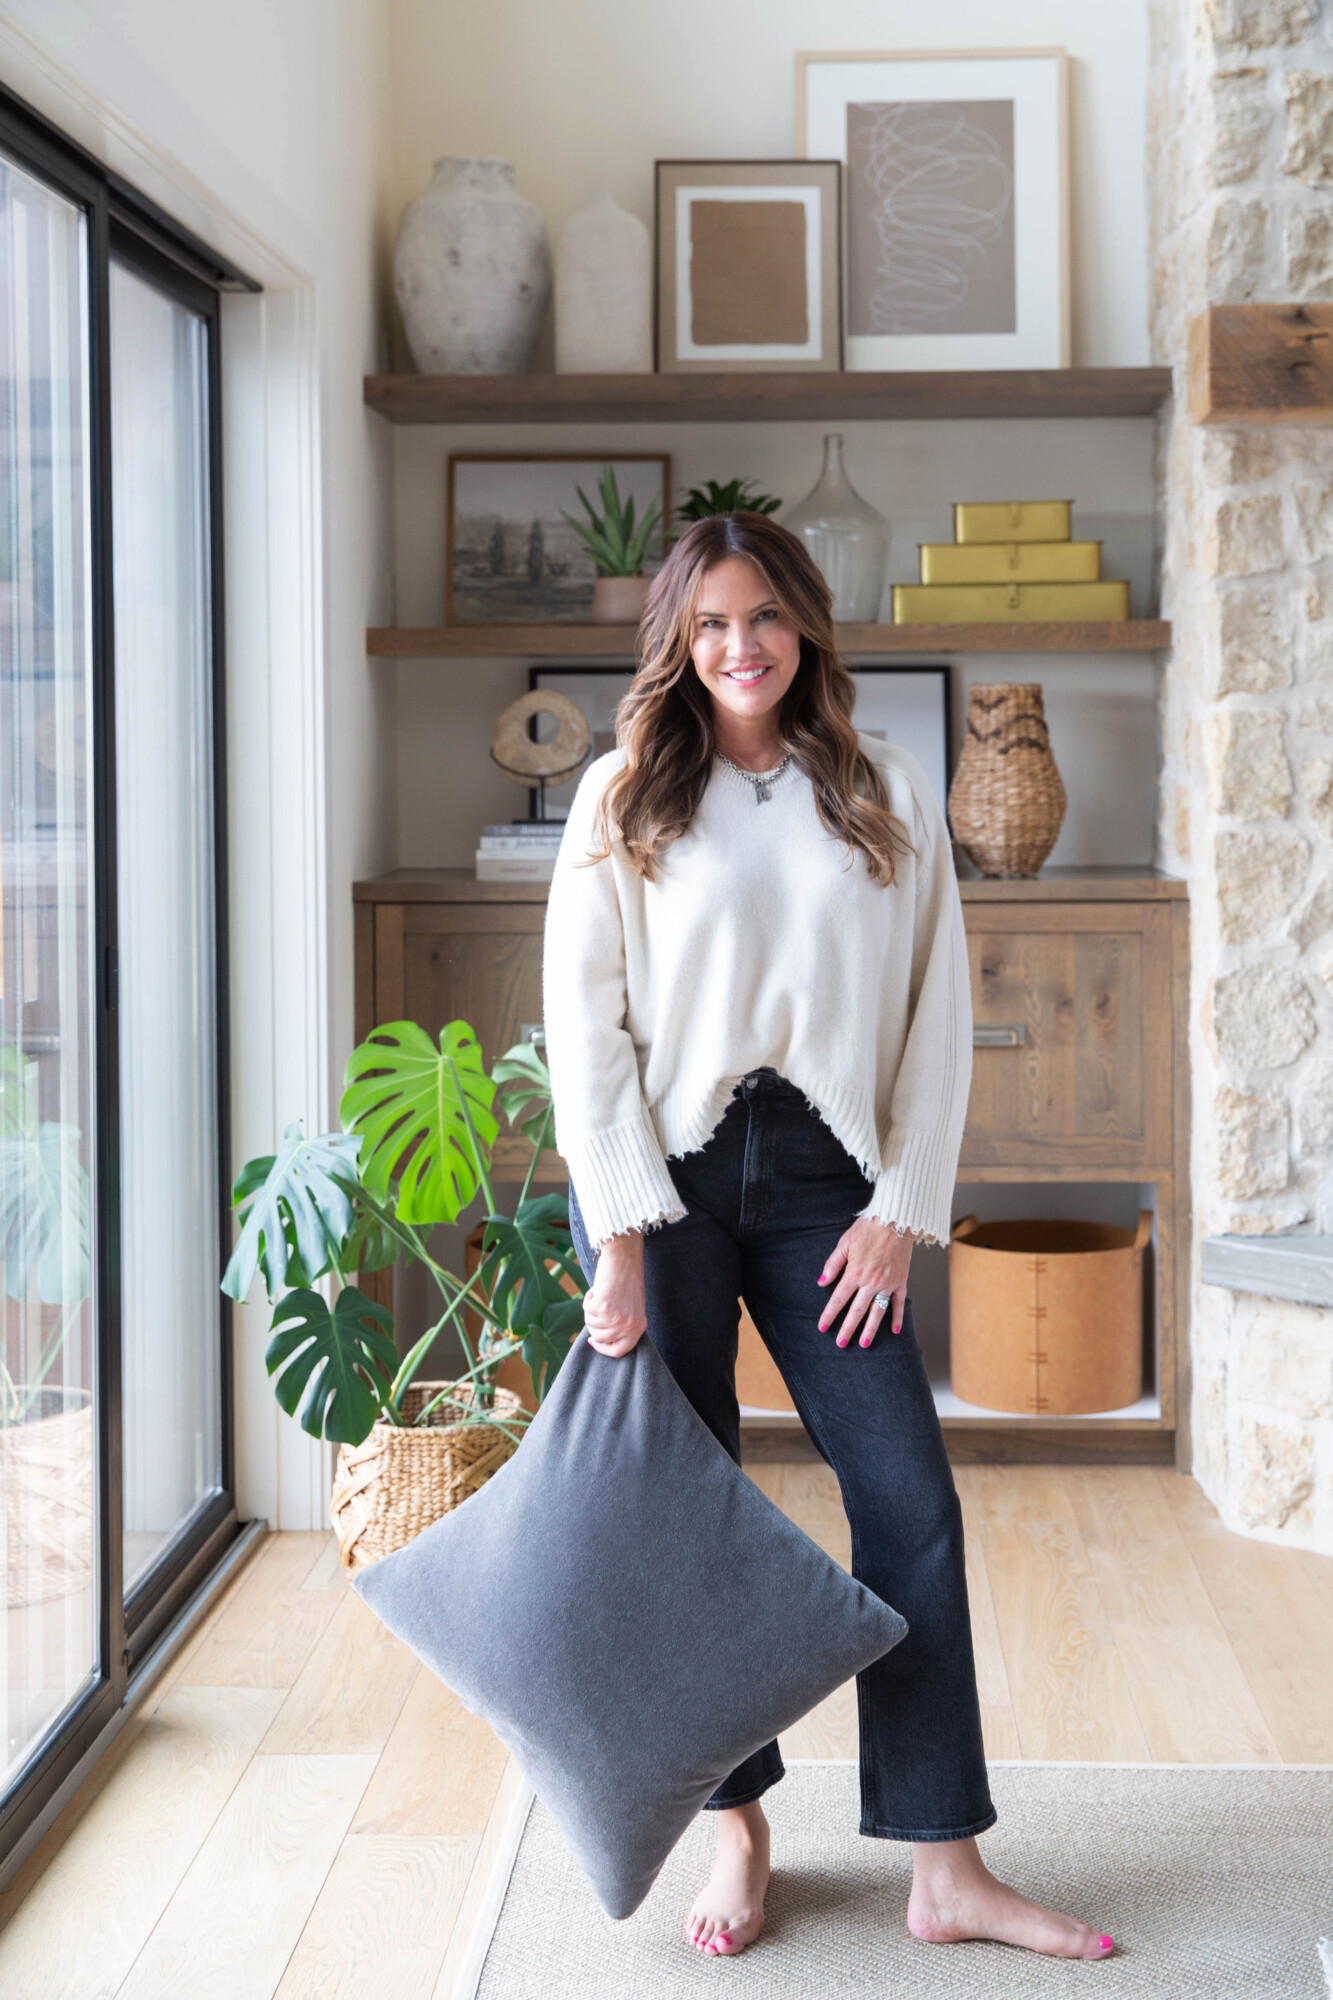
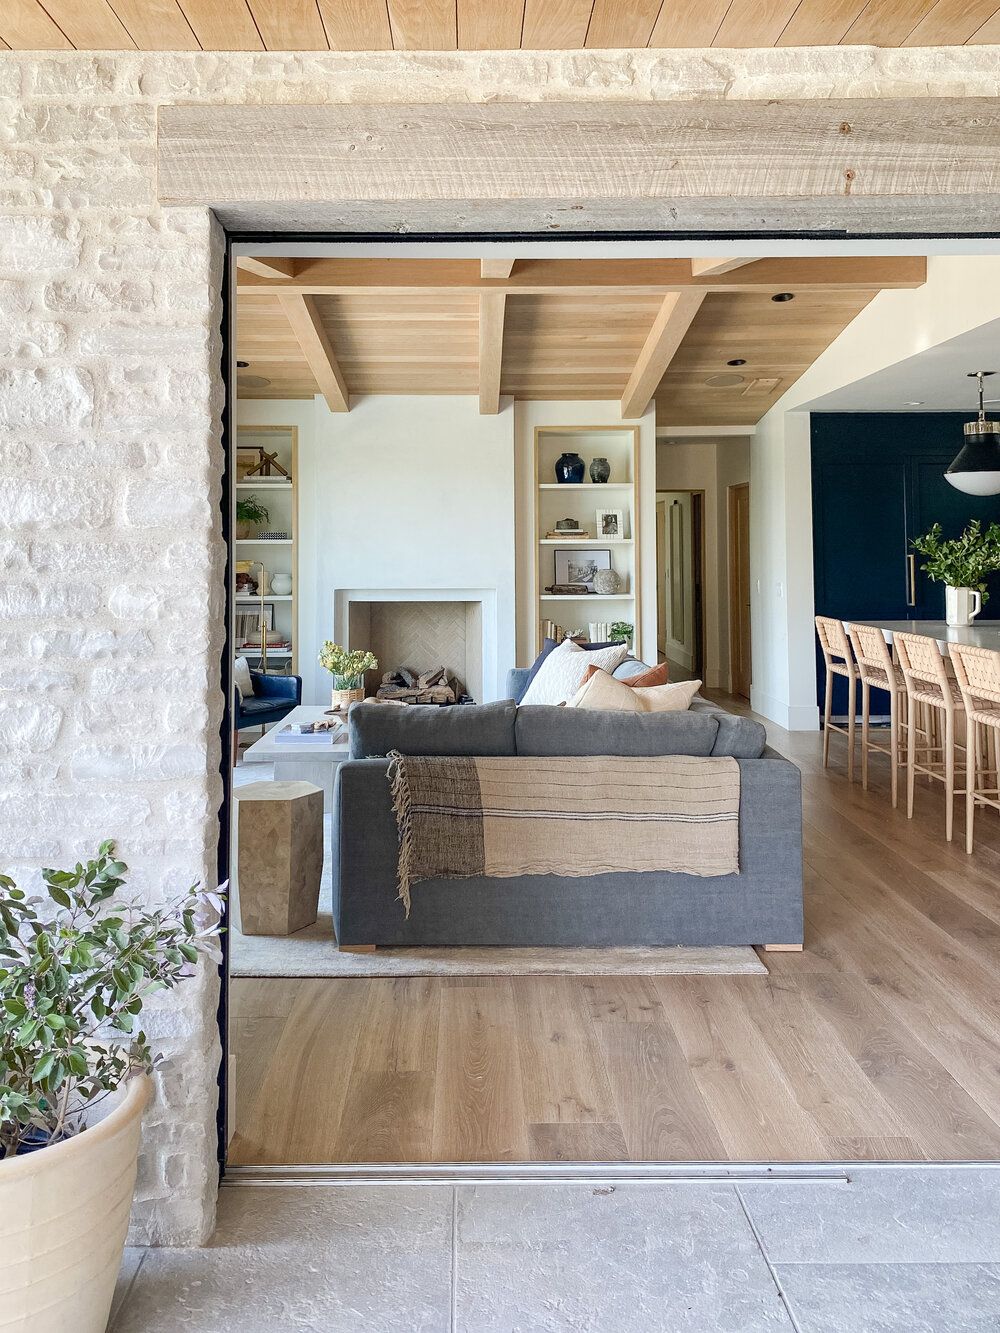
It’s almost spring! That means time to clean and refresh 🙂 Today’s post is short and sweet. I’m giving you my top five tips for styling your shelves! Our goal is always to make things simple for you. We’re excited to show you how easy it is to give your home a stylish, new look this season. We wanted to share a fun little project we just completed, where we helped our clients style some shelves in their gorgeous living room. Studio McGee for Target’s Spring collection was our primary source for décor.

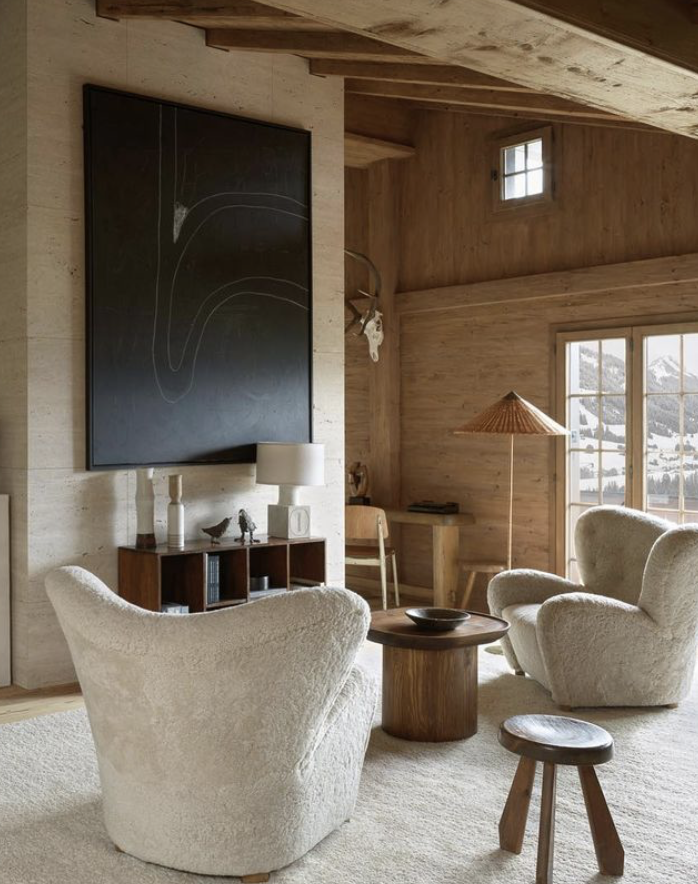
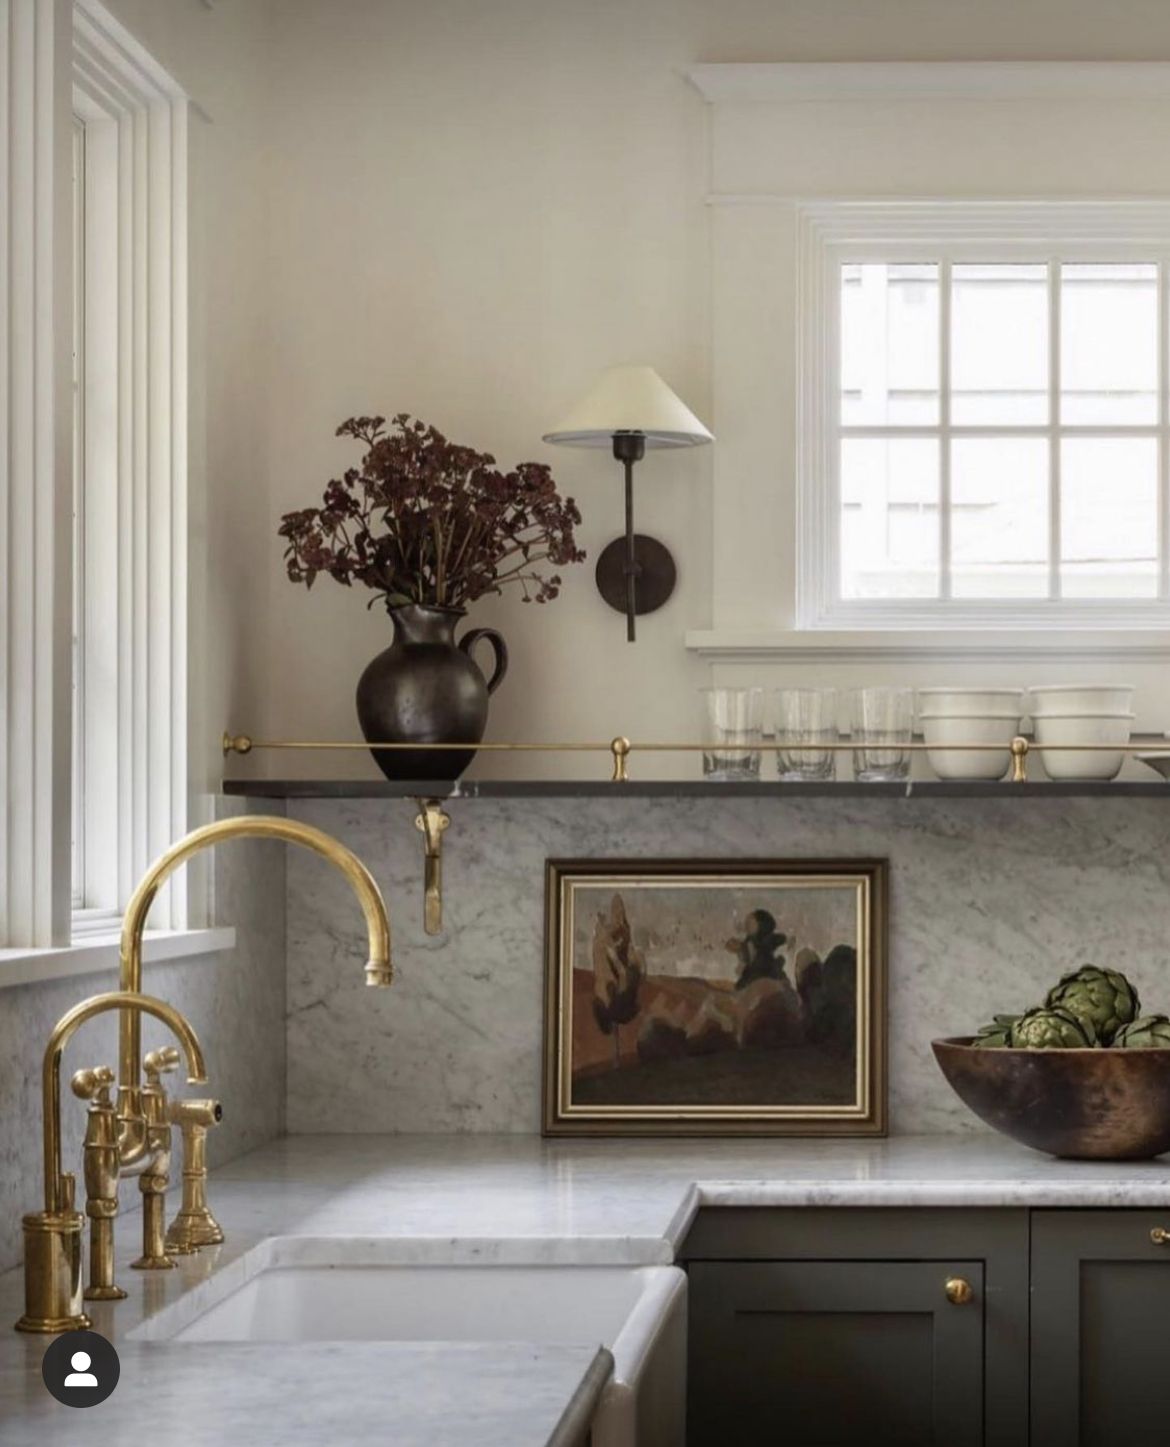
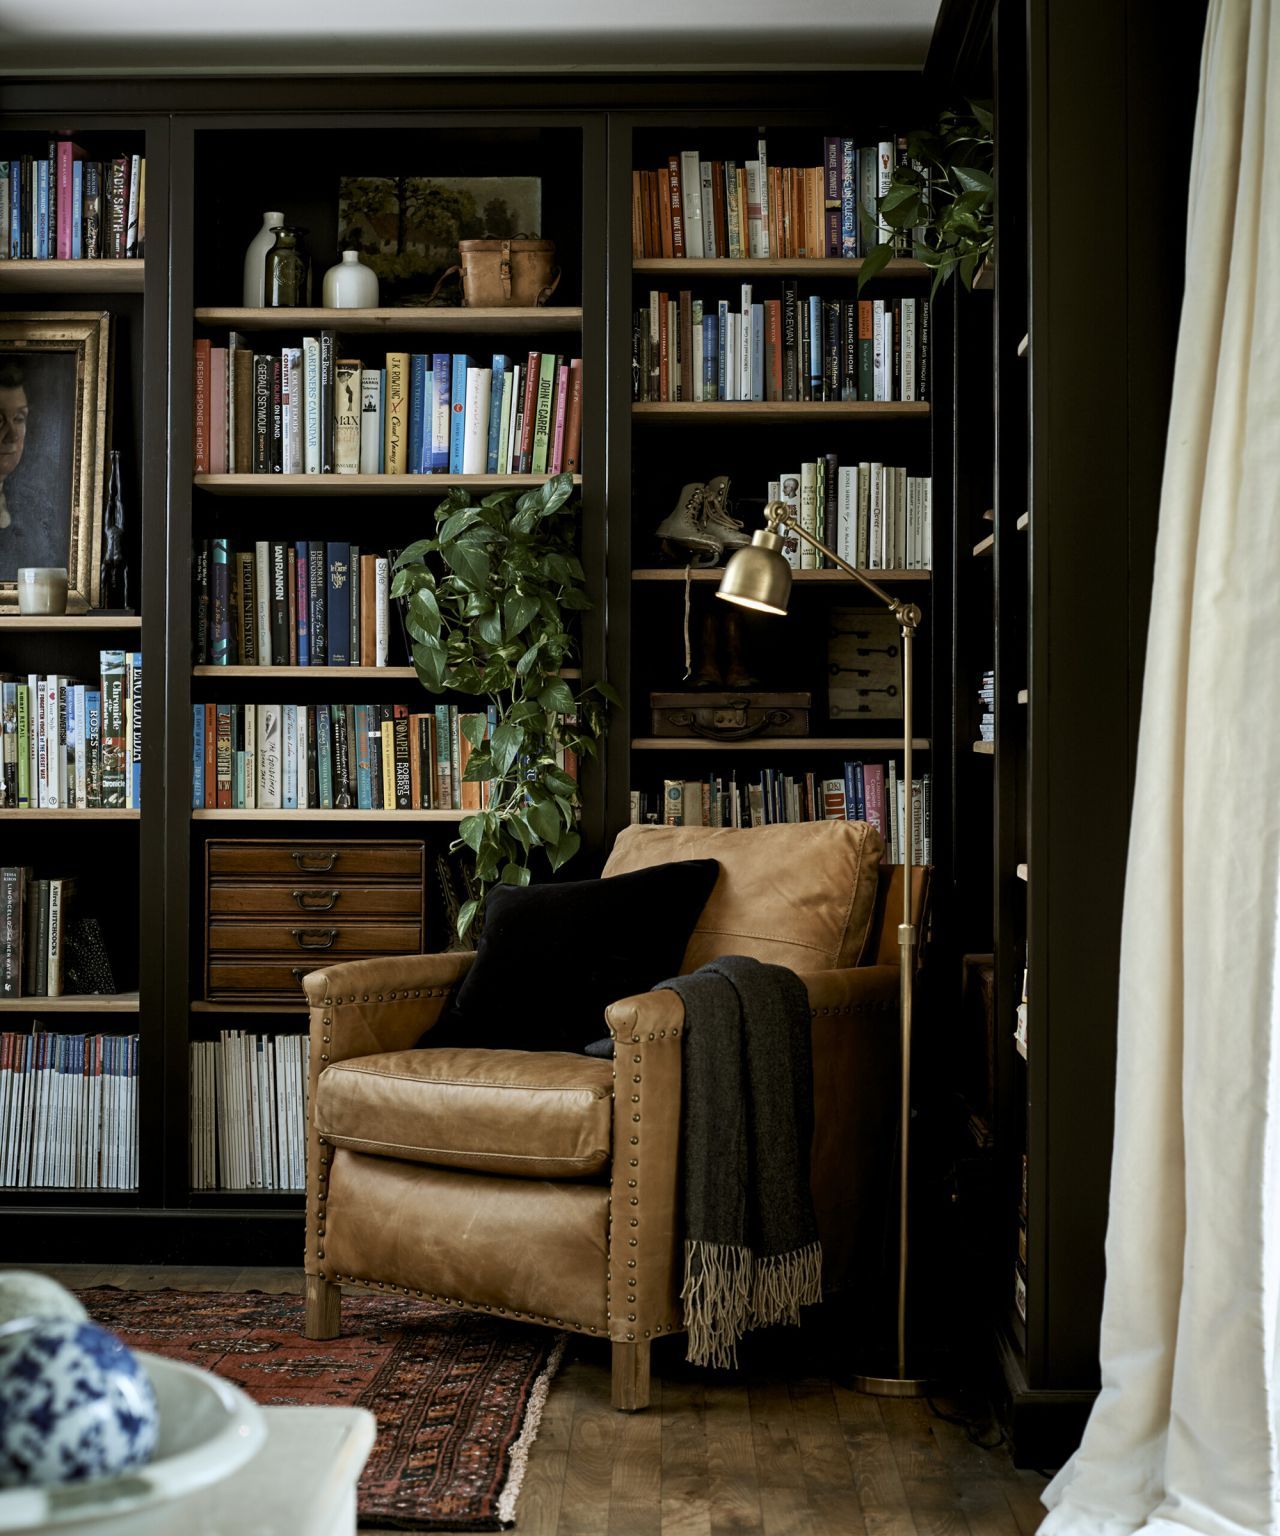
With the sun starting to make a regular appearance, what better way to start transitioning into spring than by sprucing up your shelves with some fun, new accessories? By mixing natural materials, modern silhouettes and contrasting colors, I gave these show-stopping shelves some personality. Layering is KEY to making large shelves look intentional and not an afterthought. You want to tell a story with your shelves — a collection of personal items that have a cohesive look and just make you … happy! 

Here are My Simple Go-To Steps for Styling Shelves


STEP ONE

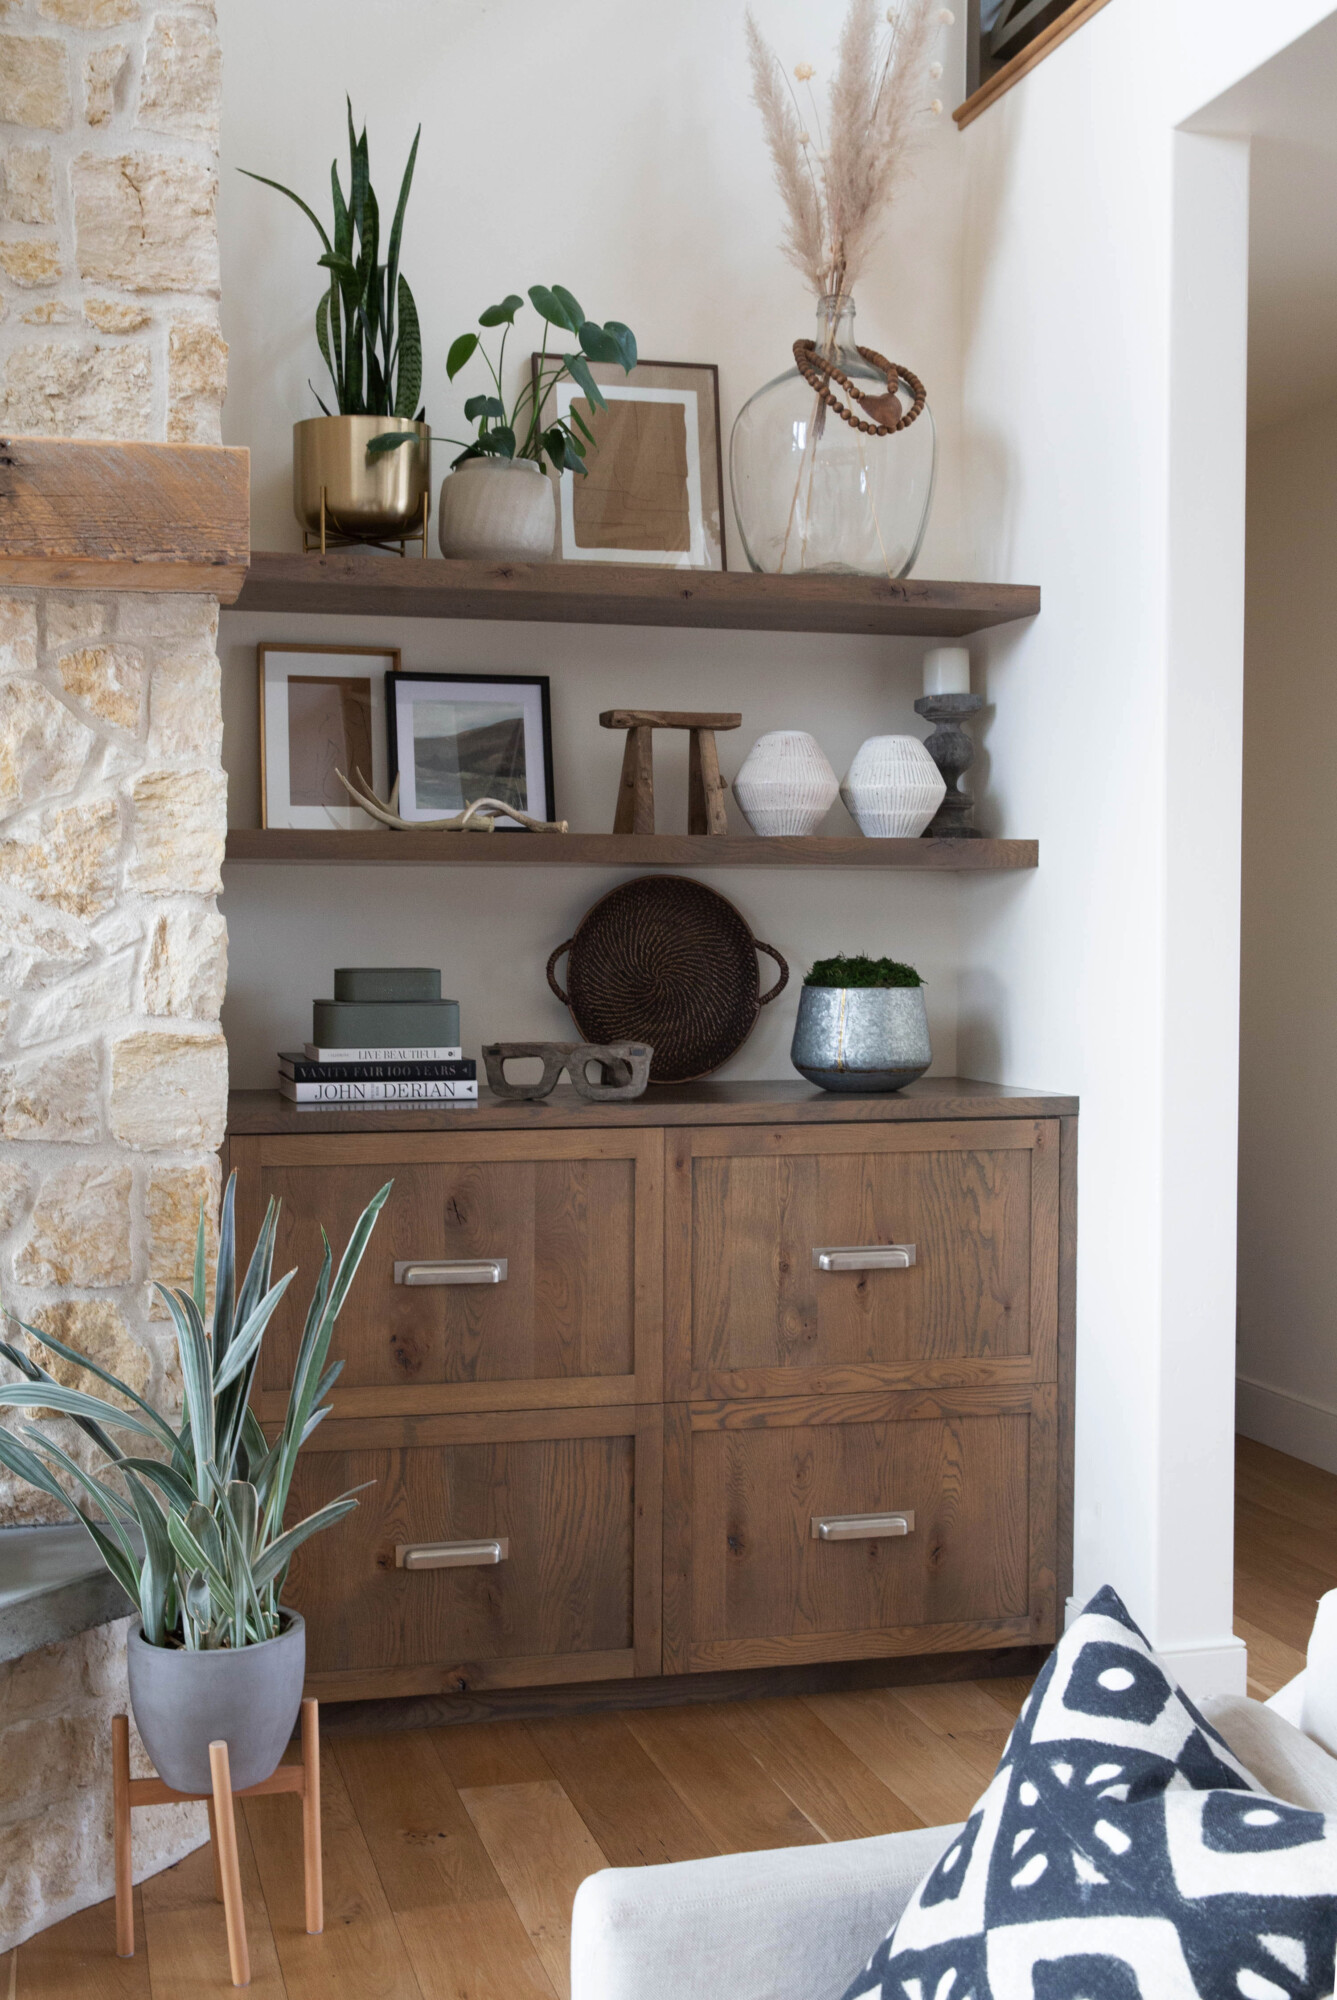
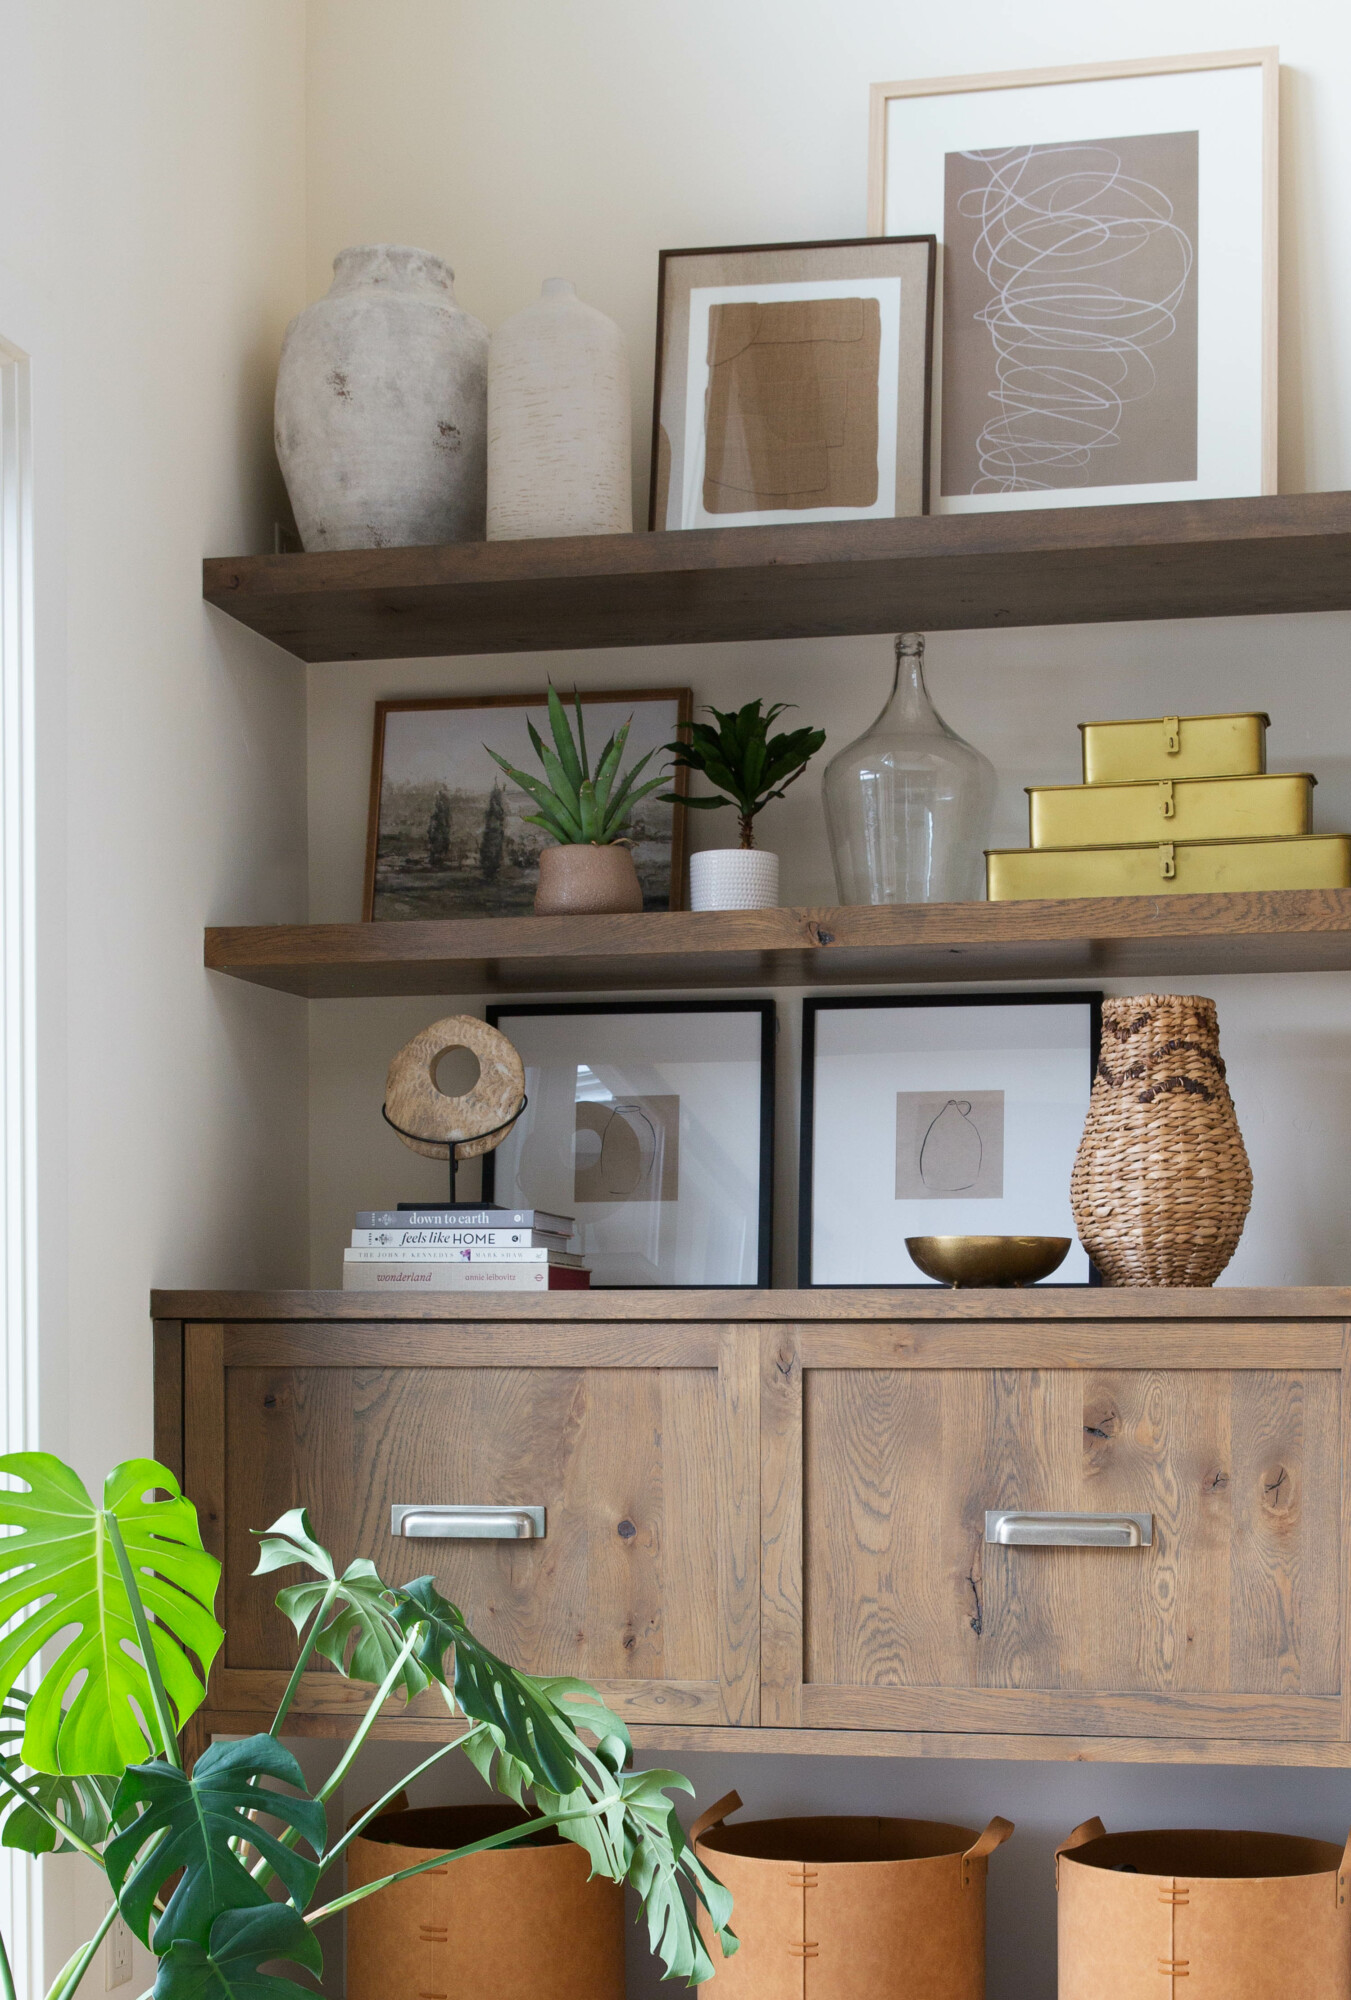
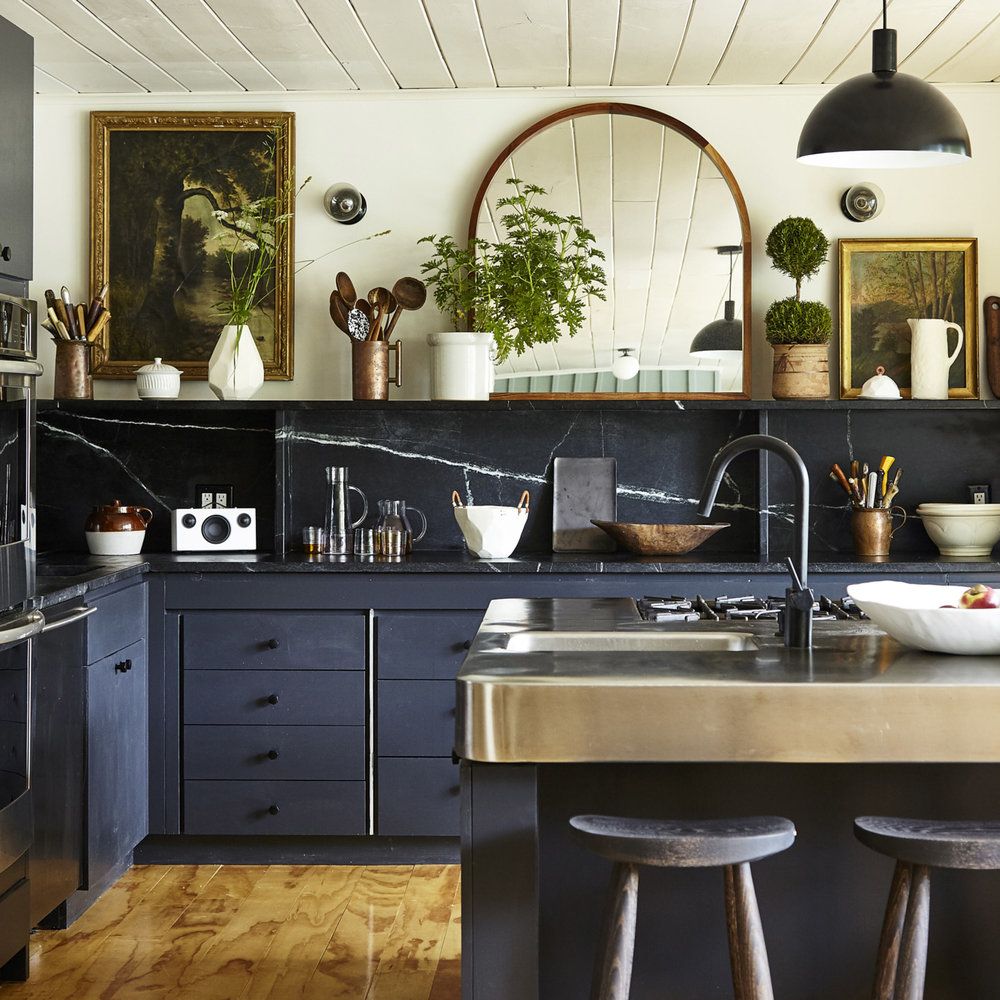
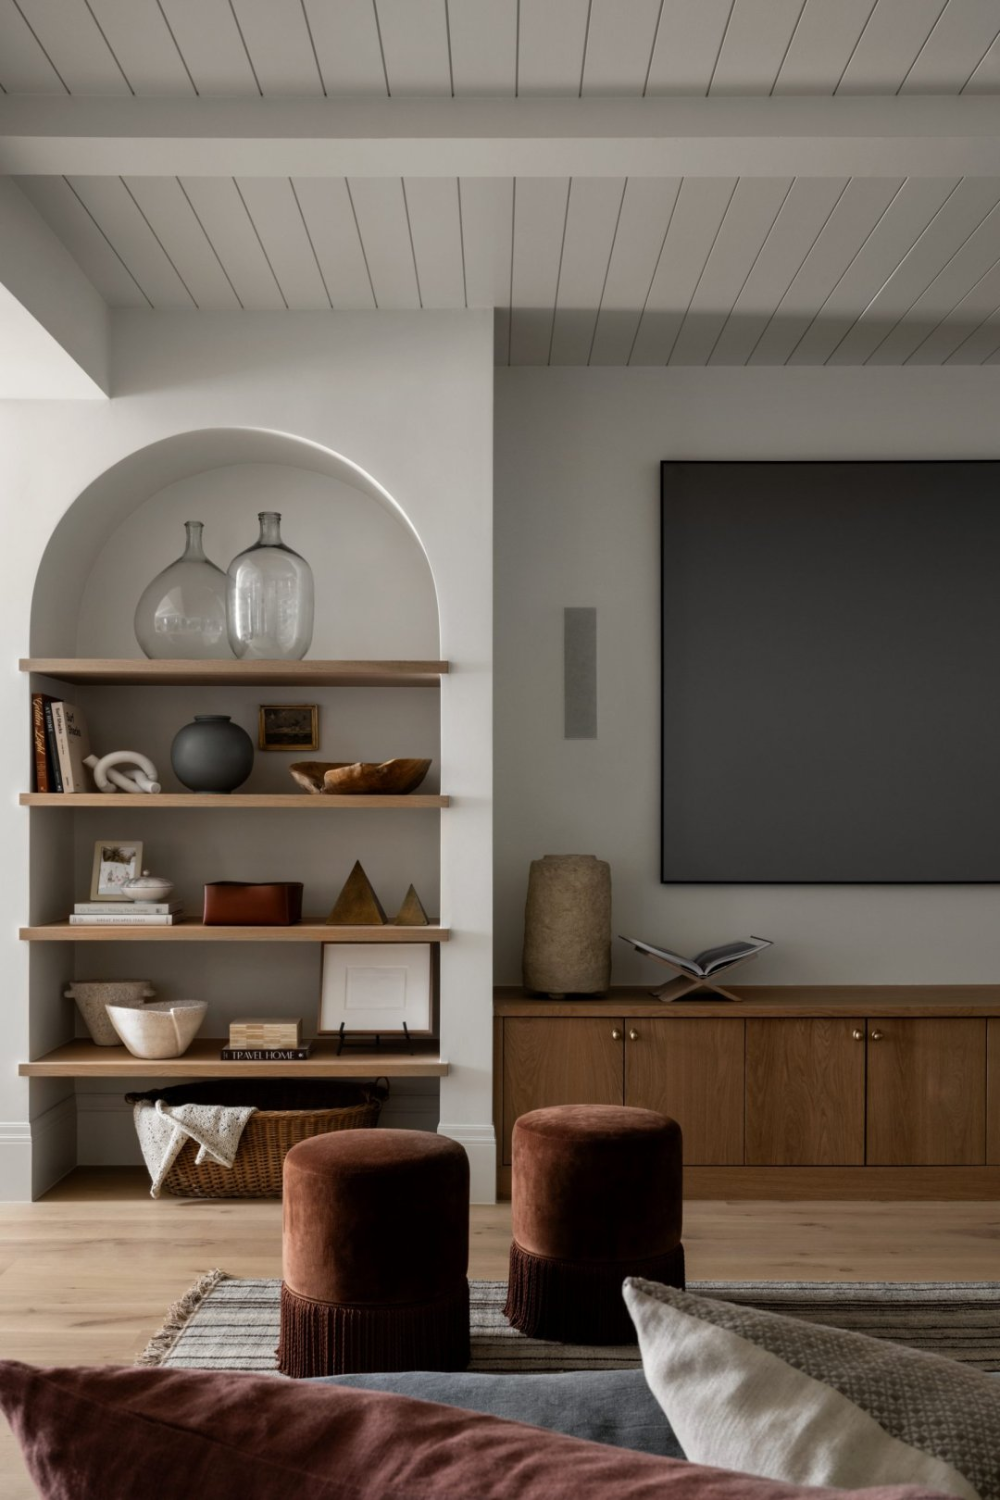
Start with larger items, such as baskets or larger pieces of art or prints, and display them on shelves in a zigzag pattern (top shelf: large piece is on left, middle shelf: large piece is on the right, and lower shelf: it’s back on the left). This way, your eye flows smoothly from shelf to shelf. With this technique, you’re able to give the area a cohesive look. This technique grounds each shelf as well — if that makes sense? Ha!

STEP TWO

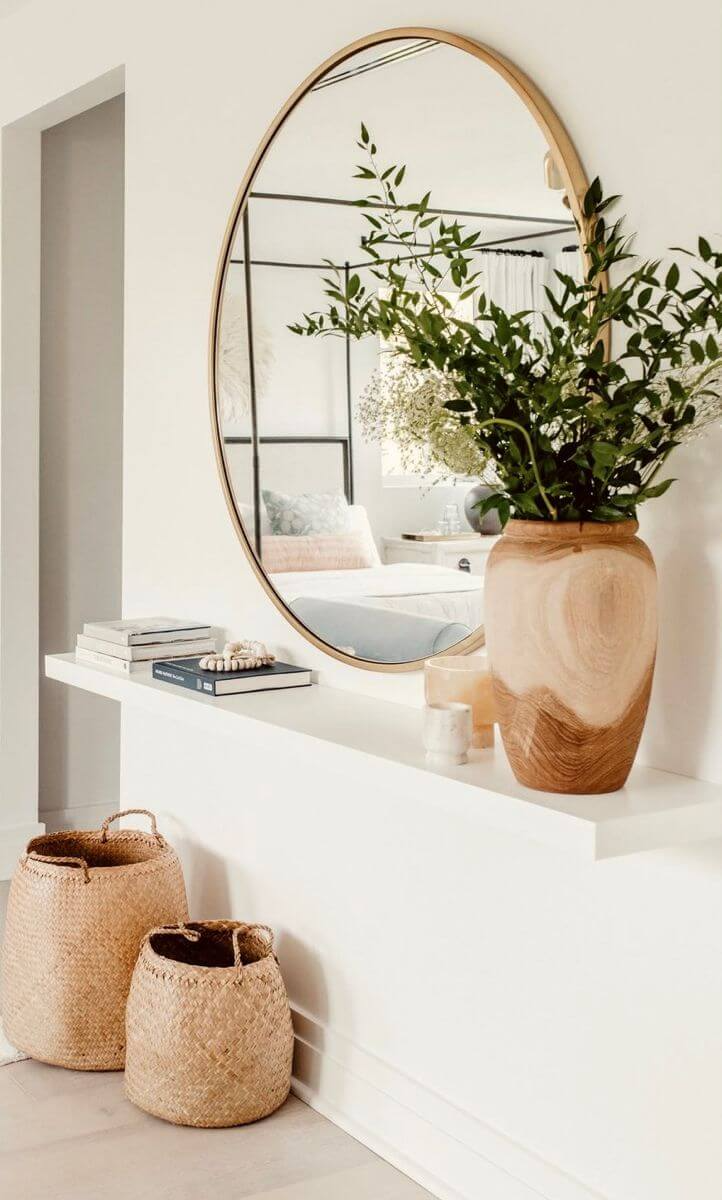
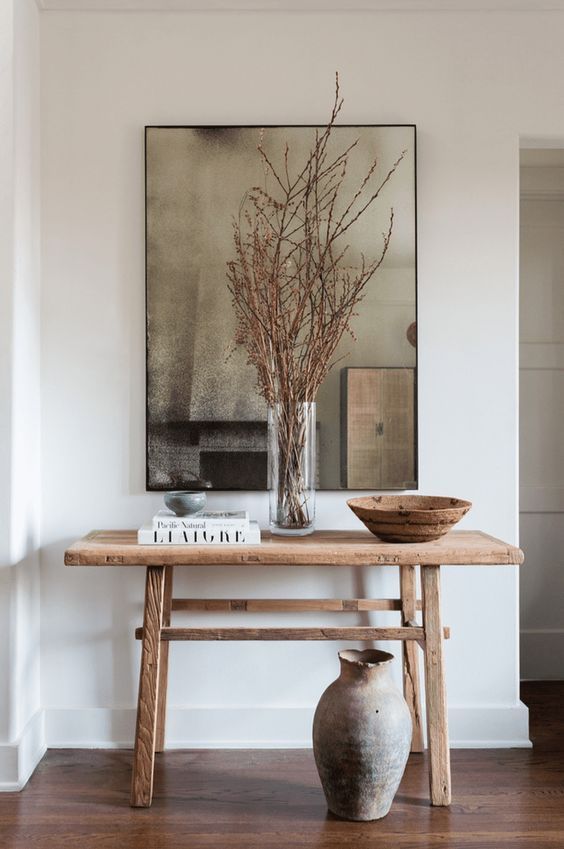
Speaking of smaller items, I think that vases are beautiful for filling in the gaps. (Style tip: for larger shelves, I typically like to pair vases — either two identical ones, or one big and one small). They give the shelves another ‘layer’ to the larger pieces. Try experimenting with different arrangements of sizes, shapes, and colors/textures to decide which suits your style best, while also adding a contrasting element. 

STEP THREE

Books! Large cocktail books are your friend when it comes to styling bigger shelves. They are particularly effective when it comes to these types of shelves because their size simply speaks for themselves. Plus, the bold colors and beautiful covers can make the space a bit more vibrant and interesting. Not to mention, they can be great conversation starters! 

STEP FOUR

Go for the greens! Whether faux or real (my personal favorite), bring any room to life with some succulents or pots of moss. But let me warn you, potted plants can be a full-time responsibility. For those who have trouble keeping them alive, I recommend some dainty dried flowers to add in your vases. There are also many good faux stems to try. Check Alfloral — I’ve been very impressed by the quality of their faux flowers and greenery. 


Photo Credit: Zee Wendell


Photo Credit: Zee Wendell

STEP FIVE

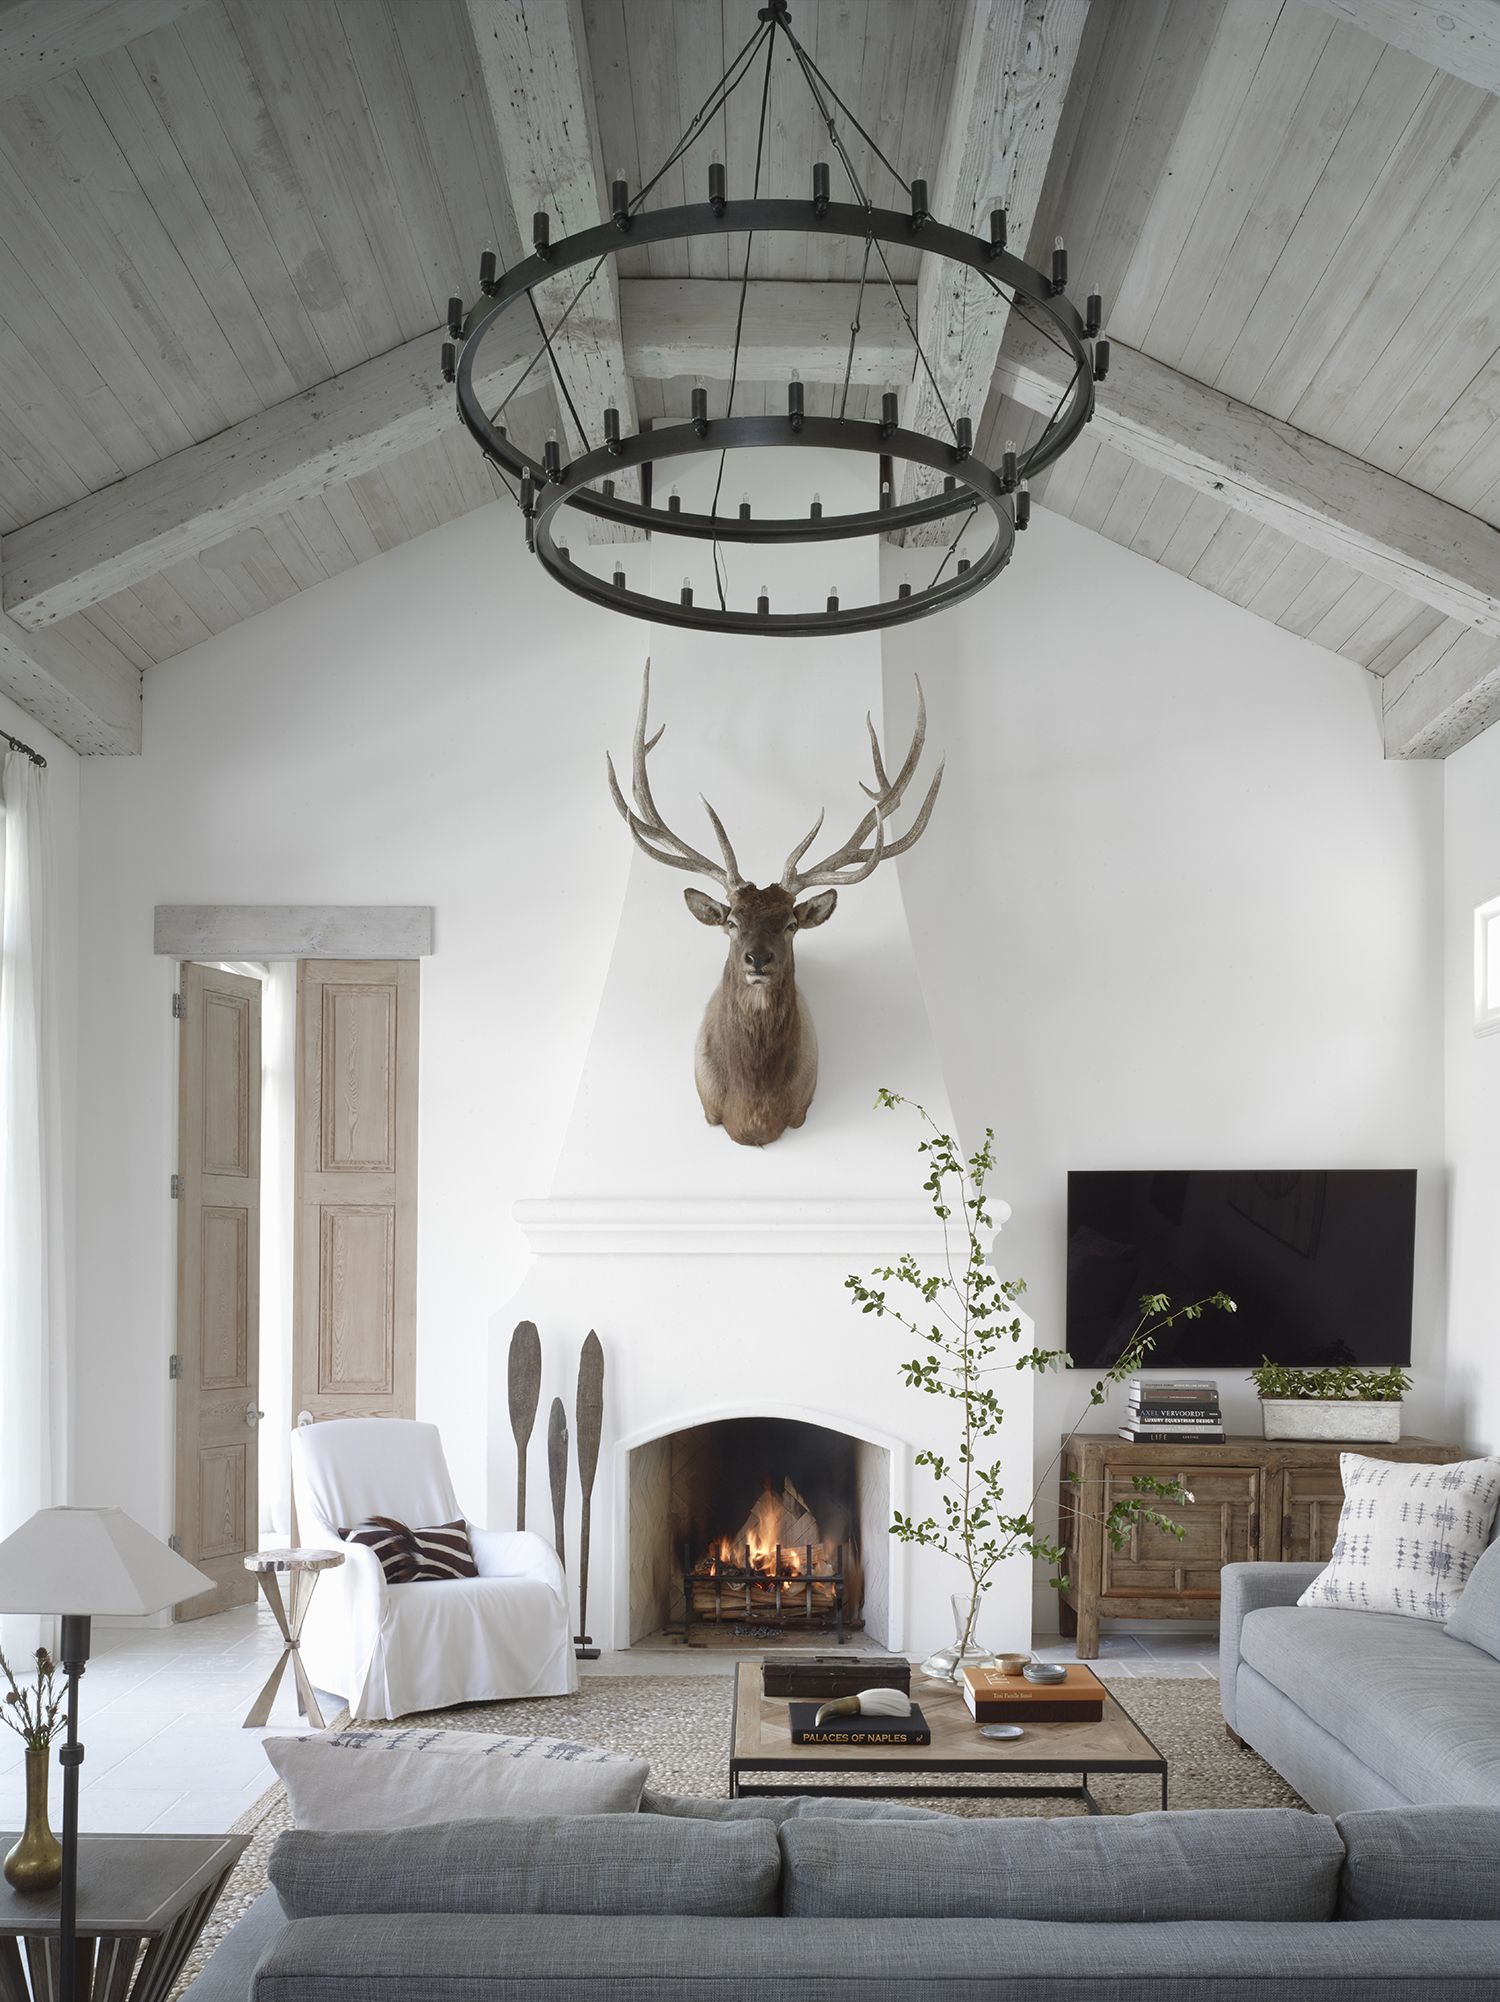
Lastly, add small architectural elements like antlers, favorite kids’ pottery projects, book ends and/or small vintage ornaments. These are perfect for stacking on top of books, and they complete the shelving ensemble. They also help give the space a more unique and personalized charm. Checkout your local antique store or flea markets to find great second-hand steals.
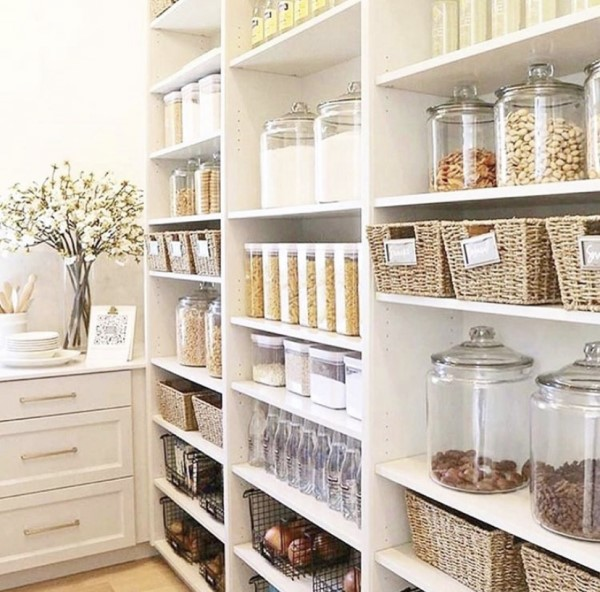
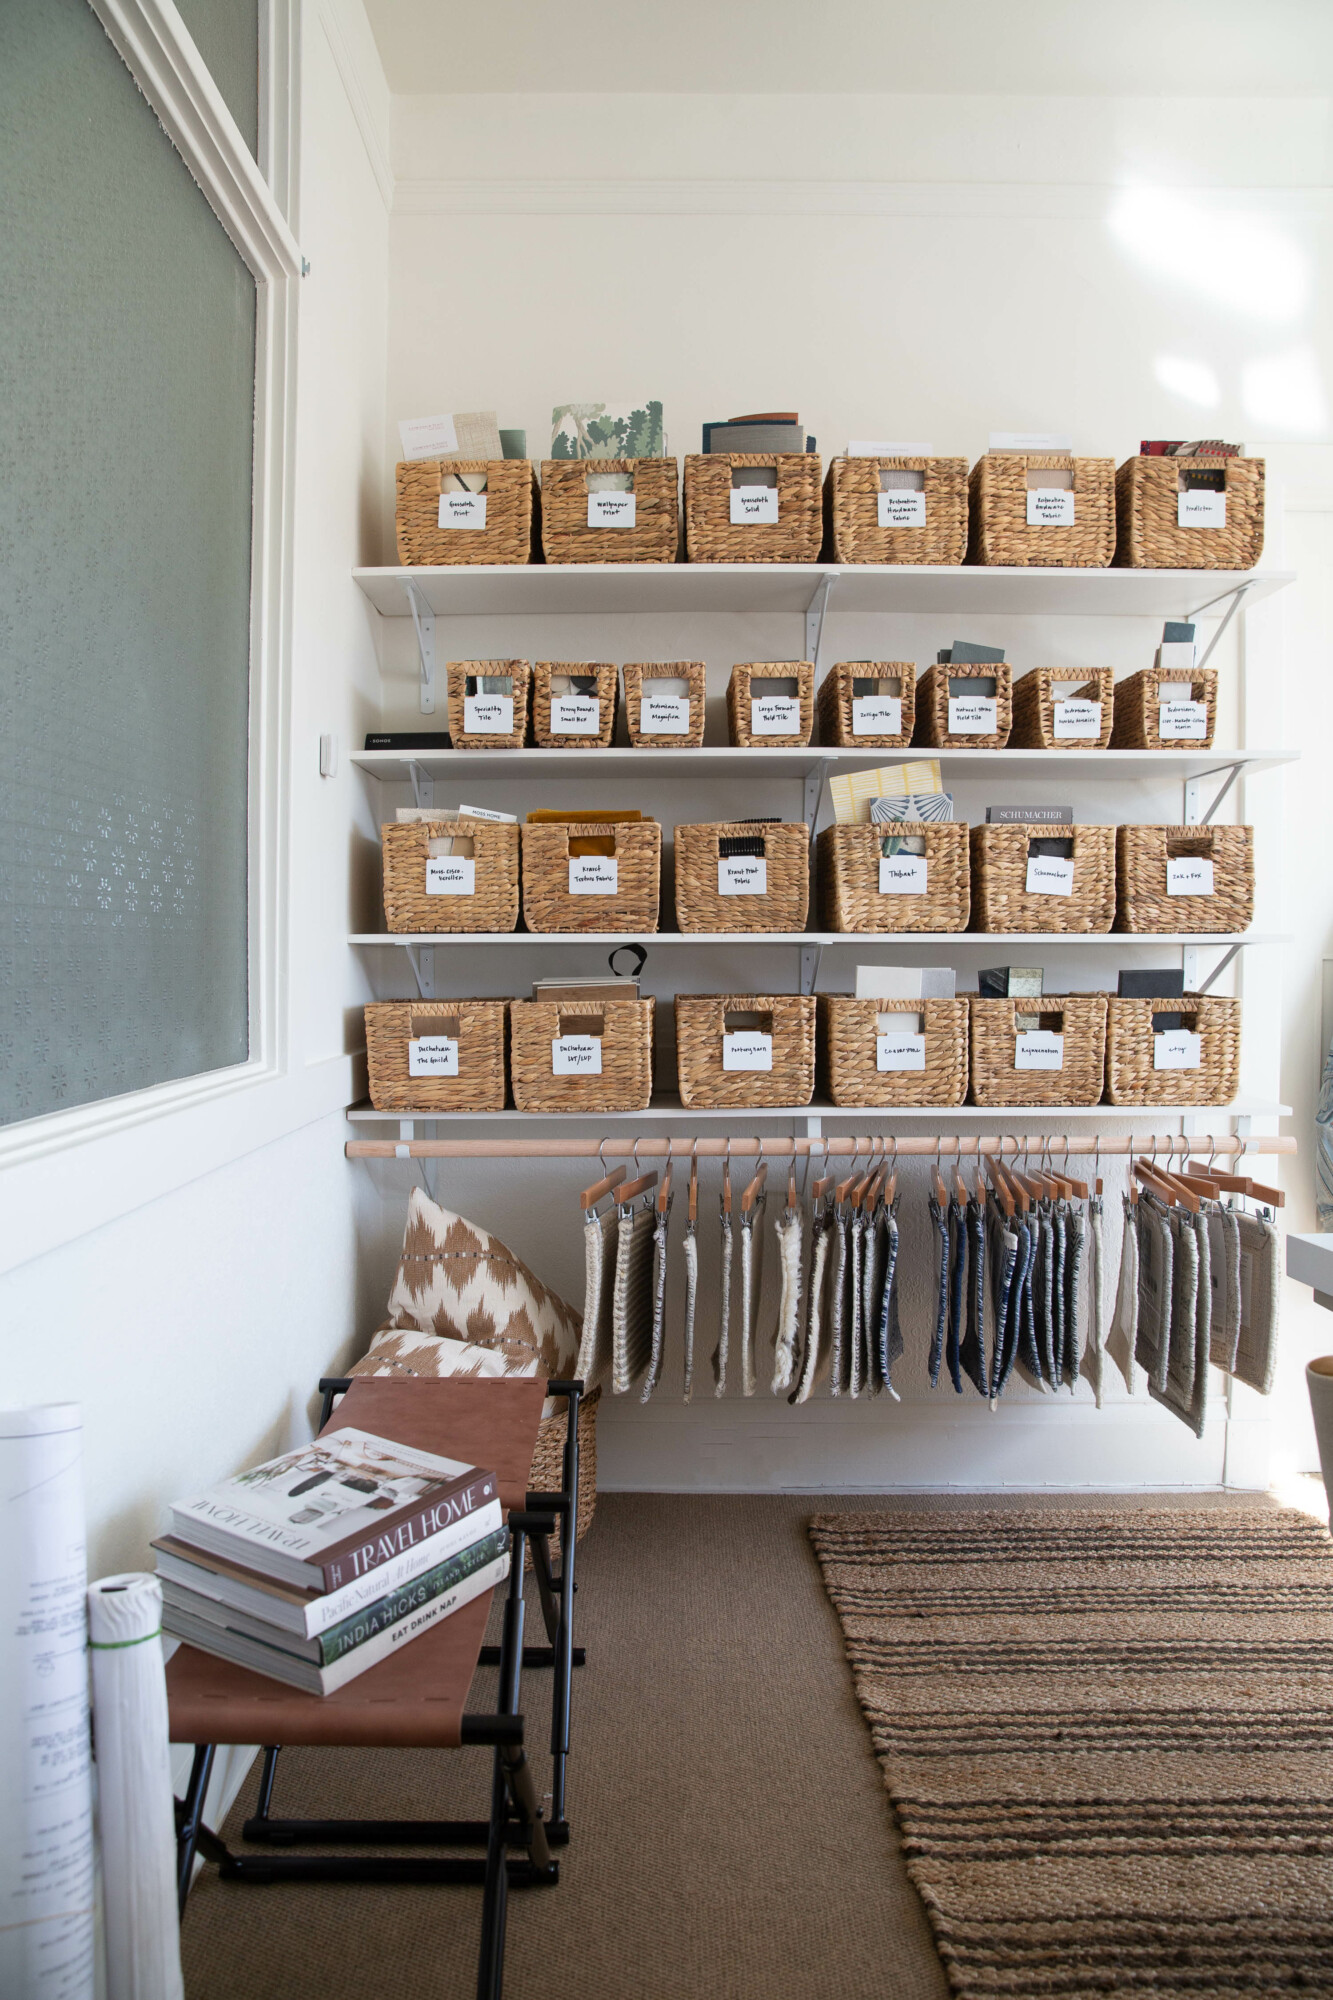
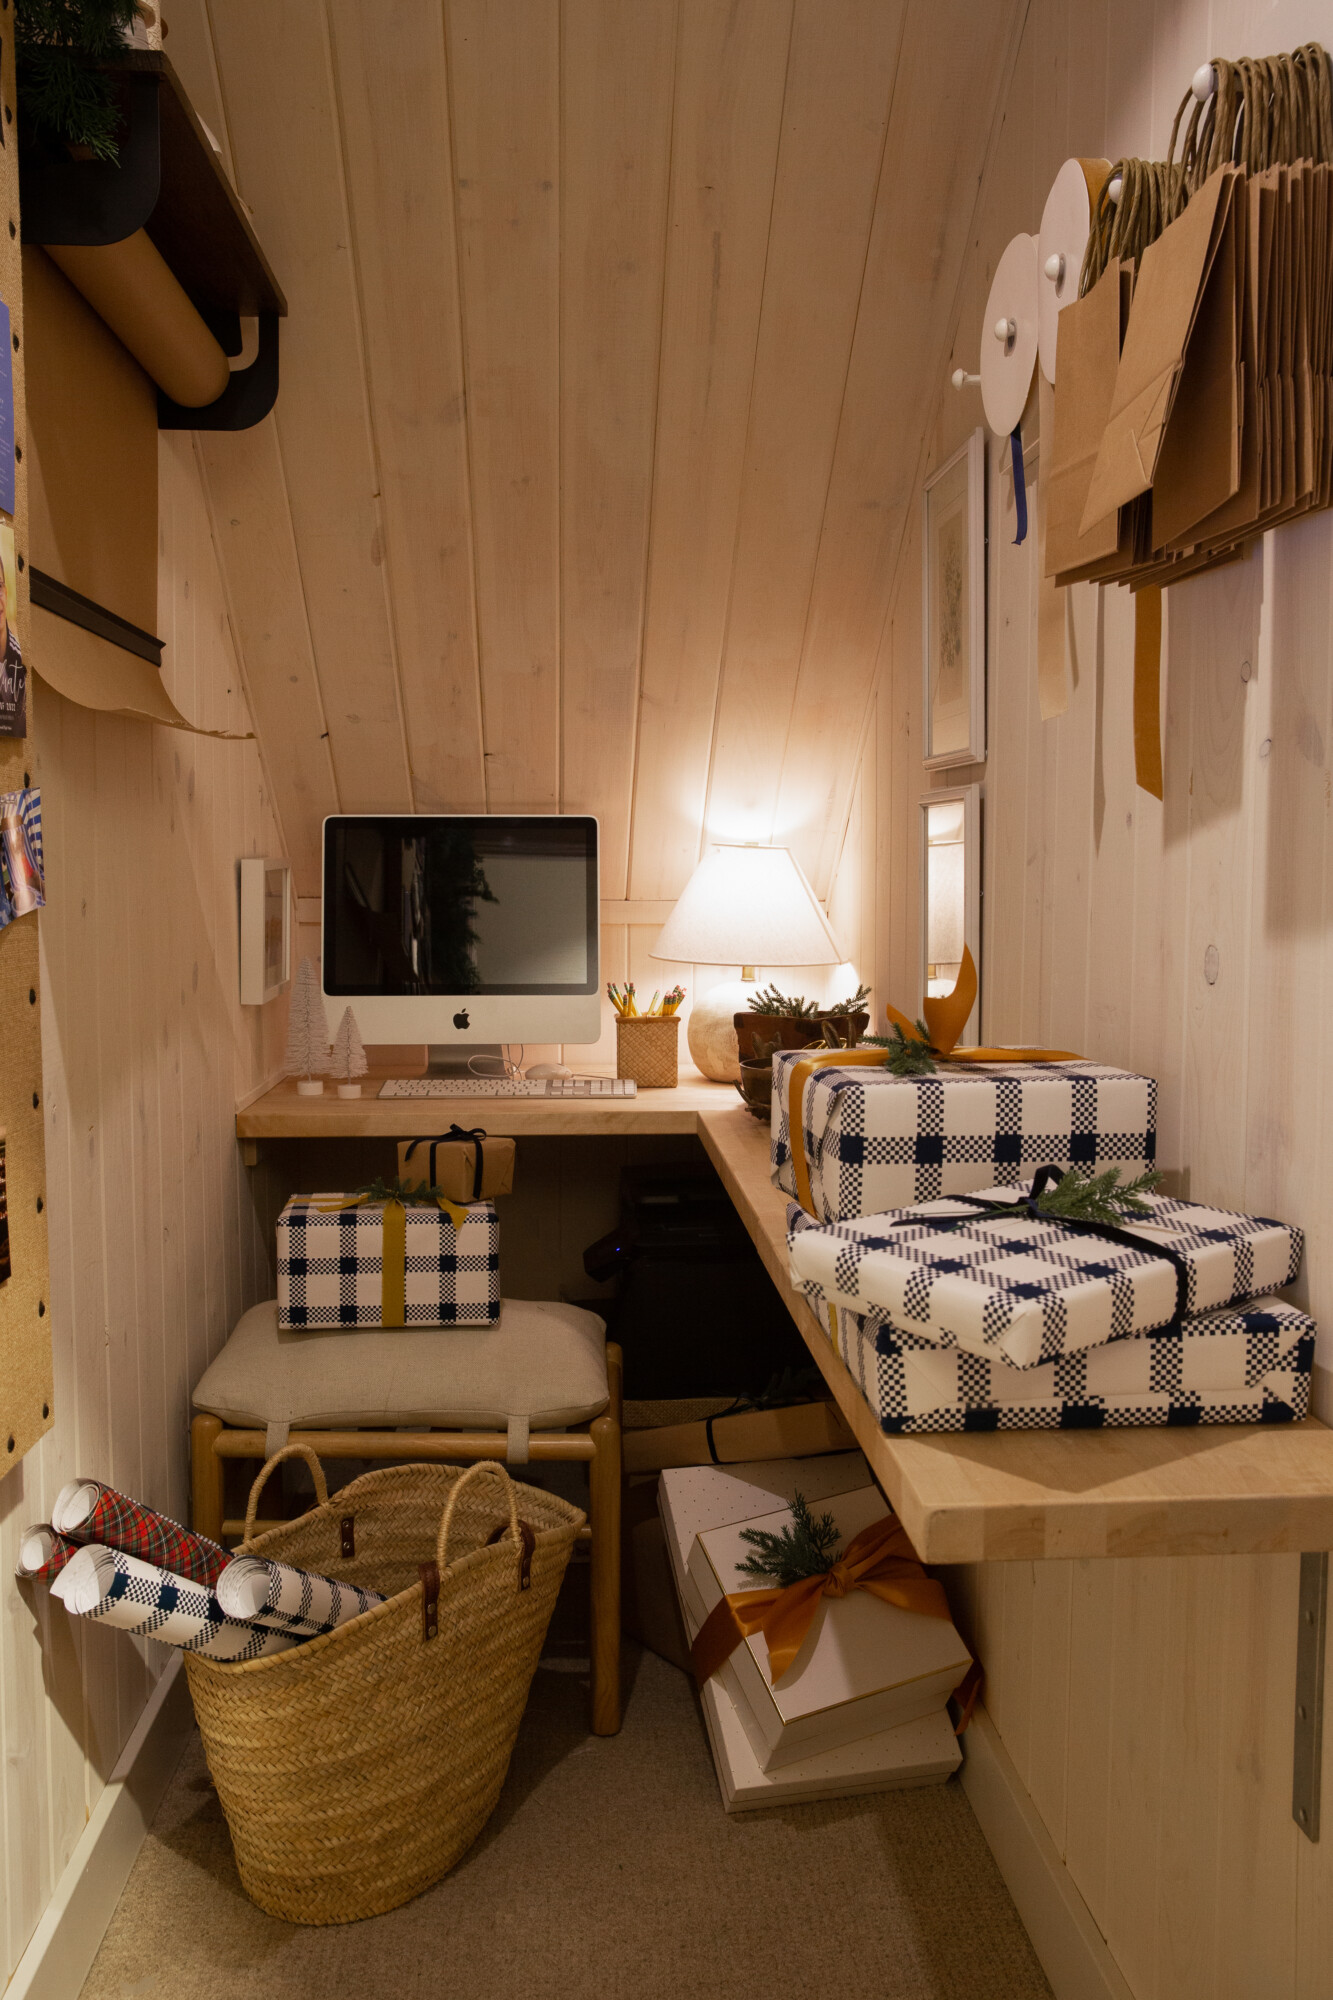
CLOUZ HOUZ TIP: Organize the clutter! Add some baskets or decorative containers for holding remotes, blankets, pet toys, and other miscellaneous items. This idea pulled the shelves all together and made the room feel more cozy. Consider it a life hack for tricking your guests into believing you are always this tidy! 


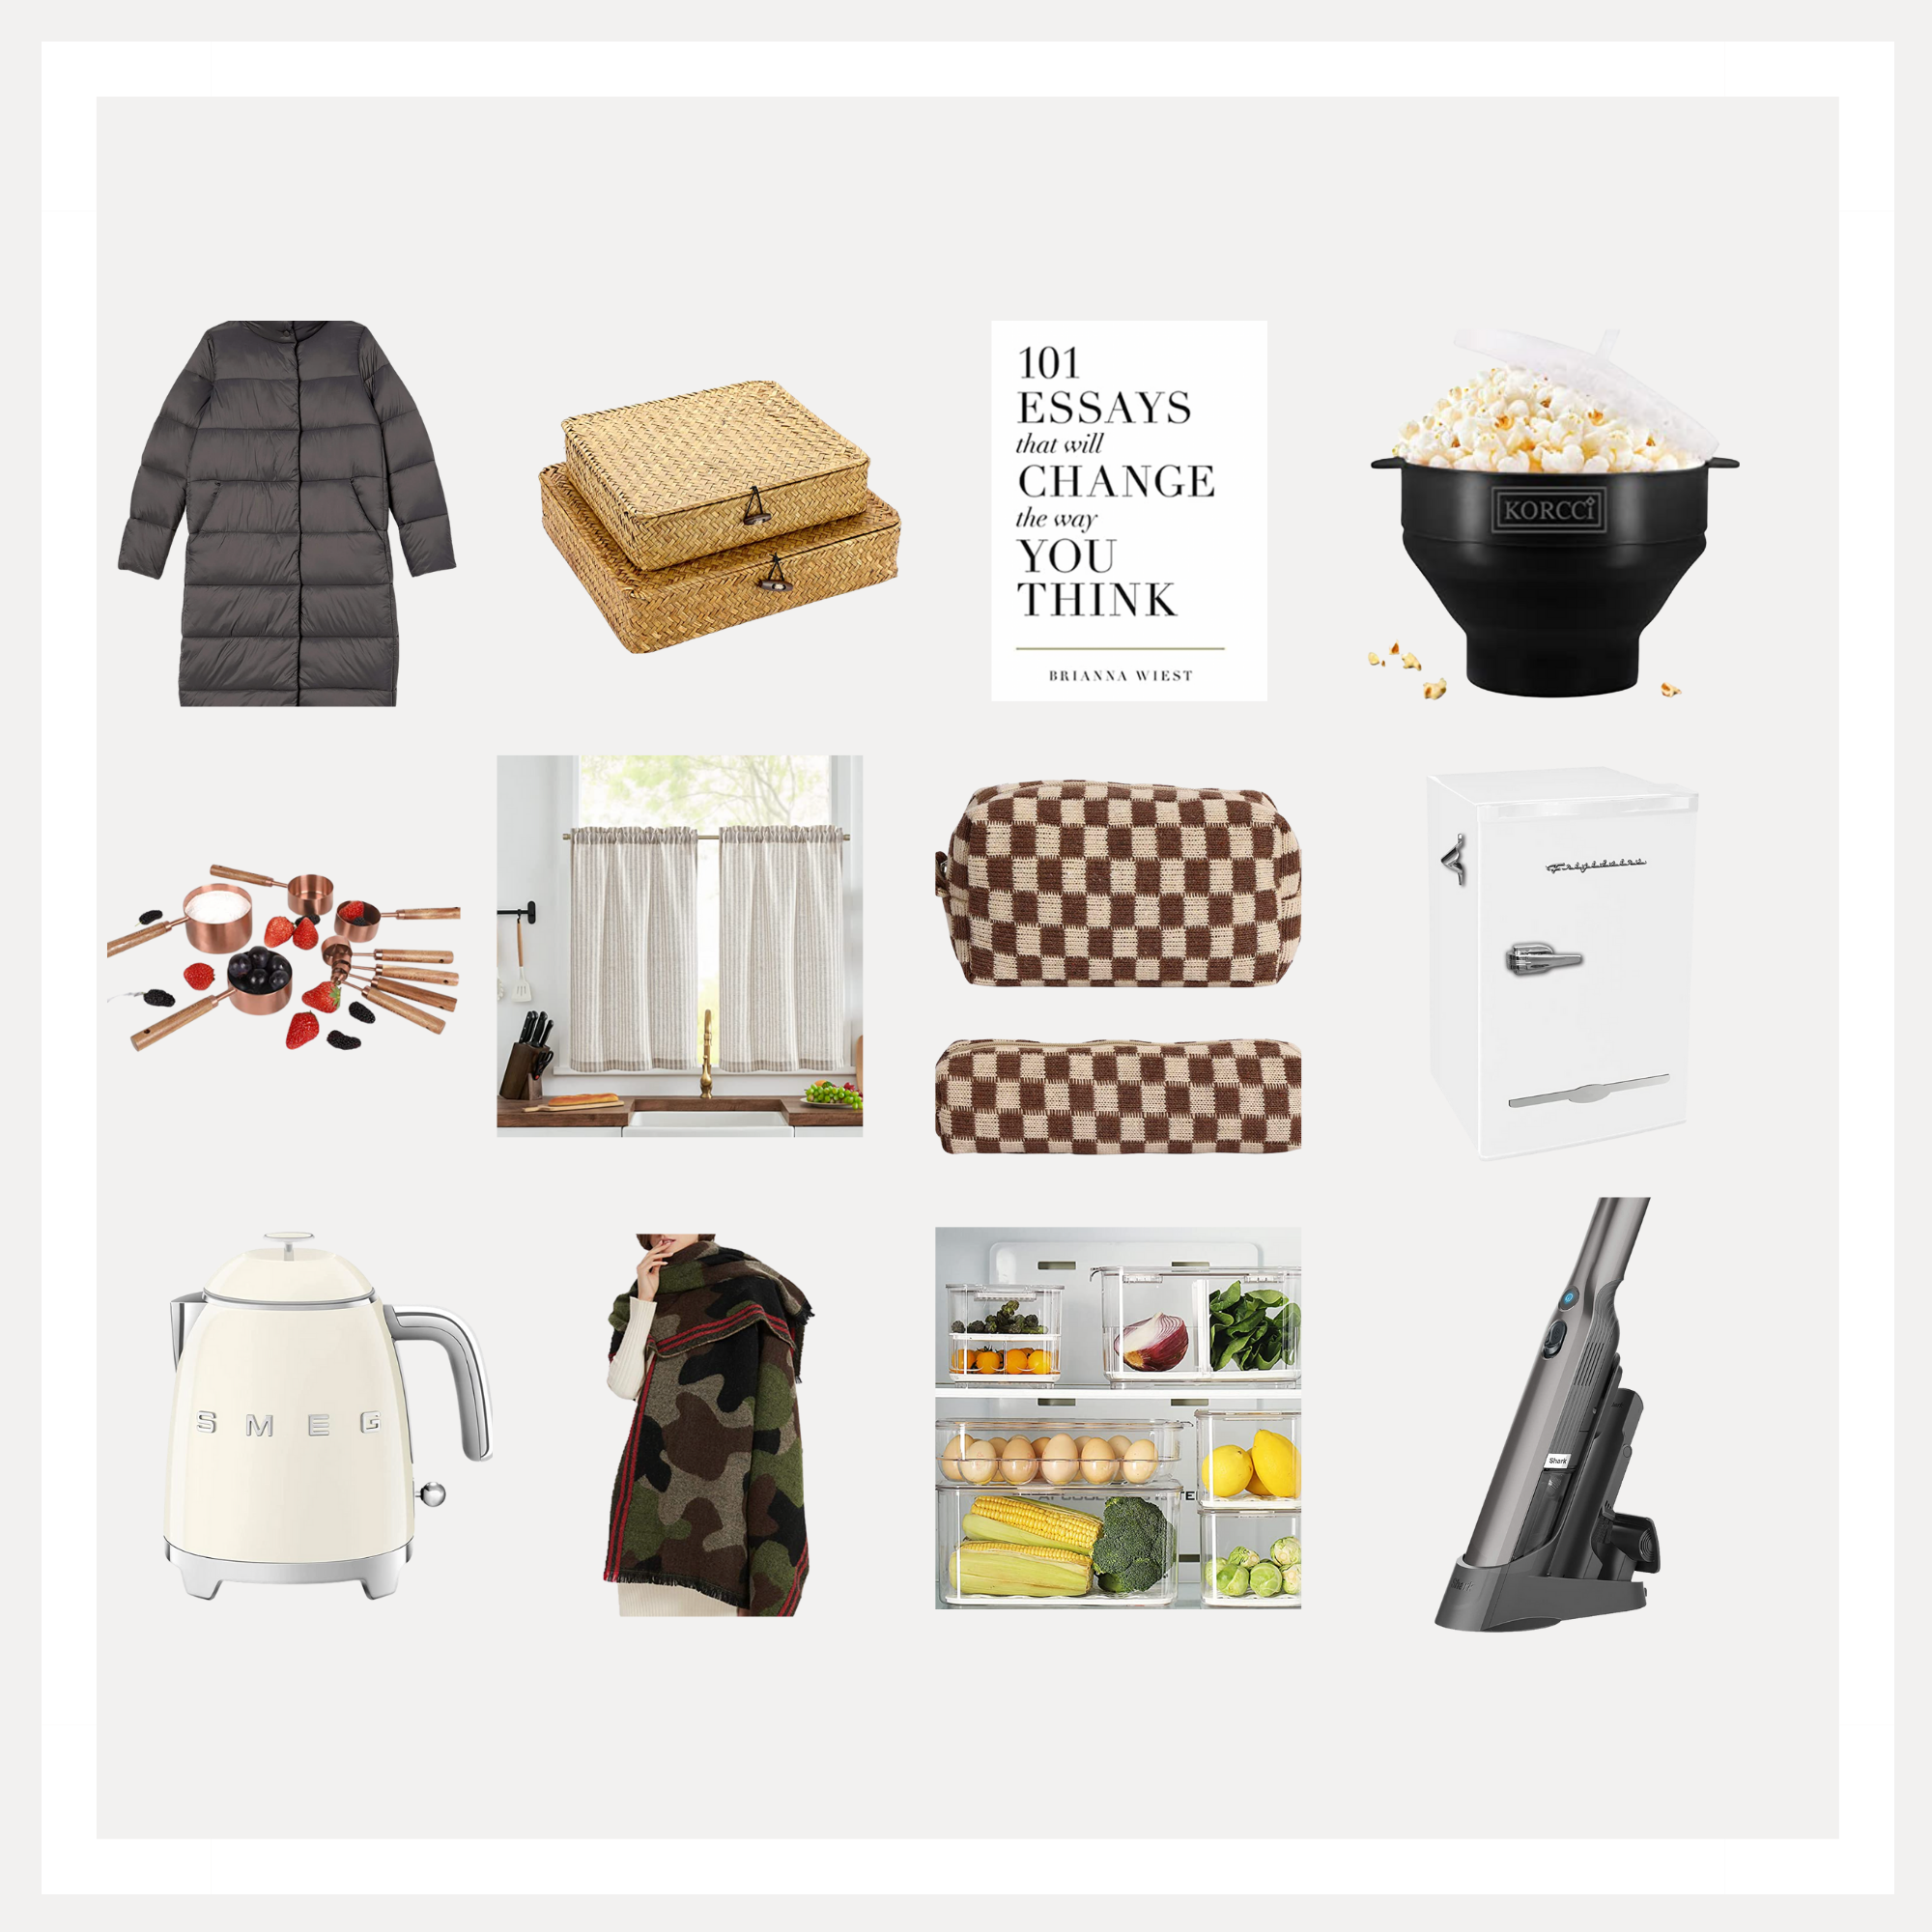
OK, so there you have it! Whether you’re looking for a few statement pieces or just a couple of small accessories, you can find all the items you need to create your perfect look. We hope this helps inspire you and get your creative juices flowing. Below is a list of items that we used for styling this project. Happy shopping, and tag us if you style something utilizing these tips — we want to see your handiwork! 

Design

What We’re Considering for the Living Room at Our Tumalo Project

Did you see our big announcement today? We’ve decided to move into the Tumalo Project after the first phase of the renovation is complete! The key words are “first phase.” There are many reasons why we’ve decided to make this house ours for a few years, but the main one is that we see a huge potential to make it really amazing. As Derrick says, why wouldn’t we want to move here — the views are so so good! We’re very excited to make this our temporary home, and put in all the fabulous touches … Clouz Houz style!

Sooo let’s talk about the living room: the main hub of this home.

We’ve been dreaming of designing the perfect mix (is there such a thing??) of rustic, modern, and earthy natural style vibes in a room together. And, the time is finally approaching for us to start turning our dreams into reality! With the living room just off the kitchen, it’s going to be used as the primary living, entertaining, and “lounging around” area of the house. It’ll be a place to come and just chill, and take in the breathtaking landscape views out back. 

Keep reading for an idea of my thought process regarding how to bring this living room into this century by giving it a fresh and current aesthetic.

Get A Feel For Our Vibe


Source: Studio McGee

We’re envisioning a cozy, inviting space with  casual and deep-set cushioned seating, a large area rug, and plenty of natural lighting. It’ll be the perfect spot to entertain friends and family, to curl up and enjoy a good book, or to work on our laptops by the fireplace!

But first, let us quickly address the elephant in the room and say that we have decided against a TV in this space. Yep, you’ll need to trust me on this one. Believe me, I wasn’t sure about this decision, and while I’m sure that there are many reasons to have one off of the kitchen, we will be putting one in the Rumpus Room that is just off the living/dining area. (Stay tuned for more detailed info to come on that space.) 

Since we want the living room to have multiple uses, we’ll need to be flexible with how we purchase and arrange the furniture to maximize the close-quarters.

Here’s A Game Plan for Everything We Want


Fireplace Surround Options

Let’s start off with the main attraction of the room: the fireplace.

We mentioned previously that we’re considering a double sided fireplace insert. I think this could be a really beneficial way to open and brighten up the space. And, what we finish it with is still to be decided, but I have some ideas to throw out there. 

Here’s a look at some of our favorite options for finishes.

Source: Unknown

01. Plaster for the Living Room?

I love the clean lines and simplicity of this option! It would bring in a subtle, industrial texture, while still creating a luxurious look that would add a touch of class to the room. This house is going to push me out of my comfort zone in terms of how I would normally design such a large fireplace. However, I think with the high and drafty ceiling being such a focal point, I want the fireplace to compliment it but not necessarily compete against it.

Source: Layton Designs
Source: Unknown

02. Stone or Tile

I love a natural aesthetic for this house — anything that feels earthy. With a variety of colors, textures, and styles, there is sure to be something that will really bring outside energy into the living room. Both options could provide a timeless and rustic feel, while still pairing nicely with other materials like wood.

Source: Brandner Design
Source: Unknown

03. Concrete (or faux concrete?)

Concrete is very similar in aesthetic as the plaster option, but I love how concrete finishes are on the rise and offer a modern touch to any space. I really enjoy (and sometimes prefer) a sleek and simple appearance. You know the saying, sometimes “less is more.” I love the idea of keeping it airy and light, but a part of me always has the urge to go the high contrast route and stain it dark. I’m all for the drama of the dark, but maybe that would be too heavy for this space? Ugh, I’m torn! One thing is for sure, and that is that we’ll definitely add a wood burning insert.

Faux concrete is also a cool concept and another viable option. The finishes are typically made from a variety of materials such as panels, tiles, and even paint, which are used to mimic the look of real concrete. Sounds like a great DIY hack to me!


My Thoughts on Furniture

The layout will be conducive for a cozy spot to sit by the fire and visit with family. It’s not a big space, so we’ll be somewhat limited on what we can fit there. A great way to make the most of a smaller space is to incorporate multi-functional furniture. 

I’ve always loved double-sided chaises as they are perfect for napping, but not so great when it comes to entertaining. Since they do provide plenty of seating for entertainment purposes, I was thinking a combo would be a good solution. A double-sided chaise paired with a couple of swivel chairs and a big coffee table would make the area feel inclusive and well-utilized. The chairs would make it easy to turn and converse with guests, while the coffee table would provide a convenient spot for cards and snacks. I can already picture it being the perfect night by the fire, enjoying a home-cooked meal and playing some games.

How Do We Warm Up the Space?

With all the natural earthy tones and textures of materials being used, we need to find ways to warm up the space and not make it feel so stiff. Cozy fabrics, a big vintage inspired area rug and lots of soft, plush throws never fail to make a room more homey. Maybe a couple of furry poufs thrown in would help to give a fun look, plus some extra seating.


Photography: Zee Wendell

Additionally, I pose the question: How to define an entryway with so little room?

There isn’t a proper entryway in this house. The front door opens right up into the living room, so we will just have to make do with what we have in this area. My first thought was that I needed to come up with some way to create a transition zone from one area to the other to break up the spaces. 

So, my goal is to find a spot, either a corner or a wall, where we can put a console or bench and create the illusion of an entryway without actually having one. Make sense? Ha! I am going to have my work cut out for me to figure out these details, but we’ll be removing what was the coat closet to the right of the front door to make more room. This will help to create more possibilities for the entry.

I love the idea of a floating console such as this one!


Doors We’re Considering for the Living Room

You’ve heard us going on and on about the spectacular view from the back of the house. Well, I’m sure it’ll come as no surprise that we’ll be adding french doors, or sliders, to the living room. These will lead out towards the backyard. We want to capitalize on the landscape for this property and make the space feel bigger however we can! Here’s some inspo for what we’re considering.

Source: Studio McGee

I love the minimalist feel of those window styles. Do we do paned or no pane? That is the question! After seeing this inspo pic, I am now in awe at the way they make the outside look as if it’s an image captured in a picture frame. How beautiful! So, there you have it. Please let us know what you think. We can’t wait to share this transformation! Fingers crossed that we get our plans approved and permits in the works so we can start implementing all our ideas!


Cocktails

A Festive Galentine’s Day Brunch

An afternoon to celebrate your besties...

Happy Galentine's Day, my lovely ladies! It’s time to celebrate some amazing relationships, so let's gather to toast your ride or die. What better way to honor our friendships than with a festive Galentine’s Day brunch? Here are some ideas on how to have a beautiful celebration!

I love Valentine’s Day … it’s all about love, and comes right in the middle of a pretty cold and dreary time of year. I know it’s a “Hallmark” holiday, but I don’t care — it just feels good, and it makes me happy to show my love for my family and friends. 

Last weekend, we came together at a friend’s beautiful home to cheers one another on fostering worthy and amazing relationships. It’s a festive day that we all look forward to, and I enjoy being surrounded by the people I love! I feel so lucky to have a community of smart and like-minded women from whom to gain inspiration and motivation. We ate, drank, laughed and just enjoyed one another. We are all very blessed!

Photography: Zee Wendell

A little bonus: my daughter was able to come home from school and join us for the weekend. I love her so much, and will always cherish the fun and silly memories we’re able to make during special times like these. I’m so thankful for the time we spent together, and am sending out hugs and love to all the beautiful moms and daughters out there. It’s a pretty special bond we have, us girls, isn’t it? 

Photography: Zee Wendell

Okay, now let’s dive into the festive, yet relaxed itinerary for a fun girlfriends’ gathering!

Keep it simple! This is s always my motto. You’ll find that if you keep things simple with good ingredients, you don’t have to go crazy with elaborate meals. And let’s be honest, friends don’t care! They just want quality time with you.

Step 01: Set the Menu

02: Set the table

03: Whip up some tasty cocktails

04: Turn up the tunes!! 

05: Get dressed up 🙂


Photography: Zee Wendell


The Menu


Sip

A grapefruit spritzer is the perfect combination of fruity and bubbly. Continue reading to see the recipe for this yummy drink. 

Champagne … you can never go wrong with a good bubbly rosé!

Photography: Zee Wendell

Savory

Caviar is one of my favorites, how about you? Why not treat yourself and your gal pals to a luxurious meal featuring this decadent ingredient! Whether you’re serving a traditional spread of blinis, crème fraiche and various herbs, or just simple potato chips and eggs, a dollop of caviar can really elevate your dish. I ordered this caviar from Om Caviar online. It arrived overnight packed in a cooler, and was so worth the splurge. I highly recommend it!

A cheeseboard is a great choice for obvious reasons. It’s perfect for grazing during cocktails and chatter. Just throw together a beautiful spread of different cheeses (I typically choose 2-3 varieties), and add grapes and berries, crackers, nuts, and honey or jam to your liking. Garnish with orange wheels and figs for a pretty touch.

Photography: Zee Wendell

Sweet

Get ready for this easy Red Velvet Cake hack! This was just a simple store bought cake that I doctored by scraping the original frosting off to give it a rustic look. Then I added some fresh edible flowers and strawberries for a decoration. Serve on a pretty cake stand and everyone will start calling you Martha Stewart!

Photography: Zee Wendell


Set a Pretty Table

Photography: Zee Wendell

Here are a few tips to help you get the mood just right.

Start with a beautiful centerpiece. (Trader Joe’s always has the most amazing variety of flowers for any occasion.) Create one larger arrangement in an oval vase, then add smaller arrangements with one type of flower, like these mini daisies. I love the girly yet chic vibe. 

Photography: Zee Wendell

These plates really made the table scape complete. They are from Pottery Barn, and they’re so pretty — they would be great to use throughout spring time. You want your table to look inviting and festive, so don’t be afraid to mix colors and prints. While opting for brighter colors, you can’t go wrong with these heavy and gorgeous pale pink glasses. I highly recommend serving up a delicious cocktail, of course 😉

The napkins and placemats will be ideal for many different gatherings. Since they’re neutral, they’re versatile for various holidays and can be the perfect compliment to any types of plates or glasses. I love how the placemats add texture to the rustic wood table, and the buffalo check napkins in neutral colors are a nice compliment to the floral patterned plates!

Photography: Zee Wendell

Cocktail Hour

Photography: Zee Wendell

Tasty Grapefruit Spritzer

To make this cocktail, combine equal parts vodka with Trader Joe’s Cranberry Ginger Seltzer, and top off with a splash of grapefruit seltzer water. Garnish with a slice of grapefruit and a sprig of rosemary, and an edible flower for an extra special touch.

Easy Peasy!

My friend had one of these countertop ice makers … omg — the pellet ice!! I’m hooked! I want one for myself. Can we all agree that pellet ice is superior and makes drinks more refreshing?


Turn up the Tunes…

If you’re looking for the perfect playlist, here is one I have compiled with all my favorite songs from favorite female artists… guaranteed to get you into the festive spirit. Get ready to jam out with your girl gang after one too many glasses of champagne!

Check out our playlist here.


Photography: Zee Wendell


Get Dressed Up

Photography: Zee Wendell

Getting dressed up is fun — especially when it’s just the girls! Go bold and have fun with the theme … we all dressed in festive florals, pink and red and it felt so beautiful. It’s rare to get dressed up in Bend, so this was especially fun for us. This time of year makes me so excited for my Spring/Summer wardrobe! I’ve been shopping for some new things to make me feel like warmer temps are just around the corner, but in Central Oregon it could be several more months before actual warm weather arrives. Nevertheless, wearing something girly and springy feels sooo good for your mental health — try it!

Take a look at what we wore here! You can follow us on LTK for more favorites- home, decor, renovation and fashion. Follow us here.

I hope these tips have given you inspiration and a vision for your own Galentine’s brunch to come to life — all while creating some memorable moments. Now put on your best pink and red attire, whip up some delicious treats, and get ready to celebrate! 

Shop the look below … we would love to see pics of you and your girl tribe, so tag us if you gather. ❤️


Lifestyle

A Gift Guide for your Valentine ♥️

Derrick and I keep things pretty simple for Valentine’s Day. We love to make a yummy dinner and just enjoy the evening together. Now that two of our three kids are out of the house, we mail them each a little gift. Typically, it’s something I know they could use for school, but it’s also fun to give presents that show our love for them but that aren’t necessarily “useful.” If you’re looking for a gift for a loved one, check out the ideas below!

By the way, did you know you can follow us on Like To Know It?? You can find ALL the items featured in this post there on our Like To Know It page. We have an account on LTK where we share all the links of things we’re loving. We hope you’ll check it out and let us know if there’s something you would like to see more of. You can find us here!


Design

High Desert Tumalo Ranch: The Kitchen

Here are our initial thoughts ...

We're massaging all the details of the kitchen layout and materials for the High Desert Tumalo Ranch project. It's a small kitchen, so we're looking to find ways to make it more functional, yet beautiful. We plan to DIY and outsource in order to bring this kitchen into our dream vision for this home.


The Kitchen … before


The Kitchen … after


So, as you can see from the original drawing, the kitchen is quite small. Our goal is to make it feel bigger without increasing the footprint of the home. Here are a few things we are taking into consideration in order to achieve a more open concept.


1. New Cabinets: Remove the Peninsula Cabinetry That Divides Kitchen From Current Dining Area

We’ve decided to keep the perimeter cabinetry pretty much as it was, with the range sitting on the wall across from the fridge/freezer and the sink on exterior wall that looks to front yard. However, by removing the peninsula cabinetry, we can open up the kitchen to the dining space. This allows the kitchen to feel more open, and our goal will be to expand cabinetry into the dining area to give the appearance of a bigger kitchen. Another way to make the space feel larger is to remove all upper cabinetry. We are expanding the window where the sink sits to let in more light and let the “outside in.” I’m loving the image below for how I visualize the kitchen to feel. I want it to feel open, functional, casual and textural.


Image: Lauren Liess


2. Cabinetry Style and Budget

We’re playing with different options on cabinetry design, style and budget. Cabinets can be very spending, but investing in quality cabinetry is really worth it! If you’re working with a small space, the cabinets need to be highly functional. Why? Because standard cabinet sizes by bigger companies may make it really difficult to achieve the look and storage components you need. We love the concept of incorporating some vintage pieces for either the island and/or the cabinet in the dining room. We think it’s so beautiful, and it gives the space more character this way. This picture is just so pretty, and yet still gives us the storage that we need. I love these images — they’ve me inspired to find a beautiful antique piece to act as the island.

Image: Amber Interiors
Source: Unknown


3. Make Up Storage In Pantry Area (which is currently the laundry room)

Without any upper cabinets in the main kitchen, we will convert what is currently the laundry room into a walk-in pantry/mudroom. We plan to utilize this space for pantry items such as snacks, dry goods, canned goods etc. This space will work VERY hard for such a little space, but I’m excited for the challenge. This room is right off the garage, so it will also need to have a place to drop bags and hooks to hang coats and hats etc. I really appreciate a great pantry, and this image is speaking my love language!


4. Create A Focal Point With A Beautiful Hood

The range will become a focal point by adding a hood insert to a framed surround. I love this look! Can’t decide if the hood will be wrapped in tile, wood, stone or plaster, but regardless, I want it to feel streamlined and be a beautiful focal point of the kitchen. Here are some inspirational images for this concept. Which is your favorite?

Image: Pinterest
Image: Pinterest

5. Create a ledge for styling and dishes

I love the look of simple design. And, there’s just something about running a ledge from one end of the kitchen to the other! I’d like to incorporate this look on the range wall, if we can make it deep enough. Then I’d plan on storing some dishes and glassware there for easy access. It’s very fun to use pieces that you also use everyday for styling!

Clouz Houz Tip: Use a palette of dishes that all match and coordinate with the hard materials in your kitchen. This way, you can use open shelves and they’ll beautifully compliment each other.

So  … there’s the first round of inspo for the all things we’d love to incorporate into the little kitchen! We’re getting excited to put these conceptual ideas to paper and reveal our final plan for layout, cabinetry and materials. We will be sharing soon. Stay tuned!

All our projects begin by getting inspiration from images on Pinterest. To follow us and see what we’re pinning, click here.


Design

We Organized Our Design Studio … Here’s How!

When we set out to revamp our little design studio in the historic Okane Building here in Bend, we had our work cut out for us. For one thing, we knew we needed to capitalize on storage since the space is approximately 210 square feet!

So, here are some things we did to organize the studio, and give the space a little refresh. We wanted it to be not only a great place to work and be inspired, but also a comfortable space in which to meet with clients for presentations and meetings.
Our little space may lack room, but it doesn’t lack charm! We’re loving how it came together.

Step One: Organization

Let’s be honest, a design studio holds lots and lots of samples, materials, catalogs, architecture plans and more. How do you keep them all organized and sorted so that when you need to find something, you can do so easily?! If you are anything like us, we’r more productive in a tidy and organized space than in total disarray. We can be more creative and efficient if things have a “home” and are easy to access. This is the same for a home office. Don’t you agree?

Organization is very, very important, especially in a small space. We don’t have a ton of room, so we needed to be smart with containers that hold all of our sample library. We used these baskets, which come in three different sizes. They’re perfect for sorting all different samples of different sizes. We have the small size for mosaic tiles, the medium size for fabrics, and the large size for large format field tiles and catalogs. In addition, we used these wipeable labels that clip on the baskets, and we handwrote each basket’s contents. You can easily wipe this off and re-label if samples and contents change.

We used the IKEA “Alex” drawer unit on casters to hold supplies and client project materials. They’re the perfect size, and we love the ability to use them for different purposes. We used these drawer inserts to organize supplies such as a tape measure, stapler, binder clips, tape, rulers, pens, pencils etc. So handy!

Step Two: Furniture + Decor

With a small office and a team that currently consists of three people, we knew we needed a desk for each of us, along with a large table for laying out presentations and meetings. We chose these desks and love the simple profile and size. They are on wheels which makes for easy mobility, and the white finish is perfect for creating a really clean, fresh feel. We have a black one in our son’s bedroom as well, and we love it! It’s a great value for the look. Highly recommend for any home office or nook where you need a spot to check emails, pay bills, etc.

We used a large vintage dining table that we’ve owned for years as our conference table. I found it on Craigslist and had it refinished, and we love the look and feel it brings to our office. We found these chairs to go around the large table, and they’re comfortable yet fit our aesthetic of neutral, clean and simple.

These cute leather stools are a great place for clients to drop their coats and bags since we are limited on wall space for coat hooks! They are so cute, and would be a great option in a bedroom at the foot of the bed.

This rug is from a collaboration between Rugs USA and my favorite designer, Lauren Liess. I absolutely LOVE it! It has a chocolate brown stripe running through a natural jute material. A perfect addition to add a little texture and warmth to our space. I would recommend this as well for an entryway or mudroom — it’s great for a high traffic area. It hides everything!

Step Three: Lighting

We used this large pendant light for over our conference table, and it exceeds all expectations! It’s from the Studio McGee Collection for Target. The scale is large, and perfect for over a dining table. I could also see it in a large vaulted bedroom over a bed! It’s really good, and we’re really happy with it.

For the desks, we added these table lamps, also from Target. They are really cute and a great dupe for more expensive versions I’ve seen. I also love the chains for turning them on/off — it’s a nice little detail.

Step Four: Setting up an Office “Honor” Bar

Let’s be real … we all need a place to grab a snack and a drink! So, we turned our little kitchenette into a spot where we can store a mid-afternoon snack. And for client meetings? Well, we like to offer a cocktail, a glass of bubbly or a cup of tea. We have a mini fridge stocked with all the things: sparkling water, prosecco and soda. It also happens to hold our lunch leftovers!

This electric kettle is ideal for making instant coffee and tea, and we love it! It’s so worth the investment, and it looks really cute on our counter. We added this tray to display cocktail mixers for that after work cocktail with clients 🙂 And this shaker, shot and spoon are a cute set to leave on the counter with the cocktail fixings.

So, there you have it … a big tour for a very small space. But we’re so happy with it, and we’re ready to tackle 2023 in our new design studio. Come visit! We would love to see you! 🥂

Lifestyle

Here are the Amazon Finds We’re Loving

Our family shops from Amazon … A LOT! And in fact, we’ve found some items to be incredibly useful in our home. Great finds include everything from home remodeling items, appliances, clothing and home décor to organizational items and more. And then there are the things that haven’t really hit a home run, so please know that we are only sharing items we stand by from a quality and value standpoint!

We’re excited to share with you our NEW Amazon Storefront with everything we’ve found to be not only incredible useful, but also a great value … and in some cases, really pretty too!

Check out our storefront here. We’ll l be continually updating the items, so keep checking back to see what we’ve added. In fact, anytime you’re on Amazon, pop over to our storefront to see our latest finds. We’ve sorted it all by category to make things easy to find: home décor, must-haves, clothing, coffee table books and much much more!

I’ve rounded up some of our favorites to date, so look at the items below and see what we love about each one. Since we’ve been at this a long time, we would love to help guide you to make smart decisions before purchasing. Reach out anytime!


Bedroom

High Desert Tumalo Ranch: The Primary Suite Addition

We’re so excited to finally share some of our plans for the Tumalo Project! It has taken a while to get them in place, and we’re still fine tuning, but we wanted to show you some of our thoughts and ideas now.

The house is 1,500 square feet, so we knew we needed to find a way to give it a little more space. We’ve decided to add on to the north end of the house, which will allow us a fourth bedroom and an enlargement of the primary suite. Currently, the primary suite lacks space, and the bathroom is just too small for the primary suite standards homebuyers are looking for today. To get the most bang for our budget, we are pursuing the idea of extending the house by 15′ x 30′. We will be adding 450 sq feet, making the home just slightly over 2000 square feet. We think this addition is much needed for the property, which is chock full of potential!

Today we wanted to share how we came to this decision and some of the driving factors that led us to build this addition. Below are our priorities for the primary suite, and how we will achieve these goals by adding square footage. We’re eager to see this space come together … it’s going to be such a great transformation!

Primary Suite Addition … before


Primary Suite Addition … after


1. Create More of a “Suite” by Adding a Sitting Area/Den

Source: Unknown

As you can see from the “before” plans, the primary bedroom currently sits right off the entryway hallway (which also has a closet where the water heater and furnace sit. This not exactly the ideal placement for a primary bedroom. So, our first goal was to create a “buffer” between the hall/utilities closet and bedroom. We’ve been working with an architect to design the addition, and came up with the idea of creating a small work space/den off the bedroom. With this addition, you would be able to enter the den off the hall and walk though it to get to the bedroom. This creates a more gracious and special entry for the primary suite, and it adds to the footprint of the bedroom so it will feel bigger. We thought by creating a den off the bedroom, the new homeowners could have an office and sitting area connected to the bedroom for relaxing, reading, watching TV etc. Think this feature is going to be so so nice! I envision this space to be moody and cozy. More to come on how we will achieve this look!

The wall that divides the den from living room is where we would like to add a fireplace in the living room. We’re exploring the option of a double-sided insert, so when sitting in the den you could sit by the fire as well! How cool would that be?? This will come down to budget. We have a quote for a wood burning insert for the fireplace in the living room, but we need to look into how much that would change if we wanted a double-sided version. If we can afford it, it would be a beautiful perk to the primary suite that would make a lot of sense for resale value. I loved when Chris Loves Julia added a double-sided fireplace to their living room (in their case, the other side was to the dining room) … but isn’t this just gorgeous?!?

Source: Chris Loves Julia

2. Enlarge the Primary Bathroom

The current bathroom is a single vanity with a small tub/shower combo. Not at all what you would want for a primary bathroom! We explored other options that didn’t require adding on to the home to enlarge the bathroom, but it was just not possible. So, by adding the additional square footage, you can see how much we gain in the en suite footprint for a beautiful bathroom. We’re able to achieve this layout with his/her vanities, along with a generously sized shower and tub area, Or, if you’re blog subscriber, you know all about wet rooms after last week’s “Sunday Subscriber” newsletter 😉 We absolutely love this look for our project! We can accomplish a really special moment in the bathroom for soaking while looking out at the amazing views. Can’t wait to make this space come together! I’m already scheming about tile and beautiful plumbing fixtures 🙂 Stay tuned for when we share our materials selections soon. It’s going to be a stunner.

You may be asking: why is there a door that leads to outside off the bathroom? Our thought is the future homebuyers could add the most beautiful space off the bathroom, whether it’s an outdoor shower, a sauna or even a cold plunge tub. I’ve never tried a cold plunge, but our new assistant Kaylei has told me all the benefits — and I think I’m in!

I’ve always loved this image from Lauren Liess’ book “Feels Like Home.” If you don’t have it, you need to go out and buy it right now! She designed this beautiful space right off their primary bedroom in one of her previously owned homes, and it made me wonder how dreamy it would be to have a space like this connected to the primary. Especially in Bend, I can imagine the new homeowners would love to rinse off outside after a long bike ride or hike. Wouldn’t that be so so heavenly!?

Source: Lauren Liess

3. Improve Primary Closet and Storage

As crazy as it sounds, primary closet space is very very important to homebuyers. Statistics show that storage for the primary suite is a huge priority when buying a home. Although it won’t be a super big closet, it will be a nice walk-in closet for the new owners. We also plan to add some added wardrobe cabinetry in the bedroom to attain just a bit more hanging space for non-seasonal clothing (this is also added storage space).

We’ve always used the IKEA Pax System when designing our own closets, and we have some great hacks to share on how to make them look custom. This is exactly what we’ll do on either side of the large double pocket doors that lead to the bedroom. Here’s an image that shows the look we are going for! There are now companies that sell doors for the IKEA cabinetry, so I’m researching this a bit, but the idea is to create a custom built-in cabinetry look without the expense. (See a past project here where we painted our PAX wardrobes.) I’m loving this look and hope you do too!

4. Create an Indoor/Outdoor Feel

Homes in Bend are known for having an indoor/outdoor feel. Let’s be honest, a lot of people move here for the landscape and for being outside! We want the primary bedroom to capitalize on the amazing views out back, so we plan to add either french doors or a large slider that creates more of a sense of “outside in.” I’m so excited about this feature as I really think it will make a huge difference to be able to access the backyard from the bedroom. I could see a large deck or patio there for drinking your morning coffee, or enjoying a nightcap after dinner under the stars! Here’s an image that speaks to the vibe we want to create with the doors and patio outside.


Source: Côté Maison

We’re getting very excited as we finesse these plans, and we’re close to finalizing them and getting them off for permitting! Stay tuned in the coming weeks as we share more details on the rest of the house. Keep checking back for more ideas, inspo and design direction!


Projects

Our Garage + New Workout Room

Our garage + new workout room


When we set out to organize our garage this past summer, we knew we were in for a big project! It had become a dumping zone for everything from old furniture, staging and styling supplies and retired ski clothes to tools, sporting equipment, paint … you get the picture. We have a three car garage that had no room for cars (!) and the things that were in there were really really hard to find. So, we decided it was time to make the space more functional and organized.

Since we needed a dedicated area for working out, we chose to convert the third bay to a place for our Peloton and weights. And, if we organized the other two bays, we could finally park out cars INSIDE the garage 😂 Wouldn’t that be nice?? Especially during the winter months, when getting into a freezing cold car covered in snow is really not fun!

Here are a few things we learned in the process …


1. Sort 2. Purge 3. Organize! First, we literally sorted EVERYTHING in our garage. We laid everything out in groupings on the floor so we could assess what we had. Then, we were able to decide what we wanted to keep, and what was no longer needed. We created a donate pile, and Derrick loaded everything into bins to take to Goodwill. I can’t tell you how freeing this process was! Once we were left with the things we knew we needed and would actually use, it was time to organize. Finally, we placed the items that remained into bins, and labelled each bin for easy access. We wanted to be sure things got put away where they belonged.

Once the garage was cleared out, it was definitely easier to paint all the walls. What a difference this made! We decided that painting the garage a dark color would give it an industrial yet cool vibe, like in the photo below. We painted the walls, ceiling and backside of garage doors in Benjamin Moore’s “Wrought Iron” in a matte finish (which hides all the cracks and dings). Everyone absolutely loves it! Derrick sprayed it on everywhere, including all the pipes and conduits, so they now just kind of recede into the space.

CLOUZ HOUZ TIP: If you haven’t used something in 6 months or more, you most likely won’t use again. Our advice: cut ties now from all the clutter and free yourself of all these extra things you don’t need!

Source: Nesting with Grace

One of the biggest game changers for the garage was refinishing the floor. We looked into so many options for what to do with it! We considered everything from Swisstrax (which we had in a previous home), to paint, to epoxy. Derrick and I chose an epoxy floor that he was able to paint himself. I’d suggest you give yourself at least 4 days to go this route, including drying and curing time between each step.

Check out our “Garage Makeover” highlight on Instagram @clouz_houz where we show the step-by-step process in detail!


A comprehensive list of the items we found to be useful for this project is below. This includes shelving, bins, flooring and more. We hope you find some inspiration as you put your home back together after the holidays and find yourself in the organizing and cleaning mood! We love our new and improved garage space! It’s tidy, organized AND we have a place we can retreat to for a good sweat. Bring on 2023 resolutions for more self care 🌟

Design

This is How We Turned Our Closet Into An Office

Styling: Clouz Houz Photography: Zee Wendell

In the spirit of all the organizing and refreshing everyone is doing at the start of this new year, I thought we would share some tips and ideas on how to turn a closet into a small home office … or what some may call a “cloffice.” We did just that with the awkward closet under our stairs that had become a drop zone for whatever we didn’t want to deal with. Honestly, when we set out to implement this project, we realized there was so much in there that we didn’t NEED! Purging feels so good — especially when it opens the door to increased creativity on how to better use a space so it’s more efficient and useful.

When designing a small office, it’s helpful to think about how you are truly going to use it. In our case, we knew it wouldn’t be a space in which we would work often (mostly because of its size). But, we still needed a place to collect mail and packages, print documents, check emails, set boots and shoes during the winter months, etc.

Our home doesn’t have a formal office area. We’ve always used the area right off our entryway (see photo below) as both a dining room AND a place to work and be inspired with design books and such. Look at this reel where I show how I organized the space to work both ways.

Photography: Zee Wendell

To be honest, it always felt like there was so much clutter when you walked in the front door … mail, packages, coats and purses would pile up, which made it a pretty uninspiring place to sit and work. If you’re anything like me, you work better in an area that is clean and tidy and pretty. In fact, I can’t start until my space is clear of all distractions! So, our so-called “office” wasn’t working anymore. By creating a zone under the stairs to collect those things, we were able to keep the table and dining area as a more conducive space to be creative — and as an actual dining room!

CLOUZ HOUZ TIP: Find an area in your home that can be a drop zone for things such as mail, car keys, packages and such. This kind of clutter creates chaos in a room. You will feel more calm and zen if you know you have a dedicated and organized space in which to store those things. Then, you can wrangle through the clutter when you have time, but it’s not in the way.

1) Find a space that can be repurposed

If you have a closet that isn’t really needed (i.e. it’s full of clothes and other items that are never used), clean it out, donate the unwanted items, and turn it into a functional space! I guarantee it will get your year started off right. I love some of the inspirational images below that speak to this idea. And, please note, it doesn’t necessarily have to be a closet — it could be a large armoire, hutch, dresser or small nook. Get creative: look around your home and I bet you will find an area that can be transformed into the central “organizational hub!”

Source: Apartment Therapy
Source Unknown


2) Add “whimsy”

If you can, add elements to your space to make it feel special. Try to make mundane spaces feel a little unexpected and inspiring (i.e. laundry rooms, closets, workout rooms). That way, when you open the doors, there is a touch of whimsy and inspiration. We added V groove panelling to all the walls and ceiling of our closet. Then we white washed it to give it a beautiful hue of creaminess and warmth. I love when guests open the door and are wow’d by how cute and cozy it feels!

Derrick built the tiniest little desk and counter to hold our computer, a small lamp, and a place to set bills and mail. Over the holidays, we added a wall-mounted roll of brown butcher paper for easy wrapping. In fact, this space became a great little spot for wrapping those last minute gifts!

Photography: Zee Wendell

3) Go Vertical

In spaces that are small, you are forced to go UP. Use every inch of your walls and you will be amazed at how you can organize that space. I use inspiration boards all the time in my design projects, and love to have a bulletin board in our home to hold mementos, invitations and special announcements. It’s a fun way to remember events, special photos or even torn magazine images that inspire you. The bulletin board has been with us through several moves, and I always find a place for it. It just makes me happy!

4) Add Lighting

We didn’t want to deal with a lot of electrical work in our new office, so we added a decorative sconce with a battery operated puck light (it comes with a remote). All you do is screw in the battery operated puck light into the socket, and turn it on with the remote when you want to use it. I love the cute sconce I found from Joss & Main (a great dupe for other designer versions). It adds an extra bit of light in this small space. And, I highly recommend adding a lamp to your desk if you can. The glow gives it that little extra charm.

I hope these tips were useful, and inspire you to find a spot in your own home to convert into something similar that works for you and your family. If you give it a try, drop me a comment and let me know! Below are a few items (some are the exact items I used) that I like to consider when designing spaces such as this. Good luck!

Design

Trends we are Loving for 2023

Source: NY Times

Okay … so let’s take a look at some trends that are being forecasted for 2023. We know it’s going to be an amazing year, and we’re so excited to start fresh with some fun projects for clients — and for ourselves! And remember, just because it’s a “trend” doesn’t mean we can’t see it lasting. We’re looking for those elements that are cool, but that will also go the distance and not just feel like “oh, you must have done that in 2023!” Kind of like the jewel tone interiors of the 80’s, or shabby chic for the 90’s. What we’ve learned is that today’s trends are all about the feel and vibe. Think classic, vintage, textural, and organic. We love what we’re seeing and can’t wait to implement one, two, or more of these in our own designs!

Source: Scout & Nimble

Painted Trim

I’ve always loved white walls with the same white color on the trim (different sheen of course). But, these days, I’m leaning more and more towards the painted trim in a complimentary color to the walls, or even wallpaper. I love the richness it adds to a room, and the vintage vibes. There’s something so charming and unique about this look, and I’m kind of obsessed! What do you think? Would you give this a try this year? Remember, paint is an easy fix, so go for it! Simple edits to a room can make all the difference.

Source: Luxe Remodel


Integrated Bathtubs & Sinks

We’ve been eyeing more and more kitchens and baths with integrated sinks and tubs. This is so beautiful when made out of natural stone or marble! It gives any space a sense of timelessness and character. We can’t wait to try this in a project in 2023. I love the idea of a tall apron front integrated marble sink in a powder bathroom. And, there are so many options on Etsy that will help you achieve this look. Check out our favorites below!

Source: IDF Studio

Burnt Orange

There is something about this color — it’s warm, organic, and rich. We’ve been feeling all the punchy colors lately, and we think they will be BIG this year. After all, Pantone named Viva Magenta the color of the year! Adding a pop of color to any space has always been a favorite design trick, but this orange is sooo good with neutrals, green, and even deep blue. If you’re afraid to go crazy with this trend, try dipping your toe in by adding a few accents throughout your home with a brilliant and rich hue like this. We’re sure you’ll love it!


Source: Design-Milk
Source: So Domino

Saunas and Hot Tubs

Let’s be honest, self care is important! Everyone is jumping on the trend of implementing rooms or spaces where they can indulge in a little of that in their own homes. We love the trend of infrared saunas, ice tubs and plunges … and, of course, an “après favorite”– a jetted hot tub for the ultimate relaxing experience. And please know: hot tubs don’t have to be ugly! We’ve seen so, so many beautiful designs incorporating built-in cedar tubs. In fact, we can’t wait to share a project that will be wrapping up after the New Year where we’ll show you their gorgeous new patio and tub! We love this image below. It’s by one of our favorite designers, Raili Clasen, own home. The deeply stained exterior with the offset of beautiful clear cedar soaking tub? Um, yes please!!

Source: Studio McGee

Fringe

If you know me, you know I love me some fringe detail in my wardrobe … and now I’m seeing it more and more, with accents on furniture, pillows and lighting. There are so many ways to bring this trend into your own space — it’s one of the coolest trends around! And, a little goes a long way. For example, take these poufs from Studio McGee. I would love these in a den or cozy family room for seating by the fireplace. Be on the lookout for this element in designer spaces this year! And we’ve rounded up some of our favorites we have seen so far for you to shop the look for your own home!

We hope you find these trends inspiring and ones that you think you can implement in some way in your own projects! And if you want our help – let us know! We are here for you.


Design

High Desert Tumalo Ranch Renovation: The Main Living Spaces

Our next fixer upper project is full of charm and potential. We can't wait to get our hands on it and make it everything we know it can be! Check out all our ideas and "before" photos to document where we begin this sure-to-be-exciting and wild ride!

When we set out to look for our next investment project, we knew we needed something that checked all the big boxes: potential for expansion, location and aesthetic. This little 1700 sq ft home checked all those boxes, and then some! See below for some “before” pictures … we always think it’s good to appreciate where you came from, and this labor of love will be no different. You can also learn about our priorities when planning new spaces, and the ways we will make this home really come into its own.

home remodel by Clouz Houz
Photography: Zee Wendell

Living Room

The main living space is right off of the kitchen and dining area (and the footprint of this space isn’t that big). We know we’ll want to make this space feel cozy with a new fireplace and cabinetry. We’ll store a TV in the cabinetry, since it will most likely be the main space in which the future homeowners will be hanging out the majority of the time. Our goal is to make this a space that not only works for relaxing, but also that is conducive for entertaining guests. Look at these images of living rooms below — we think they’re the perfect reflection of the style and function of this space.

Do you see the two large picture windows looking out at those killer views? That’s where we intend to add french doors or large sliding doors … anyone have opinions on which we should choose? Of course, budget will play a role in what we can afford, but we really want an indoor/outdoor feel in this main hub of the house. We want to capitalize on all the beauty that you can see out back! So, in our opinion, the more glass the better.

Source: Nesting with Grace

I love light hardwoods if we keep the ceiling natural. But, we have had mixed feelings about the ceiling. Do we just paint it a creamy white or beige? Or leave it natural, and play off that with a really light floor like this? I also think the white stone fireplace over-grouted is gorgeous!


Source: Kenneth Brown Design

If we decide to paint the ceilings, I think I would want something like this. I have been researching all the techniques out there for achieving this beautiful washed effect. I don’t want it to look “shabby chic” but more pickled. Or, if we go with a solid color, I might choose a contrasting color that is slightly warmer than the wall color. There’s something so peaceful about this … and I love how warmth and texture is contained with furniture and accent decor, such as the area rug.

Source: Light and Dwell

I love the revival of all the greigey colors I have been seeing again and again. And, here’s a beautiful example of a slight contrast to the wall color, and yet it warms the space with that accent hue on the ceiling.


Dining and Kitchen Renovation
Photography: Zee Wendell

Dining Room

The dining room is right off the living room and kitchen. Our plan is to create more of an eat-in kitchen, with the dining room becoming more an extension of the kitchen. Off the kitchen will be a wet bar and chairs for enjoying a cocktail or just relaxing. This will allow for a casual vibe for dining and cooking. We want the space to feel as big as we can, and we think by combining the kitchen and dining (remove the peninsula counter dividing the two spaces) we can create one big space for cooking, entertaining and enjoying family and friends.

I absolutely am obsessed with the idea of designing an eat-in kitchen with your dining table in the center of the kitchen space — it’s very European — functional and beautiful. See this image below that shows some of the inspiration I have been turning to when designing this space.

Source: Vogue

Clouz Houz Tip: When combining two different spaces into one, don’t think that it makes the space feel smaller. In fact, it will do the opposite and make it feel more spacious without any “division” in the room. You can still make the space feel intentional. We plan to define “zones” with a wet bar area for cocktail mixing and relaxing, and a “zone” for prepping meals and dining. Finding a way to create zones helps the space feel cohesive without feeling closed off.


Photography: Zee Wendell

Kitchen

The small kitchen will be turned into a space that is better suited for cooking and visiting. The footprint of this room is not big at all, but by changing the cabinet layout and adding some windows, we will create a sense of more space. We have so many ideas for cabinetry style, appliances and hard materials! We can’t wait to share what we have selected for these areas in more detail. Here are some inspirational images that speak to the aesthetic we want.

Source: Lauren Liess

I not only love the natural and textural element to this space, but also the retro and funky lighting to make things feel not so serious! I would like to incorporate elements like soapstone countertops and sink. And all those white dishes?!? Yes please — I love open shelving for your everyday dishes. Makes things easy and will make the kitchen feel bigger without all those upper cabinets!

Souce: Unknown

This kitchen is soooo cool, it definitely would push me outside my creative boundary, but I’m kind of wanting to do that! I don’t think we can make the checkerboard floor work in the main kitchen (but maybe you will see it make an appearance in the new butler’s pantry/mudroom). I just love the idea of a painted cabinet, against some natural stone and cedar (unfortunately though, our cedar is much knottier than what you see here).  For it to give a more rustic vibe, we may need to use the cedar in smaller “doses.”

Family Room aka the rumpus room for games and tv
Photography: Zee Wendell

The Rumpus

So, for lack of a better term, we are turning the space off the dining room into a hangout zone for kids and adults. We’ll add a comfy built in sectional with thick cushions and pillows. We want this area to feel like a place you can truly kick up your feet and watch a movie or play cards. We’d like it to be an “annex” to the main living areas, but an extension for family and friends to enjoy each other.


Source: One Kind Design

I love the cozy vibe of this space above — the luxe sectional in velvet and rich colors to offset all the natural light this room gets. And those sconces?!? So charming for night time reading and dim lighting while watching movies! Ambient lighting is something we never forget – I’m always thinking about this at the beginning stage of any project as its necessary to be sure you have all your electrical boxes set appropriately. Although, you can see a reel here where we show a hack to add battery operated puck lighting if you can’t deal with hardwiring!


Source: Amber Interior Design

There’s nothing about this built-in sectional in a neutral linen fabric that I don’t love!! Notice the serenity and calmness this room exudes, especially against the natural grain of the knotty pine. I’m wondering if we could repurpose the wood panelling in the living room to the Rumpus so we can achieve the warmth of this space … I know that the wall that the fireplace sits on in the living room will get covered up with new fireplace hearth/mantle and cabinetry so I want to use it in some way where we can enjoy it!

So, that’s all the inspiration behind the main living spaces of the home. The footprint of these spaces will stay the same; however next week we plan to share all the deets around the addition for the house! This will provide us another guest bedroom, new laundry space and a bigger owner’s ensuite… can’t wait to share the floor plans and inspiration to explain it all.


get inspired
#clouzhouz
follow along
@clouz_houz
Designing your dream home doesn’t mean you need to live in the same city as your designer.
Our Design Plan Only service has helped clients all over the country bring their vision to life-without a single site visit. If you’re someone who can handle the ordering, legwork, or install side of things, but just need a clear plan from a designer... this service was made for you.
We’ll give you everything: the vision, the layout, the links, the notes for your contractor-and the confidence to finally make your space feel like you.
Comment “PLAN” and we’ll send you the link to fill out our quick client questionnaire and get your discovery call on the books.
Life is short.
Make it beautiful!
Cover image: Pinterest
if you’ve been dreaming of that Old-World aesthetic but have no idea where to start, comment ‘ELEGANT’ and we’ll send you all the tools you need to get this look with confidence!
We’re so obsessed with this style—timeless, layered, and full of charm-but it can feel overwhelming trying to actually pull it off without a designer by your side. That’s why we put together our Design Guides to help you go from inspiration to execution without the guesswork.
It’s perfect if you’ve got a big occasion coming up and want your home to feel put-together and beautiful, or if you’re just ready to stop pinning and finally start styling. We’re giving you the exact colors, pieces, and pro tips we use to get that romantic, storied look—no endless scrolling required.
Seriously, this is the shortcut we wish everyone had.
Drop “Elegant” below and let’s get you started with curating your home like a designer!
Some days I look around and still can’t believe this is our life. Not because it’s perfect or easy… but because it’s ours.
We started over when we didn’t mean to. Moved to a new place. Took a chance on a completely different rhythm. And slowly, we fell in love with this slower way of living. With the quiet. The space. The chance to build something that actually matters to us.
It’s wild how one unexpected change can unlock a version of your life you never even knew was possible.
Just a little reminder—there’s no “right” timeline. You’re allowed to begin again, to take the long way, to dream up something new.
This is your sign 🤍
Love the California Casual aesthetic?? We do too! But it’s easy to feel overwhelmed with all the options out there. 
To get everything you need to start designing your dream space, comment “STYLE” and we’ll send you a link to get started. (FYI you must be following prior to commenting or the link will not send.)
Your style is the foundation to creating a space that feels authentic and uniquely yours. It will guide EVERY design decision you make—from the colors you choose to the furniture, materials, and finishing touches.
Need help with what comes next? 
Comment below or share with a friend who needs this to get the BEST top designer tips and personally curated product lists in our Design Guide to get the look.