CLOUZ HOUZ DESIGN GUIDES - What’s your style?
TAKE THE QUIZ
Design

A Case for Painted Wood Floors

There’s something about a deadline that makes decisions happen.

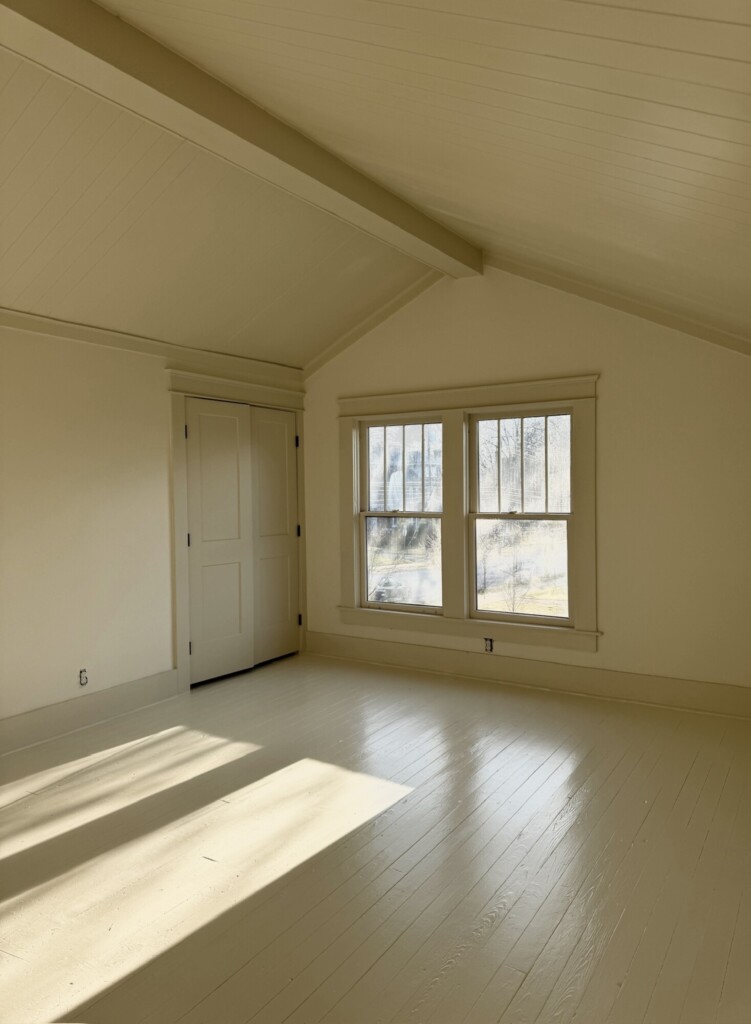
My parents are coming to visit in April, and suddenly these upstairs bedrooms that have been sitting in limbo feel… urgent. Not in a stressful way, but in that motivating, okay let’s finally finish this kind of way.

Empty upstairs bedroom with vaulted ceiling, light gray walls, white trim, and worn wood floors; double windows with greenery view and window AC unit; ceiling fan overhead; doorway leading to adjacent room with patterned curtains.
(Here is where the main guest bedroom started)

So here we are: painting the upstairs floors.

I know, I know. Everyone says: “Don’t paint wood floors.”

And I get it — in theory, I agree. We actually made it a priority to refinish all of the downstairs floors, and I’m so glad we did. But upstairs? It’s a different story. These floors have been through it. Years of wear, plus months of renovation traffic, tools, dust, dropped materials… they were not in great shape when we bought the house. I And while we could have refinished them, I didn’t feel like that was the best use of time or budget at this point.

So instead of forcing something that wasn’t working, I decided to lean into something different.

Narrow hallway with painted white wood floors, paneled walls, and a large window at the end; antique wooden dresser styled simply beneath soft natural light.
Photo: Pinterest

The Case for Painted Floors

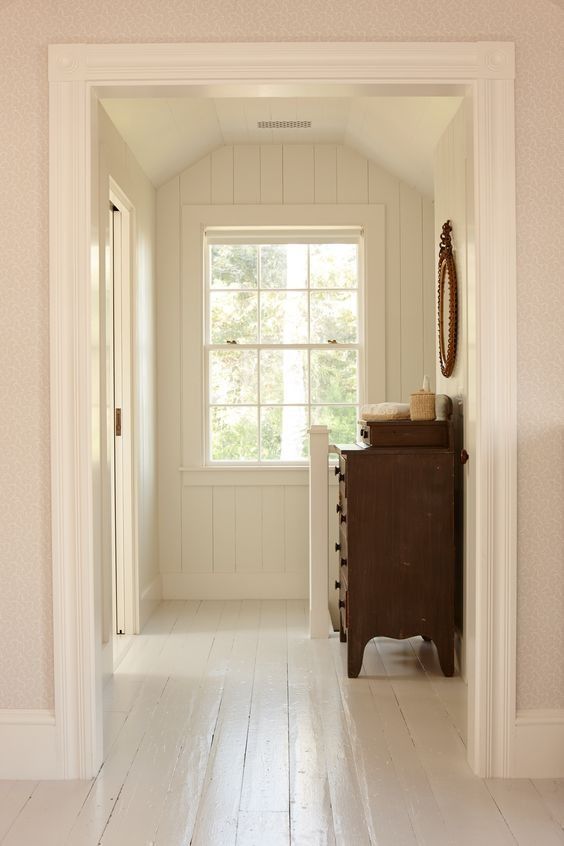
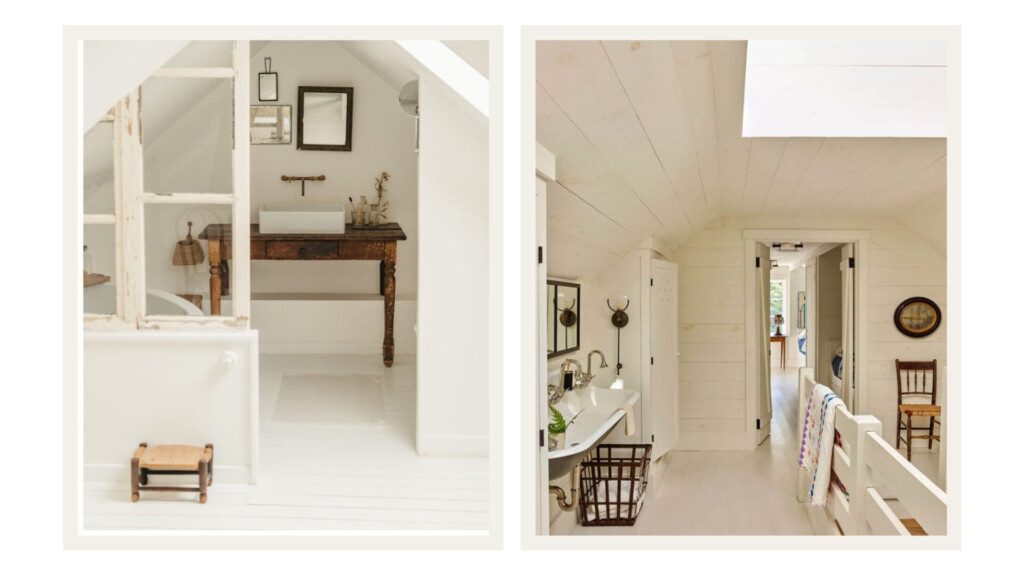
I’ve always loved painted floors.There’s something about them that feels:

  • light and airy
  • a little nostalgic
  • slightly coastal, but imo slightly southern too (in the best way)

I have been a long time admirer for William McClure’s art and interiors. If you don’t know his work- check out his instagram here. I’m obsessed with every space he touches and he is kind of known for painted white floors, so I guess you could say I have been dreaming of a way to incorporate them from the beginning.  I actually think that softness works really well layered with the rest of what we’re doing.

Think jute rugs layered on top, warm wood tones brought back in through furniture, and a mix of antique and new. It keeps the space from feeling too precious. A little more relaxed. A little more lived-in.
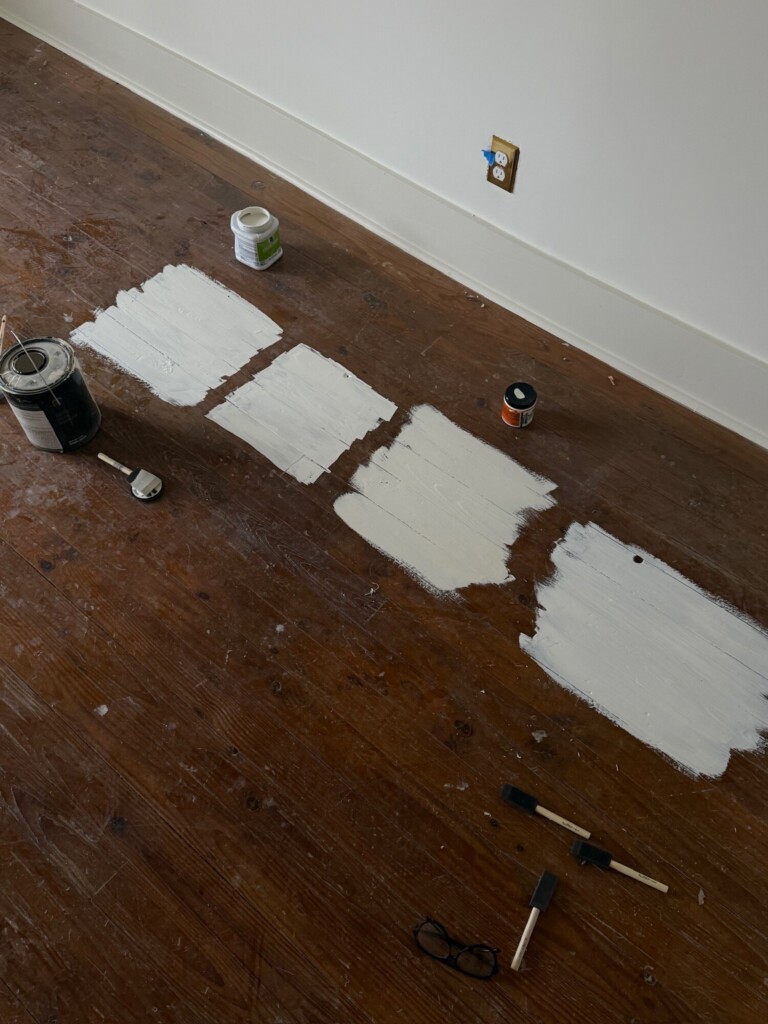
Light-filled cottage bathroom with painted white wood floors, vintage wooden vanity, vessel sink, and layered antique mirrors; adjacent hallway with shiplap walls, open railing, and soft neutral tones.
Photos: Pinterest

The Color Decision

We’re painting the floors Benjamin Moore Swiss Coffee.

This has been one of my go-to colors for years, and for good reason. It’s that perfect balance of warm, creamy, and bright.

Bedroom with painted white wood floors, paneled walls, and a large window at the end

For context:

  • Walls: Alabaster
  • Trim + windows: Shoji White

I went back and forth on whether to do the floors in Shoji White as well, but ultimately decided against it. Everything would have blended together a little too much.

I wanted just enough contrast so the space still has dimension and depth, without anything feeling harsh. Swiss Coffee felt like the right middle ground.

Close-up of wood floor with multiple white paint samples, paint cans, brushes, and tools laid out, showing the process of selecting the right floor color.
Paint colors from left to right: Swiss Coffee, Shoji White, Oyster White, Simply White

A Few Things We’re Learning (If You’re Considering Painted Floors)

This is one of those projects that seems simple… until you’re in it.

A few things already top of mind:

Prep matters more than anything
You can’t shortcut this. Cleaning, sanding, and properly priming the floors is what determines how well this will hold up.

Use the right paint
Not all paint is created equal here. You need something durable (we’re using a porch enamel) that can handle wear over time.

Expect character, not perfection
This isn’t going to look like factory-finished hardwood. And that’s kind of the point. Painted floors have a softness to them. In fact, I asked the painter to brush on the last coat so we could see brushstrokes- I very much wanted it to look imperfect.

Plan for rugs
Especially in high-traffic areas. I’m already designing these rooms knowing where rugs will live, both for comfort and longevity.

The Vision (and Where We’re Headed)

I’ve been pulling together a vision for these bedrooms, and it’s starting to come together.

(This is the look I’m working on for the first guest bedroom)

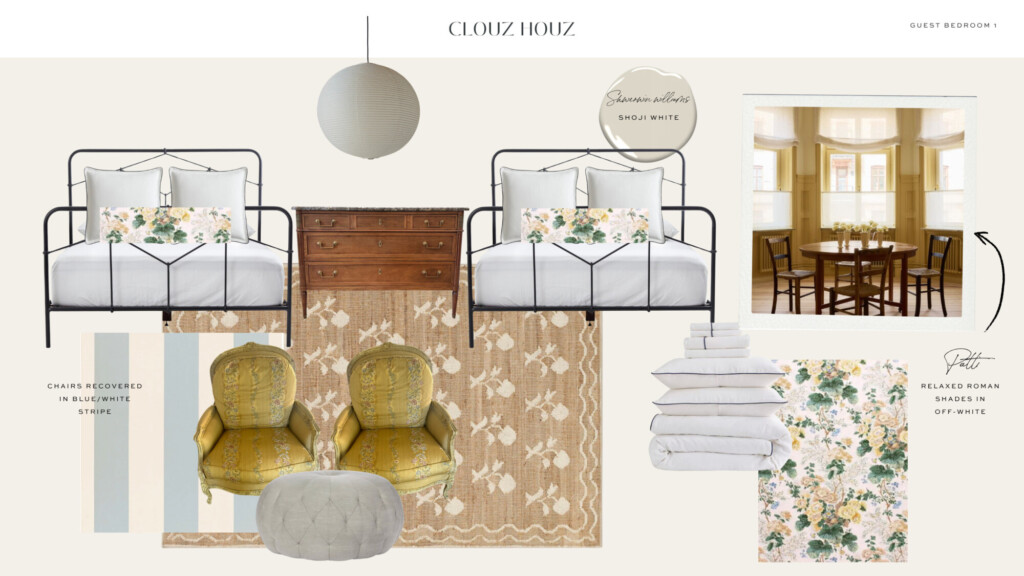
We’ve already ordered:

  • the beds
  • the paper globes (which I’m obsessing over)
  • and the rugs (which I’m very excited about)

I’m currently on the hunt for either:

  • antique nightstands
  • or a long dresser to anchor one of the rooms

Something with a little age and warmth to balance out the painted floors.

Person kneeling on worn wood floors testing paint samples; small swatches of creamy white tones applied as natural light fills the room.

Stay Tuned

We still have a bit to go, but getting the floors done feels like a big turning point.

I’ll be sharing more as things come together — including how the paint holds up, where we land on furniture, and (hopefully) a finished reveal soon.

Just in time for April.

Join the Conversation

get inspired
#clouzhouz
follow along
@clouz_houz
What started as a “simple” fireplace update quickly turned into one of those classic renovation plot twists.😅 
Here’s how it actually unfolded:
1. Planned to install tile over the existing fireplace tile — that was the original vision.
2. Began demo and discovered some serious structural damage to chimney. Immediate pivot.
3. Tore in further and uncovered the original brick hiding underneath.
4. Brought in the mason to re-mortar and clean everything up.
5. The brick went from dusty and rustic to bright red and very classic — and yes... I freaked out a little.
6. Lived with it for a bit to see if I could make peace with the new look.
7. Ultimately we applied a watered down lime grout (what was used by mason) to give it that old-world imperfect feel again.
8. Polished/stained the original stone hearth to refresh it without replacing it.
9. Stripped down the fussy details from the wood mantle and surround.
10. Painted the mantle and reinstalled it — and finally, it all felt right.
Renovations rarely go exactly as planned, but sometimes uncovering what’s underneath leads to something better than you imagined in the first place.
Omg this kitchen is so close I can feel it😭
The brick floors are in, the character is there, and the countdown to actually cooking in here (aka retiring the air fryer + constant takeout era) is officially on.
This one detail alone is making everything feel real and lived-in already... And I can’t wait to see it all come together.
If you’re into kitchens with soul + old-house energy, save this for later!
I’ve been getting a lot of questions about how I run my business… so whether you are a prospective client or a new designer here’s something I wanted to share…
After 15+ years, I can tell you this: running a design studio is about so much more than creating something beautiful.
Most days, it feels like 80% of my job is understanding people—how they live, what they need, what matters to them and only 20% is the actual design. And honestly, that might surprise you.
A lot of how I operate comes from my early career as an Executive Assistant at Nike, where I learned the value of being organized, anticipate needs, and keep everything running smoothly behind the scenes. That foundation shapes everything we do.
Because in the end, it’s not just about pretty homes… it’s about creating spaces that truly support the people living in them. And the process in getting there can completely change the entire experience. 
So if you are questioning if you have what it takes to do this, or maybe you are considering working with us- know this: if you think designers are just “creatives” you are wrong- it’s also all the unsexy stuff - the process in which we create a beautiful space.
If you want your home to feel more custom, look up.
One pet peeve is when electricians “swiss cheese” your ceiling with a bunch of recessed can lights. By strategically placing them you can get a beautiful and seamless look. Standard recessed lights have a visible trim that creates a subtle shadow line on the ceiling.
These 3” mud-in recessed lights are installed and finished directly into the drywall, so there’s no trim, no harsh edge, no visual interruption. Seamless.
A subtle ceiling detail I have never done before but I’m soooo glad we did!
It’s quieter. Cleaner. More intentional.
Save this and bring it up early in your planning phase. This is a detail WORTH considering! Also, If you want the exact lights we used comment ‘ME’ and we will DM you the link.