Why I Keep Coming Back to Tongue and Groove
There are certain design details I find myself returning to again and again—and tongue and groove paneling is one of them. I’d even go so far as to say it’s part of our Clouz Houz signature style. It’s subtle but impactful, timeless but not overdone, and it adds that little bit of texture and soul that makes a space feel lived in. I choose it over drywall every time!
We use it often across client projects—on walls, ceilings, cabinetry backings– it gives the room a layer of quiet charm that just works. Whether the home is modern, classic, rustic, or something in between, tongue and groove has a way of fitting in and grounding a space without shouting for attention.

Let’s Break It All Down
If you’ve ever come across the terms tongue and groove, shiplap, or nickel gap while scrolling Pinterest or browsing for wall paneling—and have no idea what the difference is—you’re not alone. I get asked about this all the time by clients.
That’s why I wanted to break it all down clearly in this post:
- What is tongue and groove?
- How is it different from shiplap or or some refer to as “nickel gap”?
- Where can it be used?
- What should you think about before installing it?
This guide is meant to be approachable and easy to follow—whether you’re planning a remodel, dreaming up future projects, or just want to better understand the details you love.
Let’s get into it.
What Is Tongue and Groove Paneling?
Starting with the basics: tongue and groove is a type of paneling where each board is milled with a tongue (a raised edge) on one side and a groove (a recessed slot) on the other. When installed, the tongue of one board slides into the groove of the next, locking them together and creating a snug, seamless joint.
Visually, it creates a subtle “V” where the boards meet—hence why it’s sometimes called V-groove paneling. It’s not dramatic or overly defined. Instead, it gives the wall or ceiling a soft, rhythmic texture that feels timeless, especially when painted or stained.
If that still feels confusing, think of it this way: It’s kind of like puzzle pieces fitting together—much but prettier.
Tongue and groove boards can be installed horizontally, vertically, or even on ceilings (which are perfect for adding quiet character to a room without taking up floor space). It’s a design choice that feels architectural and warm all at once.
Why We Love It (And Use It Often)
I come back to tongue and groove in so many projects because it adds instant texture and just the right amount of detail—without overpowering a space. It’s an especially great choice when we want a room to feel polished but still a little casual and lived-in.
Whether we’re designing a hallway, a powder room, a mudroom, or a primary bedroom ceiling, tongue and groove paneling has a way of bringing in that classic, collected look we aim for. It pairs beautifully with other materials like stone, plaster, or aged wood, and it wears well over time.
I’ll go into where and how we use it a little later in this post—but first, it’s important to talk about what it’s not.
How Is Tongue and Groove Different from Shiplap?
These three styles often get grouped together, but they each have their own distinct look and function. Here’s how I explain it to clients:
- Tongue & Groove: Each board clicks into the next, creating a subtle v-shaped groove. The join is tight, clean, and slightly old-school in the best way.
- Classic, cottagey, quietly architectural.
- Shiplap aka “Nickel Gap:” The boards overlap at the edges, creating a visible gap or reveal. It’s flatter than tongue and groove and feels a little more casual. See our project here where we used shiplap throughout this Broken Top home.
- More coastal, modern farmhouse, beachy bungalow vibes.
I always say: “If shiplap is your easygoing coastal cousin, tongue and groove is the charming, quiet old soul of the family.”
Where We Like to Use Tongue and Groove
One of the reasons I consider tongue and groove such a go-to design detail is because it works in so many places. Whether we’re designing a full remodel or just refreshing one corner of a home, it adds depth and texture without being fussy.
Here are a few of the areas we often use it for clients
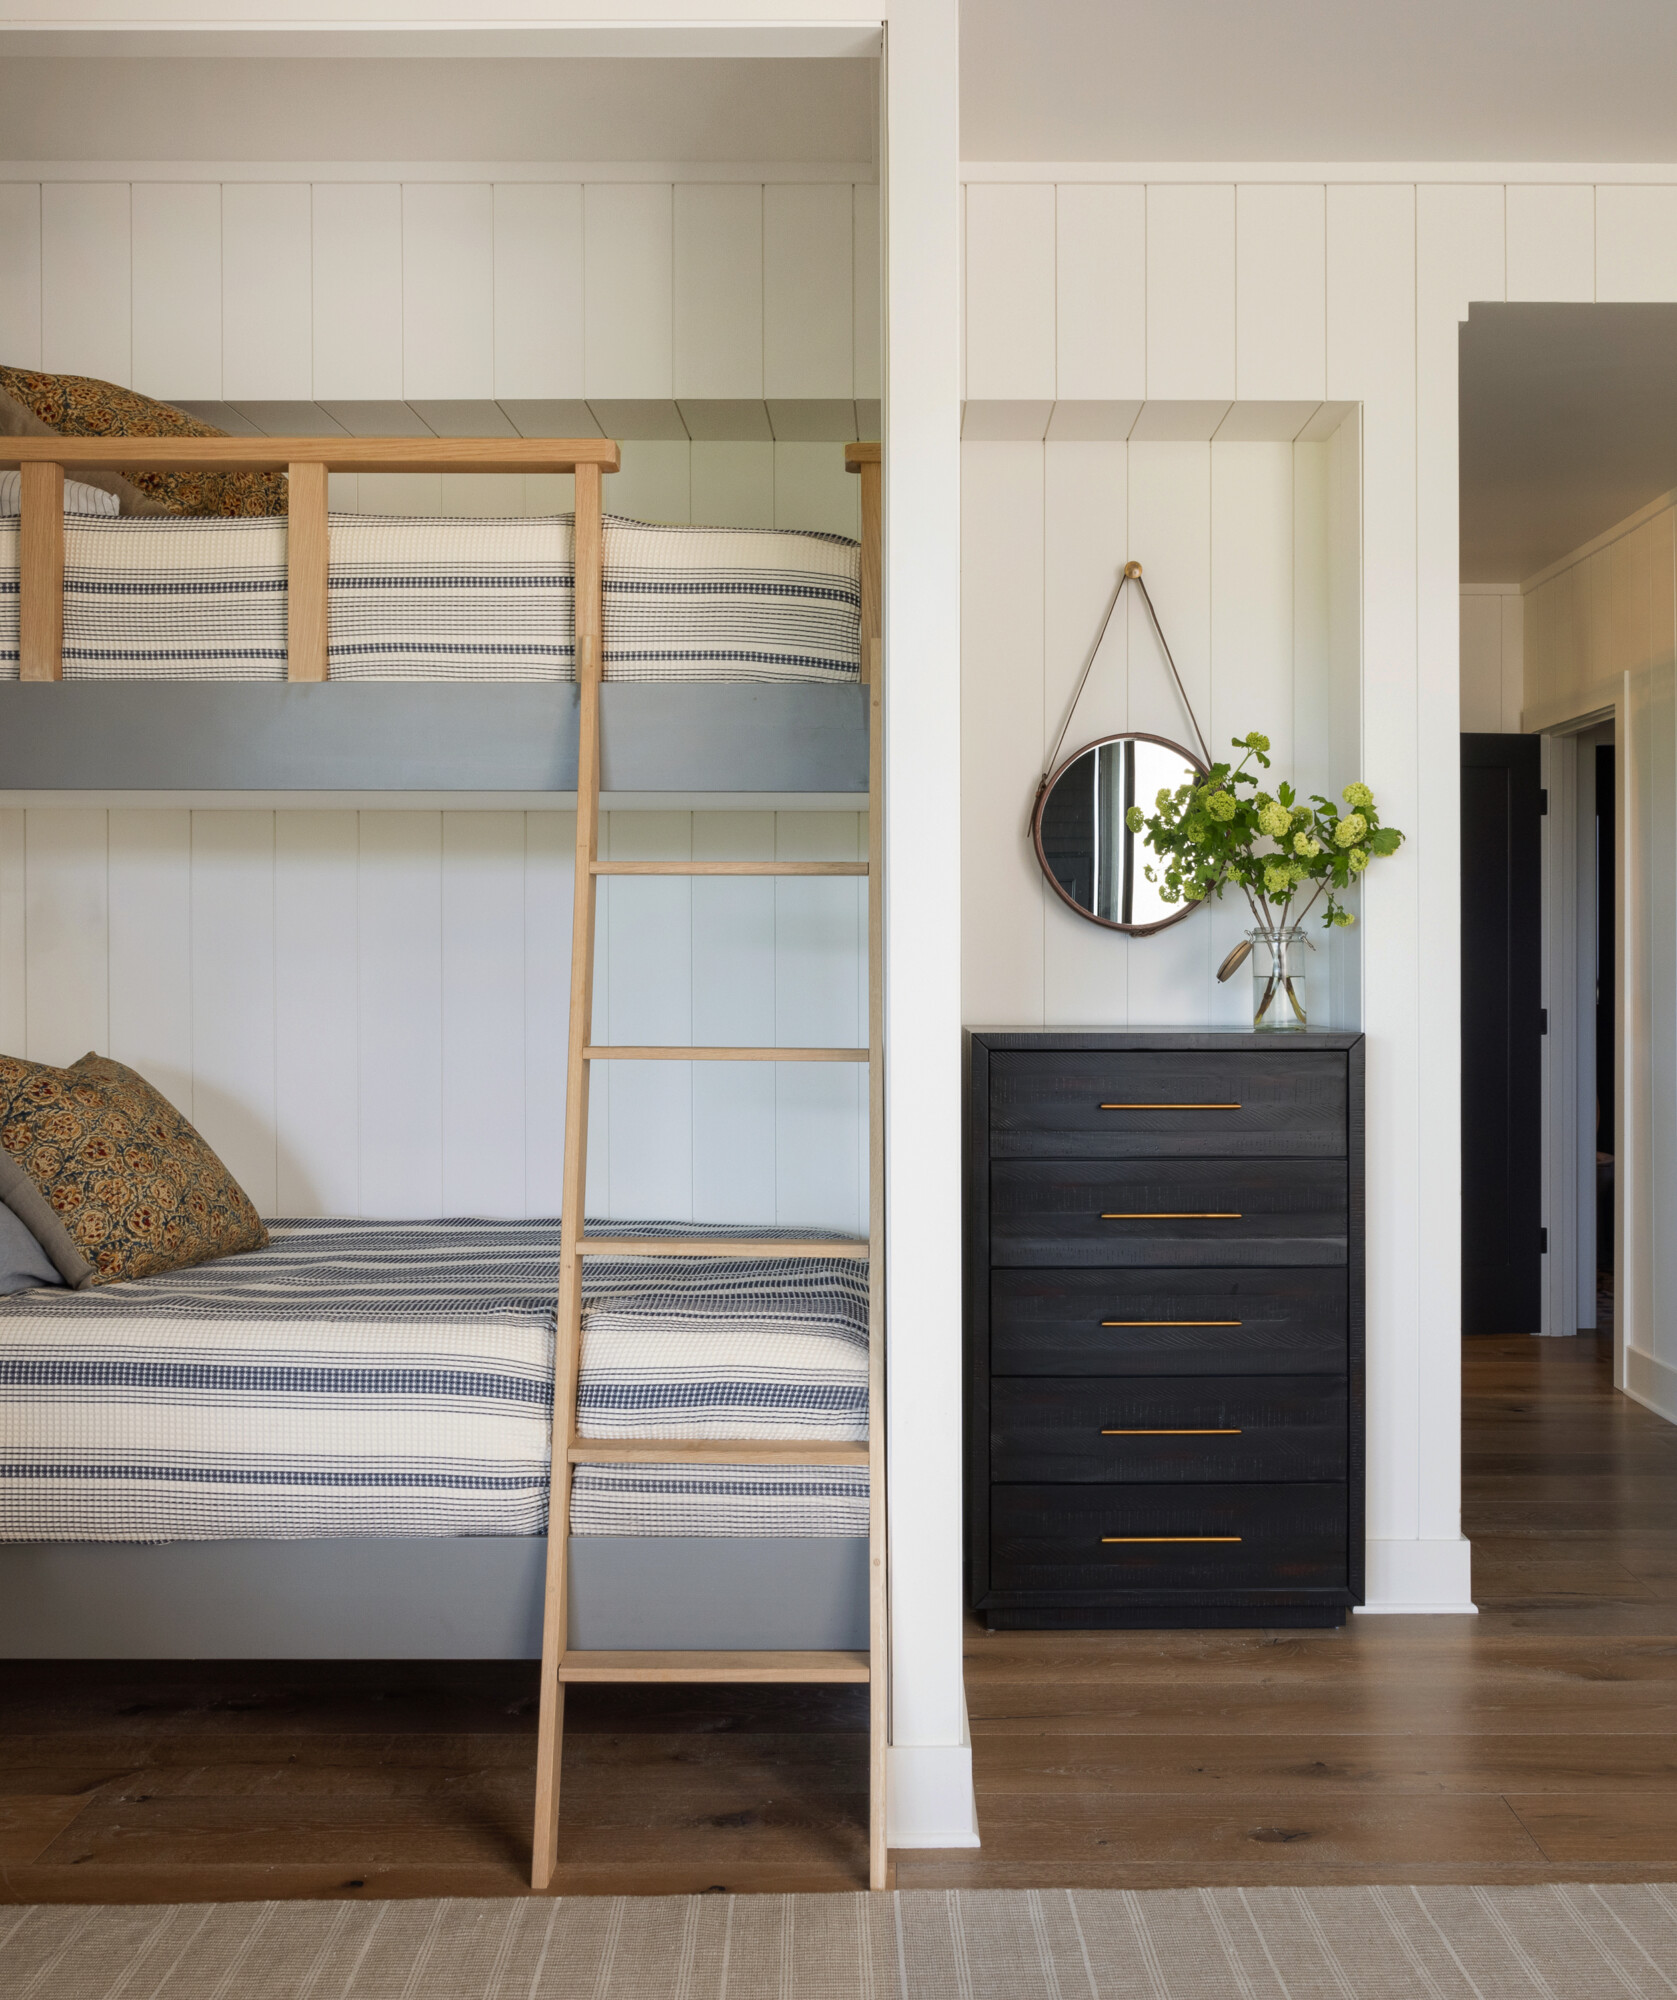
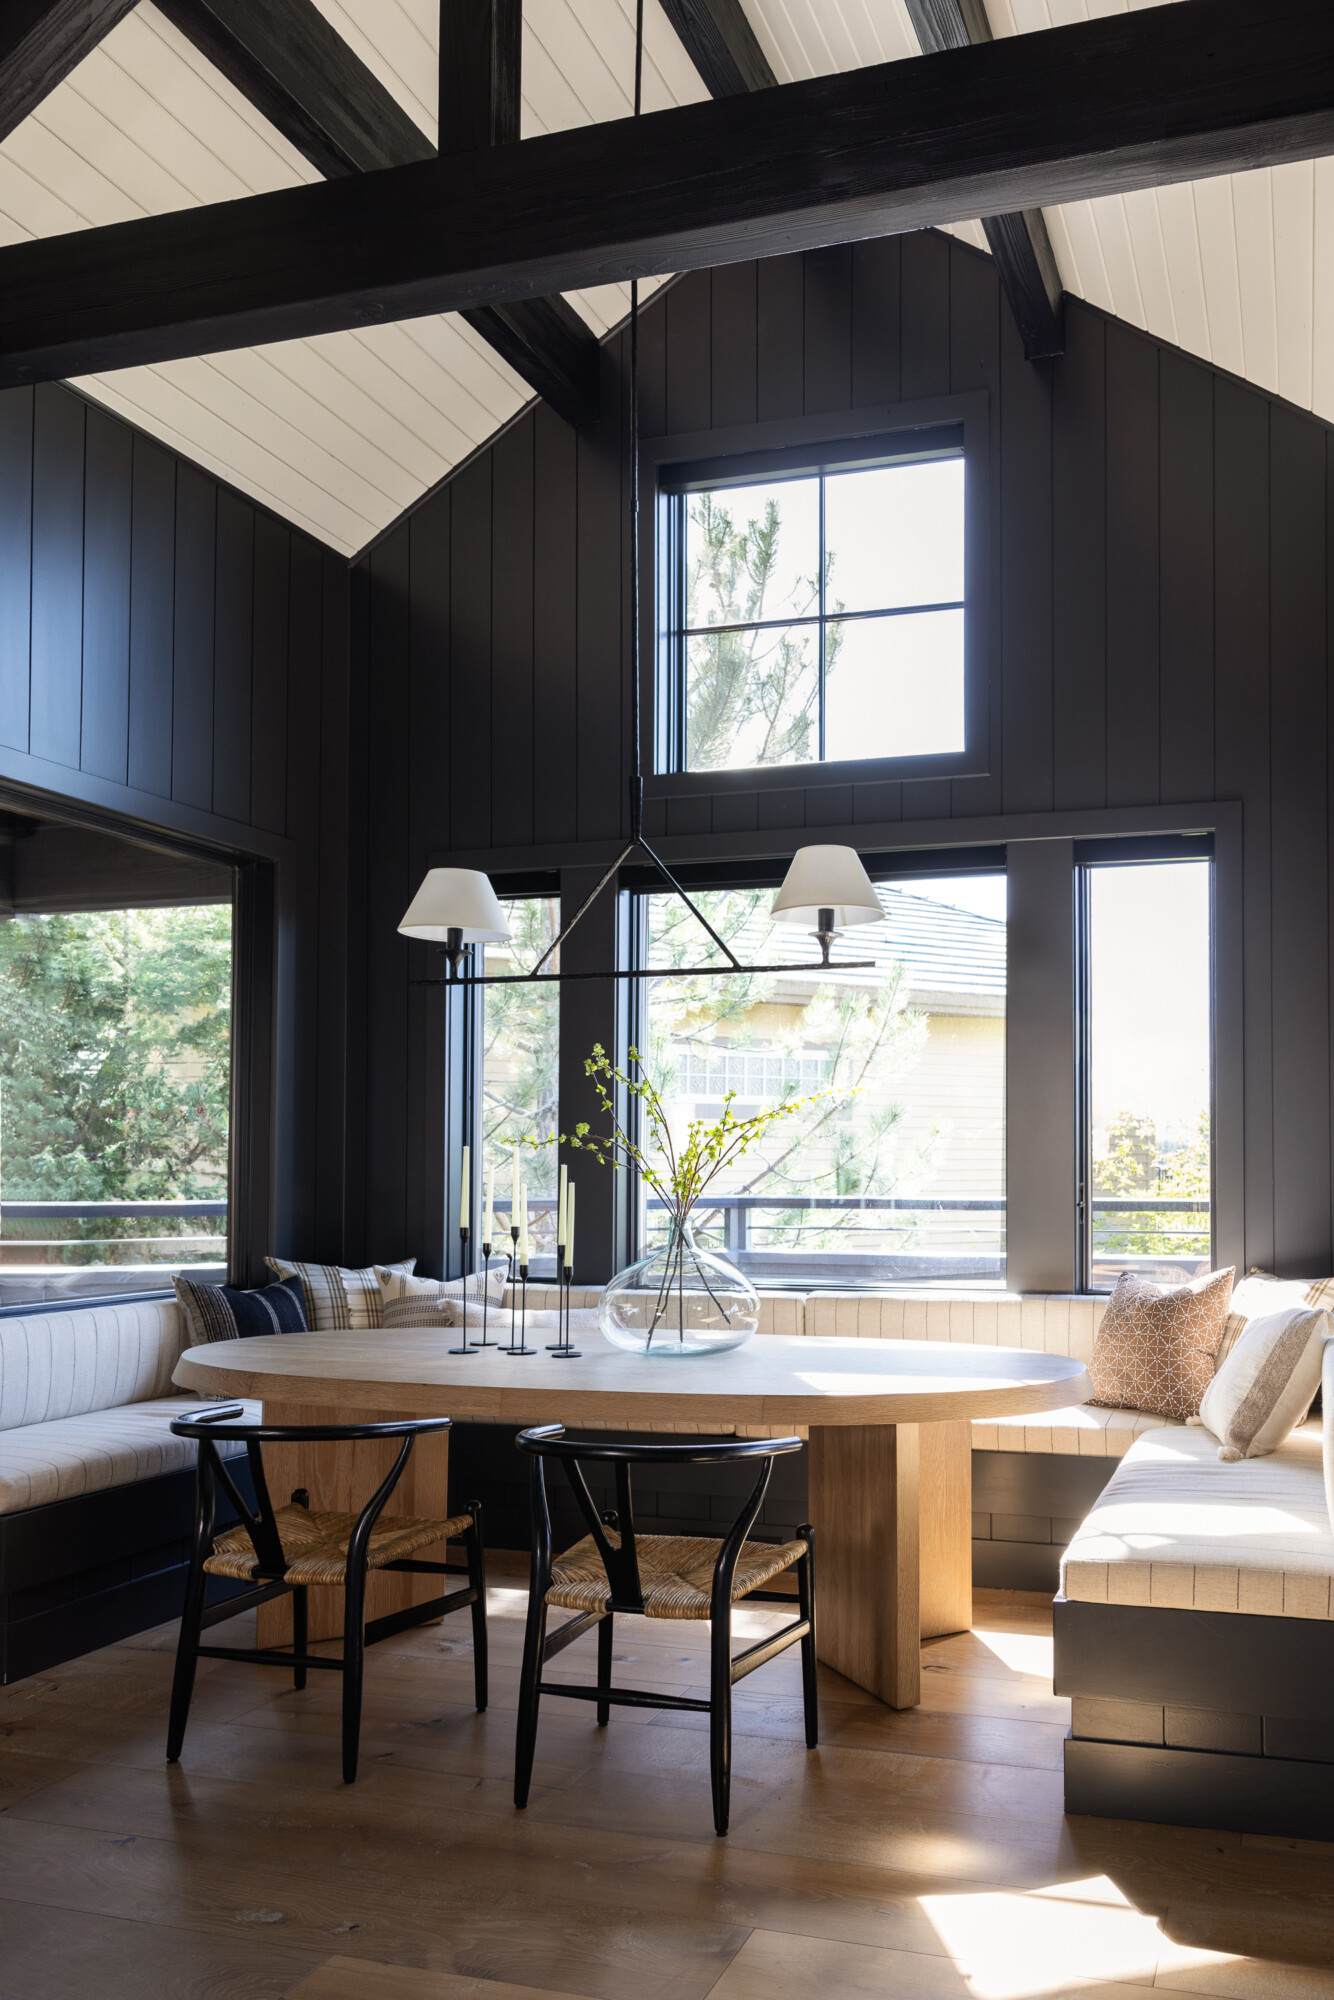
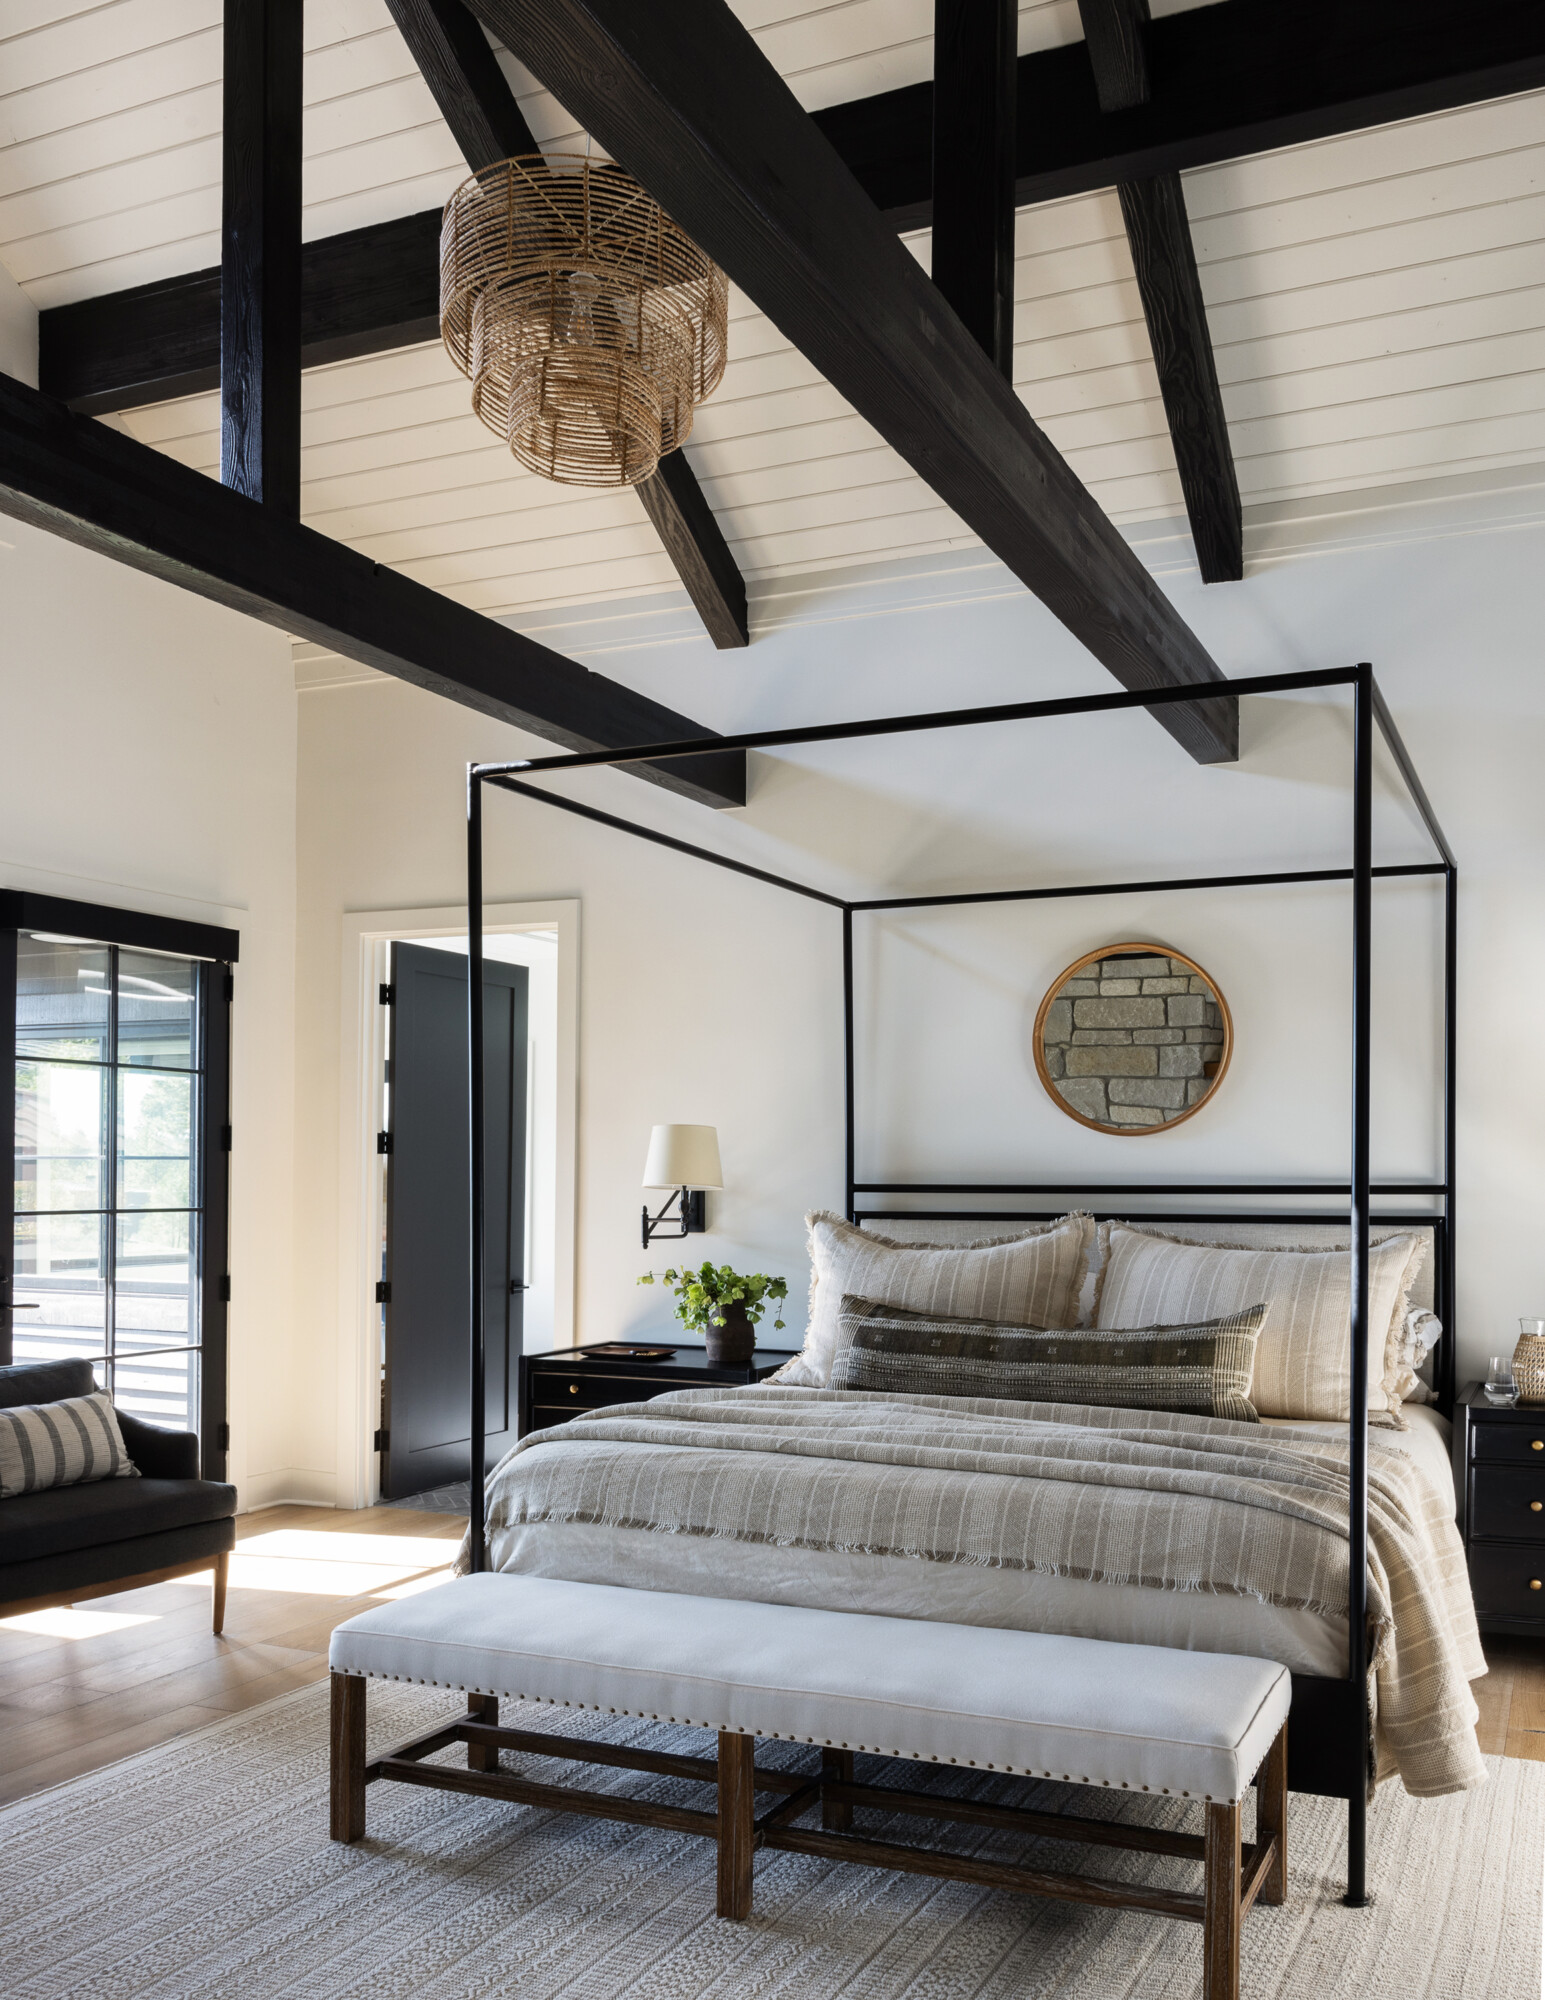
Ceilings: If you’ve ever walked into a room and thought, “Wow, this feels cozy but elevated,” there’s a good chance the ceiling had something to do with it. Tongue and groove on the ceiling is one of our favorite tricks for adding warmth, especially in spaces with higher ceilings that need a little grounding.
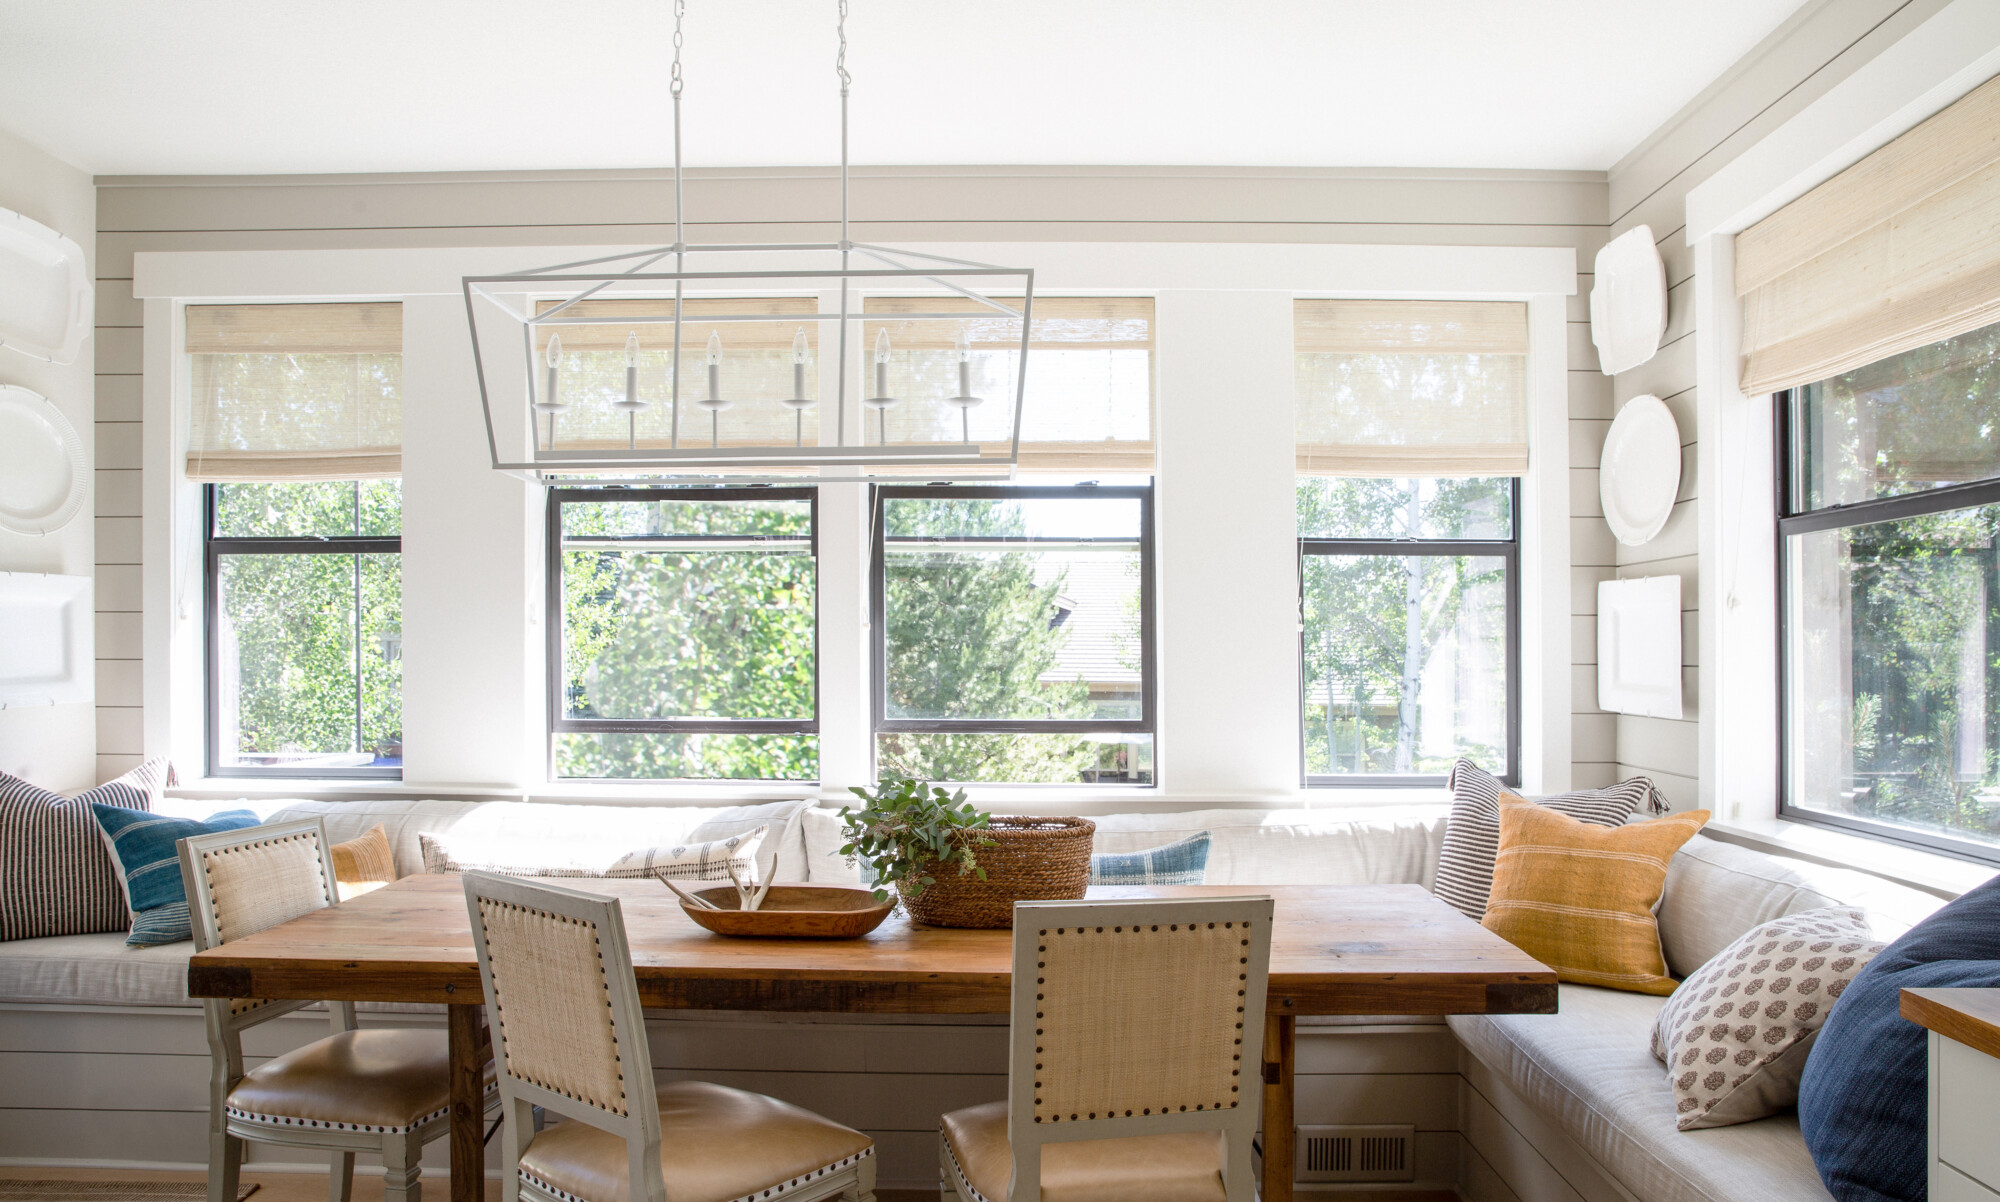
Accent Walls: Whether behind a bed, in a dining nook, or lining a hallway, tongue and groove brings just enough interest to a wall without competing with art or furniture. It’s one of the easiest ways to make a space feel like it has something to say
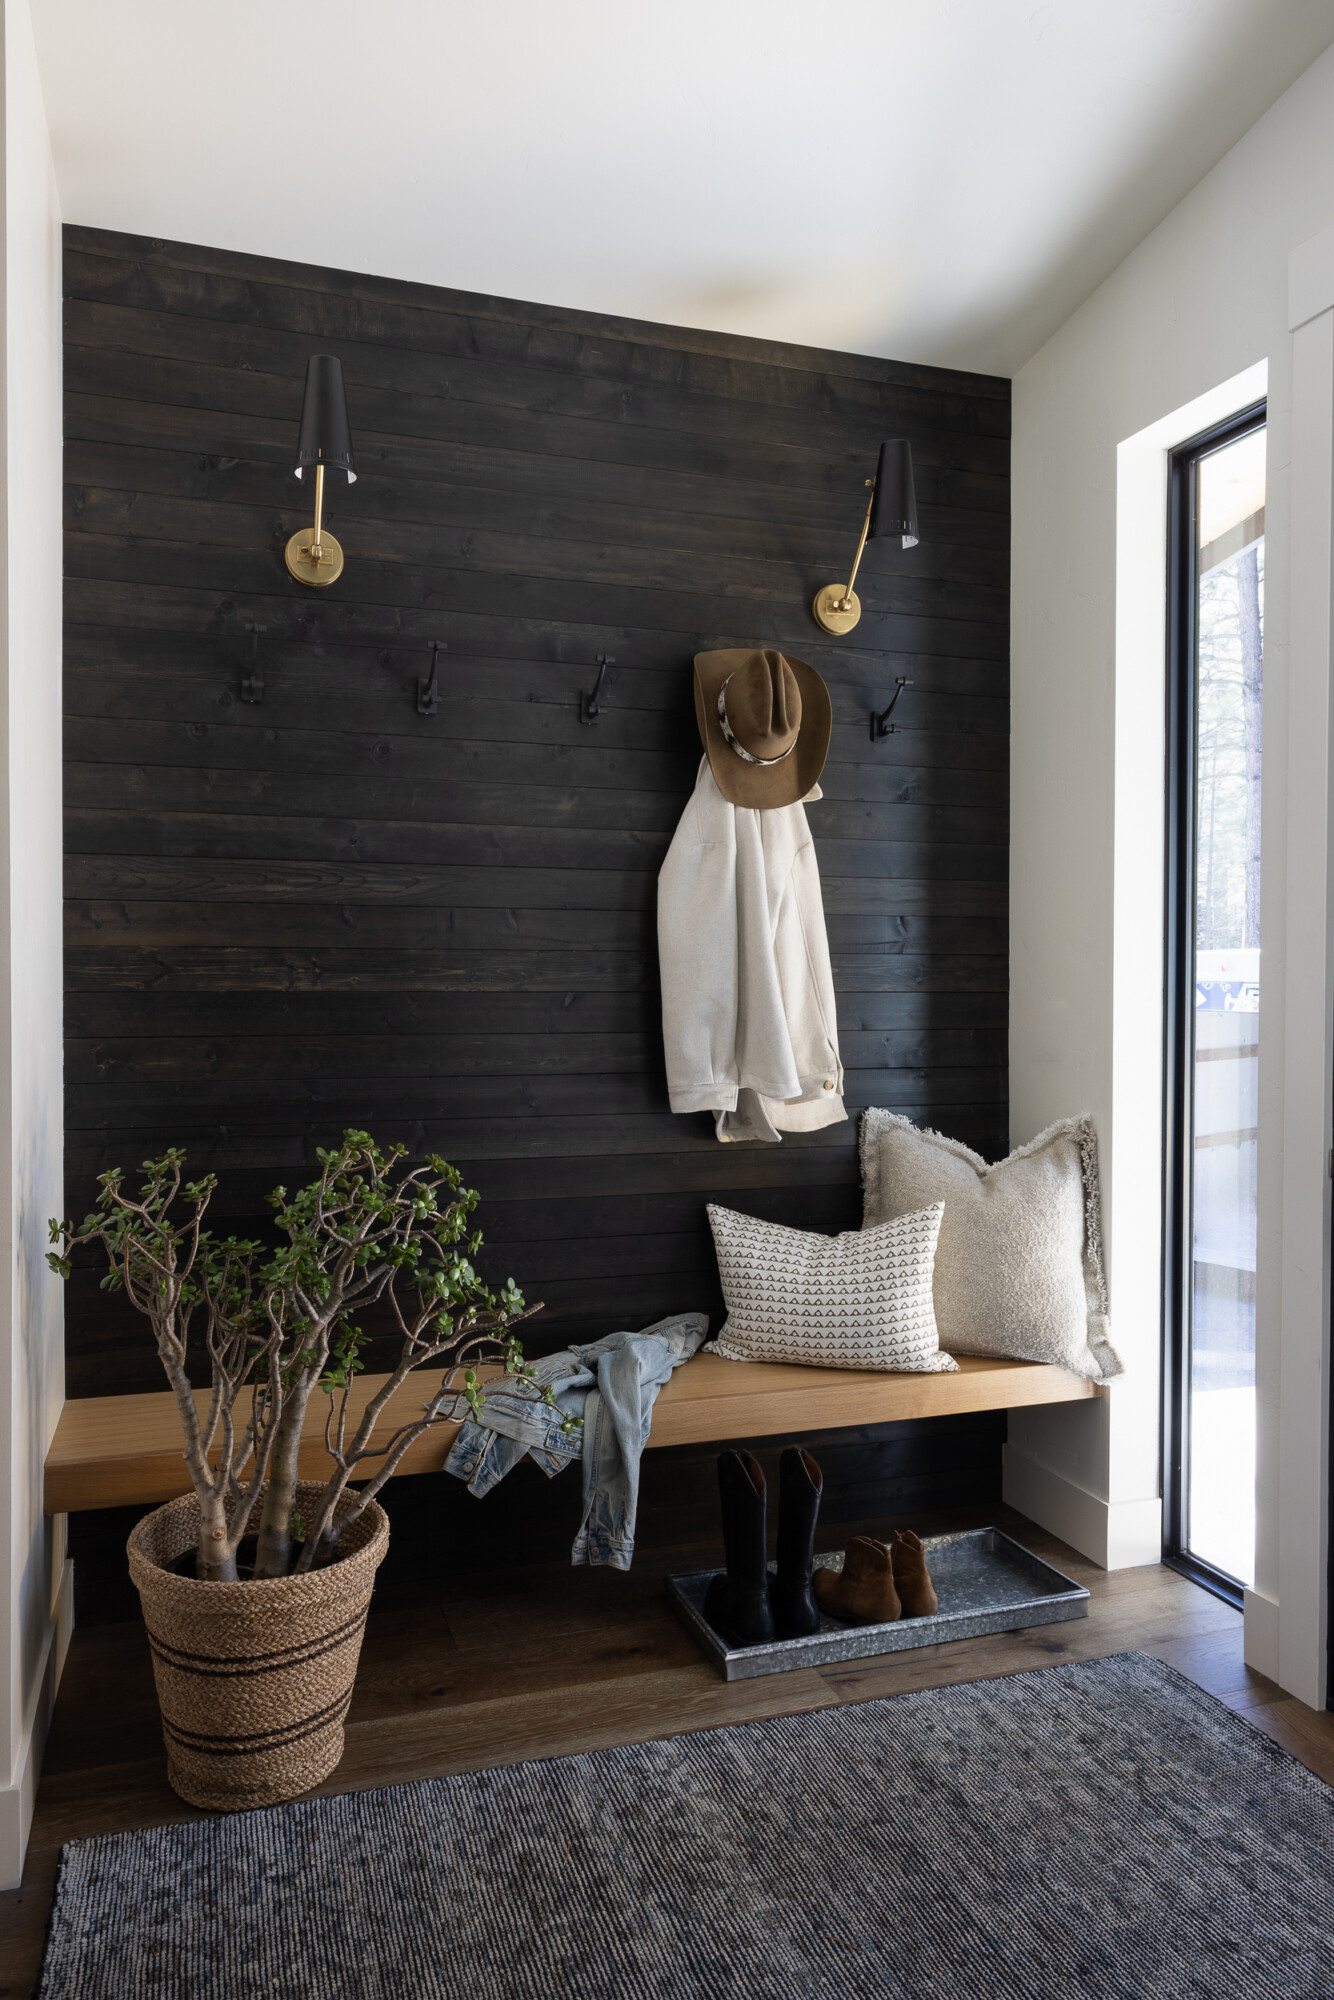
Entryways & Mudrooms: These spaces are naturally high-traffic, but that doesn’t mean they can’t be beautiful. Paneling adds texture, charm, and a sense of formality that makes even a small mudroom feel elevated. Plus, it’s especially useful in areas clients need durability. Think kids and pets coming and going through mudroom. It’s more forgiving than plain drywall
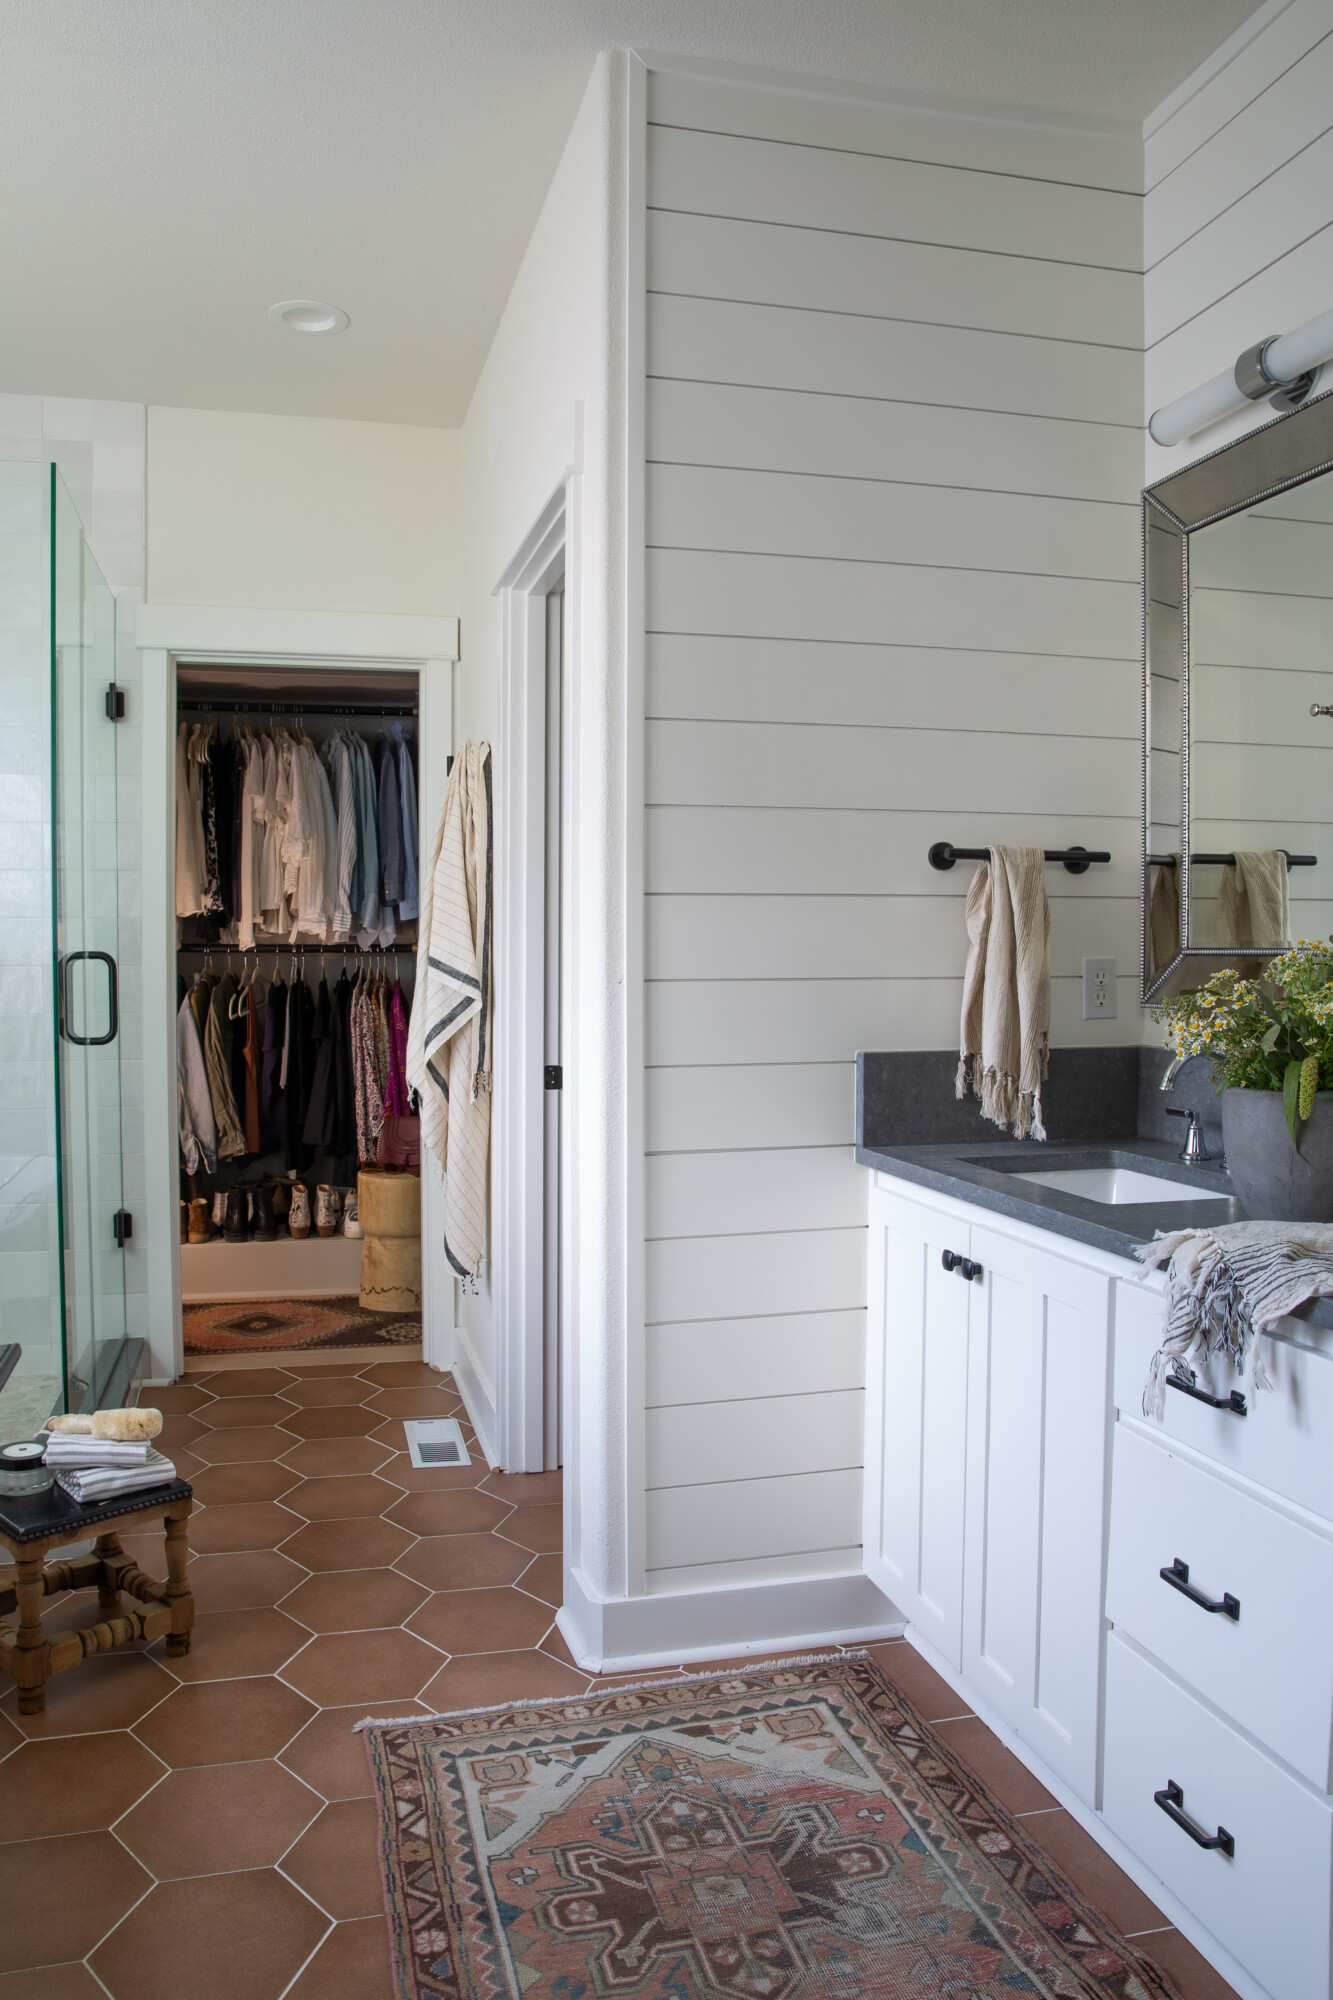
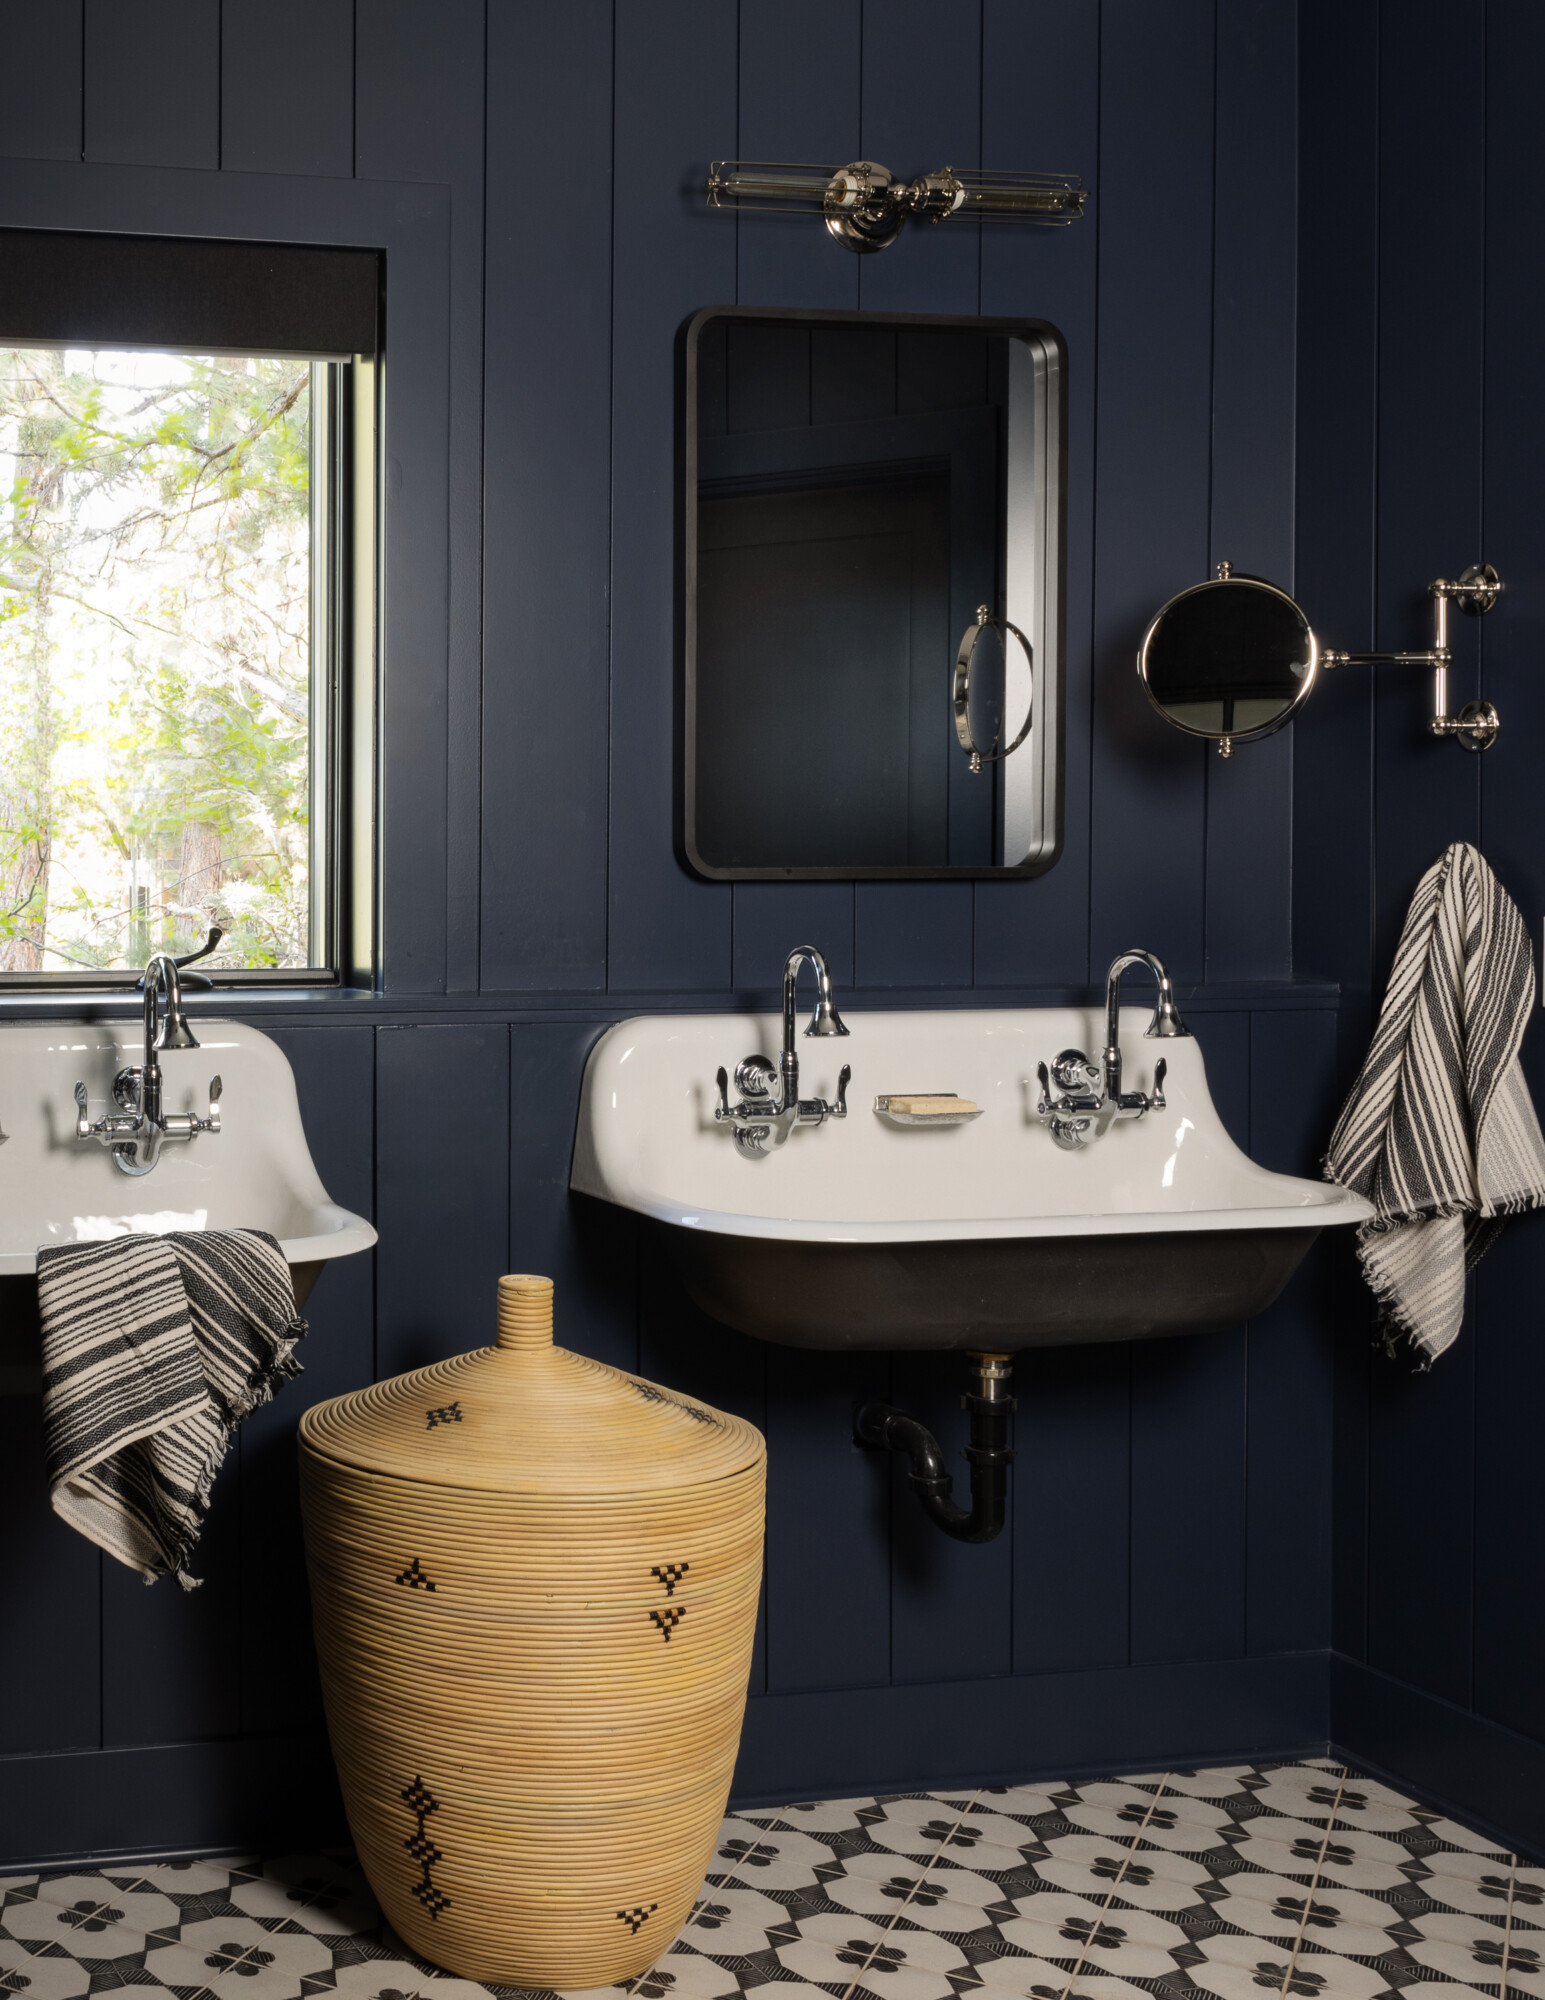
Bathrooms & Powder Rooms: Used halfway up the wall or all the way to the ceiling, it’s a great alternative to tile in drier zones such as a powder room. Painted dark it can create a mood but still keeping things classic.
Things to Consider Before You Install
Before adding tongue and groove paneling, there are a few key decisions to make. We walk our clients through each one to make sure it fits their lifestyle and their space.
Orientation: Vertical or Horizontal?
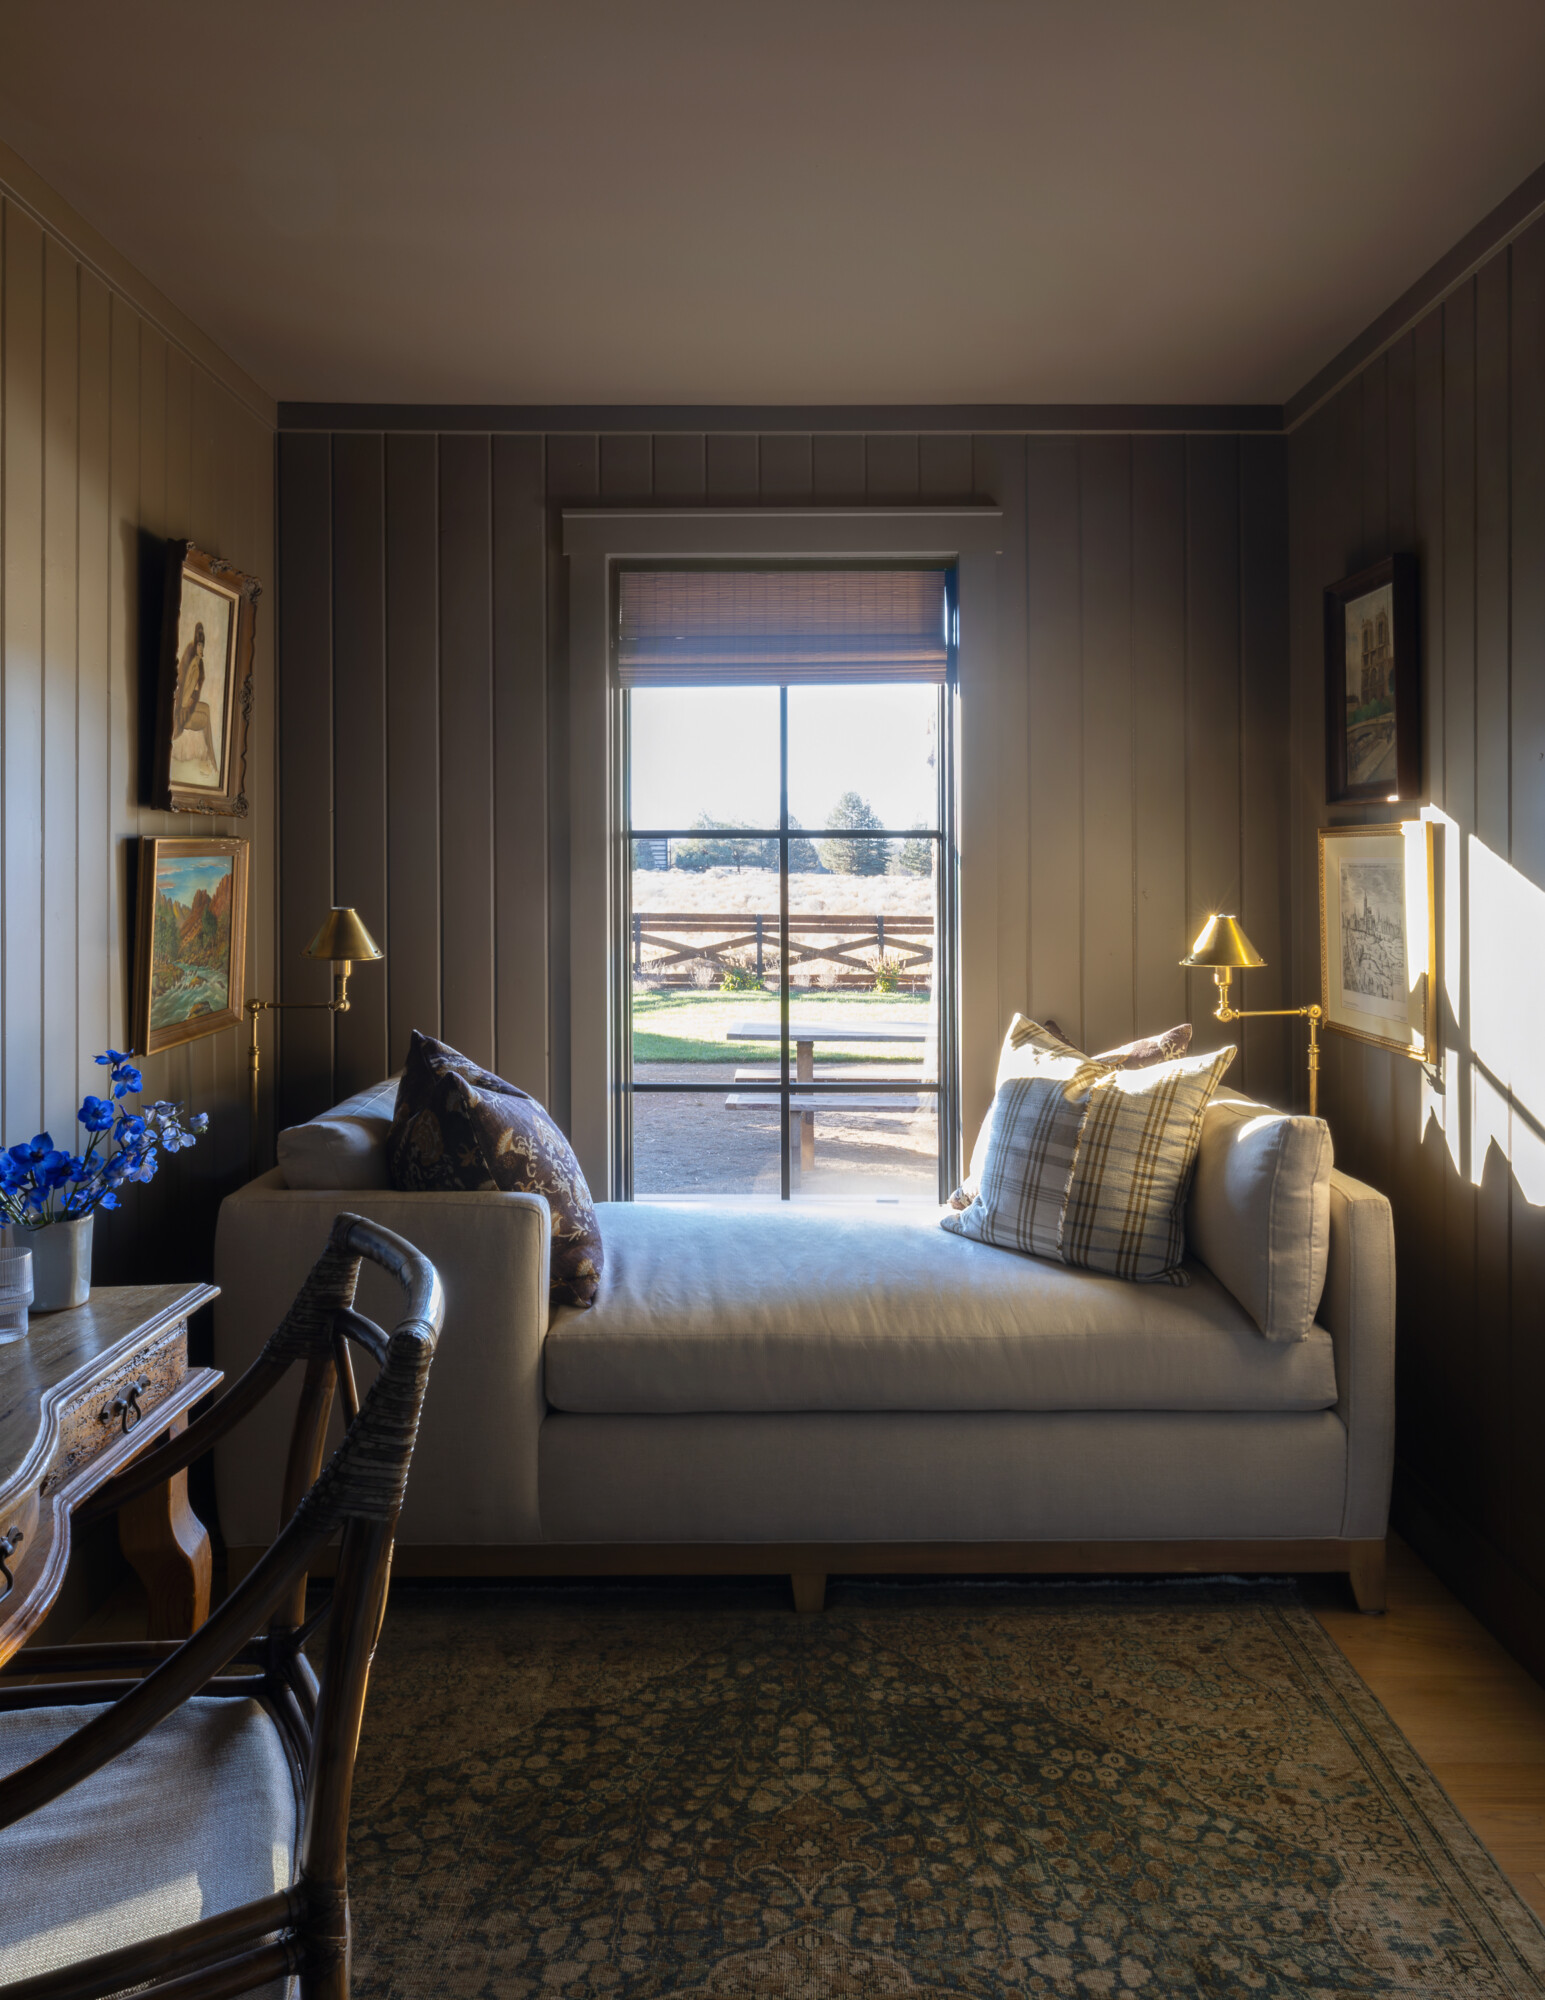
- Vertical boards feel a bit more traditional and can make a space feel taller.
- Horizontal boards are more relaxed and can visually widen a narrow room. This orientation is great for a California Casual and coastal vibe.
We’ve done both, depending on the overall mood we’re creating. Vertical feels great in formal spaces, while horizontal brings more of that unfussy, easy-living energy.
Board Width
- Narrower boards (about 3-4”) lean more old-world and classic.
- Wider boards (6”+) feel more modern or rustic.
You can’t really go wrong, it just depends on the feel you’re after.
Painted or Natural Finish?
- Painted tongue and groove gives a crisp, clean look and works beautifully in traditional homes.
- Natural or stained wood brings in warmth and texture. We love this in mountain or ranch-style projects.
- Our tip: use a satin or semi-gloss finish for just the right amount of sheen (and wipeability!).
Material Type
You can find tongue and groove in real wood, MDF, or PVC. Each has its place:
- Wood = warm and authentic, but needs sealing.
- MDF = cost-effective and great for painted applications.
Why It Matters
We often think of it as background material, but the right background can completely change the atmosphere of a room. That’s why we lean on it so often in our client projects. It supports the story of the home, without overpowering it.
S,o whether you’re remodeling, building new, or just looking to make a room feel a little more finished, don’t overlook the walls and ceilings. Tongue and groove is one of those enduring details that ages well, feels intentional, and brings a soft structure to the spaces we linger in most. And around here, that’s always the goal.
Need a little more direction?

Are you struggling to define your style or figure out how to pull your space together? That’s exactly why we created our Clouz Houz Design Guides. They’ll help you design a space that feels cohesive, elevated, and personal … without hiring a designer.
Click here to explore the five curated styles, complete with inspiration boards, designer tips, and product links that make sourcing simple.
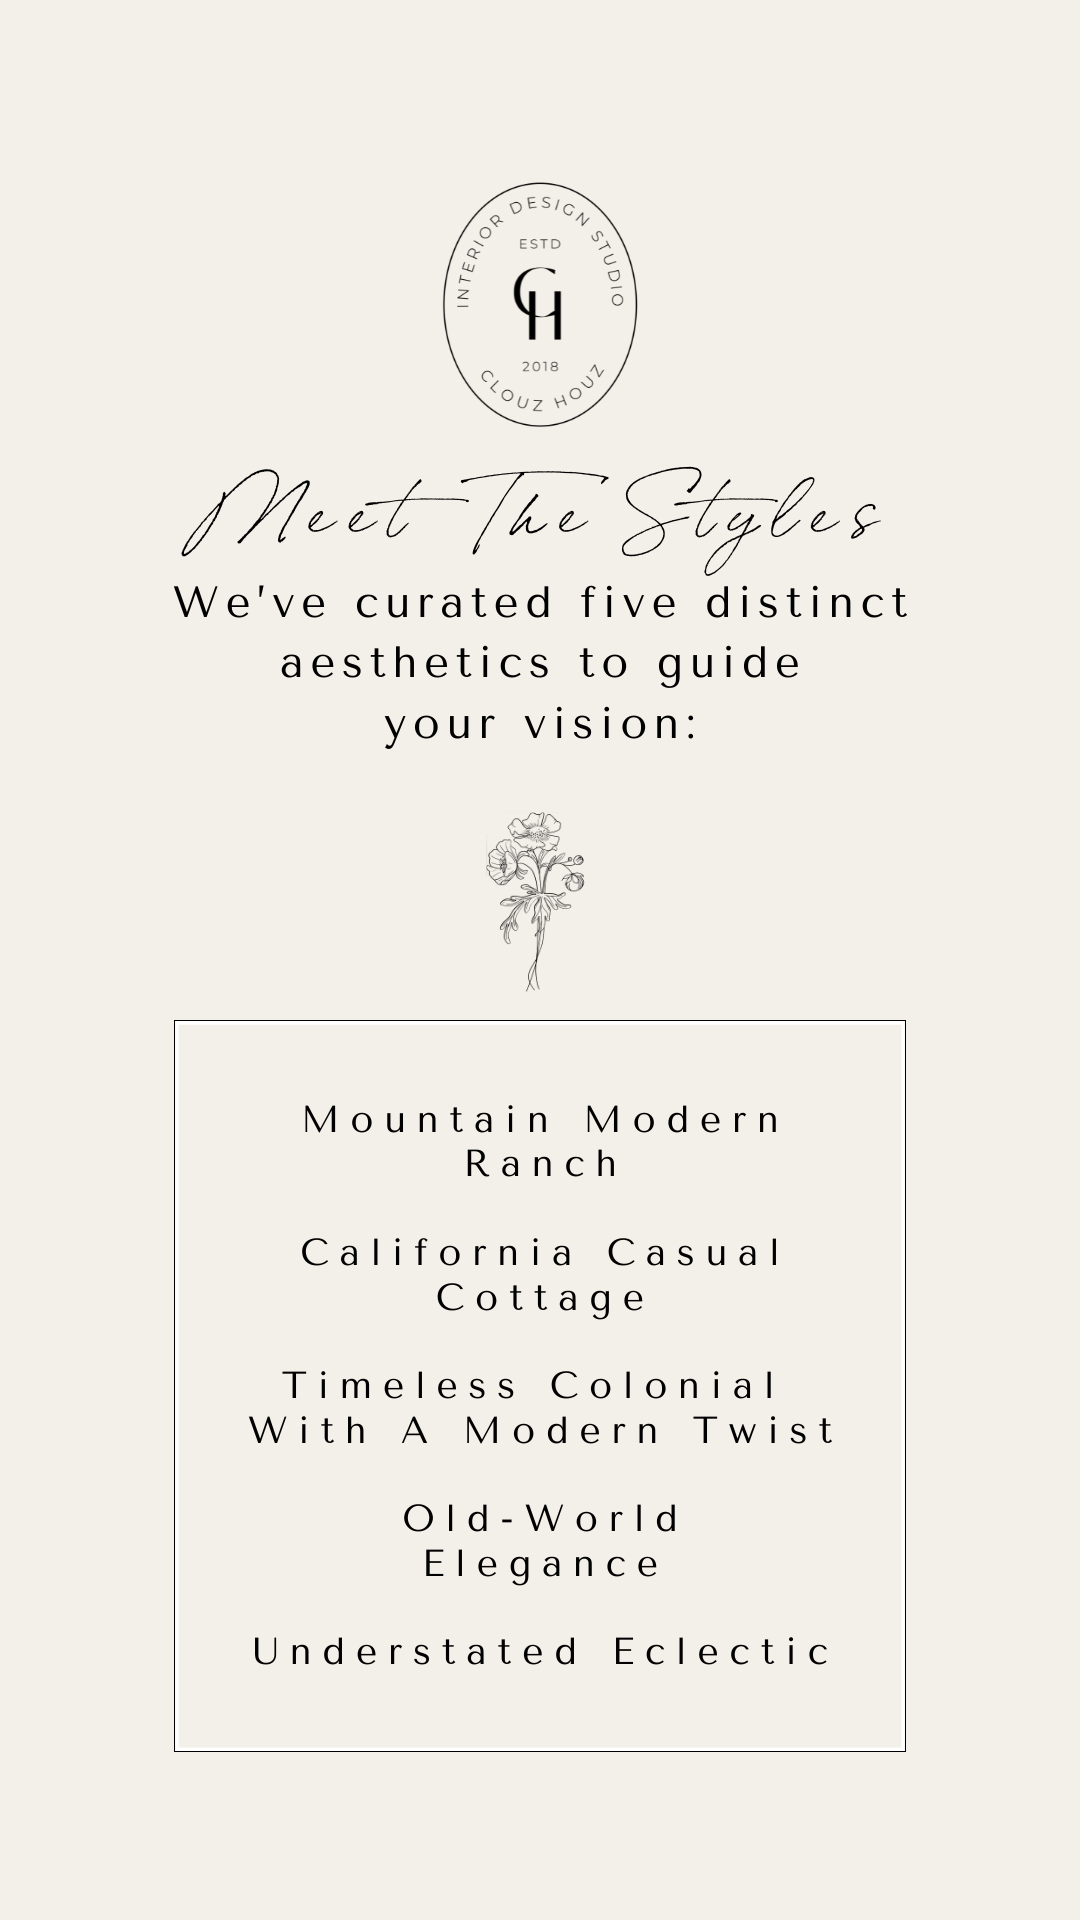
Not sure which one’s for you? Take our free quiz to discover which aesthetic best suits your space.
We’re here to help you move forward with confidence, and create a home that truly feels like yours.
P.S. Are you new to Clouz Houz? If you’d like to be in the know on all things home and lifestyle, subscribe now so you don’t miss a post! As a bonus, you’ll receive our exclusive 42-page ‘Paint Guide,’ which will help you select the perfect shades for your home. And, you’ll also receive our weekly newsletter, including special finds that are not on the blog — they’re only for subscribers. 
Life is short. Make it beautiful!

