There’s something undeniably charming—and practical—about a well-designed wet and/or dry bar. Whether it’s tucked into a hallway nook, built into a basement lounge, or integrated just off the kitchen, the right setup can elevate how a space functions and feels. And … it’s important to decide how you really plan to use the space. Sometimes a dry bar is totally sufficient (much easier to create) other times, a wet bar is more necessary. We’ve designed both for our clients, so before jumping into tile samples and faucet finishes, it’s important to understand the foundation of what makes a wet bar work.
First things first: what’s the difference between a wet bar and a dry bar?
A wet bar includes a sink and plumbing, which allows for easier drink prep and cleanup—especially when entertaining. A dry bar skips the sink, usually featuring just cabinetry, counter space, and storage. While both can be beautiful and useful, the key difference comes down to function and how you plan to use the space.
When should you consider a wet bar?
Think about where you tend to host: a cozy movie room, guest suite or even an outdoor living area. Wet bars are ideal for secondary spaces where quick access to drinks, snacks, or cleanup is helpful without needing a full kitchen setup. They’re also great for creating a moment of luxury in your home—like a coffee station in the morning or a cocktail spot in the evening.
In this post, we’re breaking down the anatomy of a beautiful wet bar—from layout and plumbing considerations to materials, lighting, and the finishing touches that make it shine. Whether you’re designing from scratch or updating an existing nook, this guide will help you get it right from the start.
1. Start with Function: Layout & Plumbing 101
Before you start designing, think about the “why” and “where.” What’s the purpose of your bar? Is it to support your love for entertaining? Morning lattes? Easy access for houseguests?
Start by identifying the zone in your home that needs it most:
- Off the kitchen: A natural spot, perfect for hosting overflow or creating a drink station that doesn’t clog up your prep area
- Basement or media room: For movie nights or game days—add a mini fridge and snack zone for the ultimate hangout
- Hallway or nook: I love turning awkward or unused spaces into beautiful, functional features. A hallway alcove can become a standout moment
- Primary suite or guest room: Yes, a bedroom bar. Ideal for a morning coffee setup or winding down with a nightcap
Ask yourself:
- Do I need a sink for rinsing glasses and prepping drinks?
- Will this bar be near existing plumbing? (That makes install so much easier.)
- Will it be used daily or only for entertaining?
If it’s a true wet bar, plumbing is the foundation. You’ll need a water line and a drain. Ideally, you’ll locate it near a kitchen, laundry room, or bathroom wall to keep costs down. Compact bar sinks are often all you need (think 10-15 inches wide). Pair with a statement faucet—we love a polished nickel or unlacquered brass gooseneck.
When we designed ours, we looked for a spot that would feel like a destination, but that was still connected enough to the kitchen and living areas to make sense. If you entertain often, proximity to your main gathering space matters.
Clouz Houz tip: If you’re designing during a remodel, this is the time to rough in plumbing—even if you’re not ready to build it yet.
2. Choose Your Surfaces Wisely: Countertops, Backsplash, and Cabinetry
Your surfaces should not only reflect your style, but also stand up to spills, drips, and the occasional splash of red wine.
Countertops
- Quartz: Durable, low maintenance, and comes in endless styles
- Marble: Classic and stunning, but needs sealing
- Soapstone: Understated with beautiful veining, and naturally resistant to stains
Backsplash
- Zellige or glazed tile brings handmade charm and reflects light
- Mirrored glass is glam and makes the space feel bigger
- Slab backsplash (same material as the countertop) adds drama and polish.
Cabinetry
- Painted shaker doors are timeless
- Reeded, fluted, or cane-front panels create beautiful texture
- Natural wood tones feel warm and organic
We once used Farrow & Ball “Studio Green” on a bar cabinet with antique brass hardware and a walnut butcher block counter—still one of my favorite combinations ever.
3. Style Meets Storage: Cabinetry, Shelving & Hidden Features
Function meets beauty here. Your wet bar should offer smart storage and show off your pretties.
Base cabinetry
- Use drawers for bar tools, napkins, and openers
- Closed cabinets hide mixers, extra glassware, or backstock
- Consider a pull-out trash or recycle bin (a total luxury, but worth it!)
Storage & shelving
- Floating shelves are perfect for showing off glassware and curated bottles
- Want a hidden look? Use appliance panels to disguise your fridge or ice maker
- Try glass-front cabinets to mix storage with display
Bonus ideas
- Add a pull-out shelf for mixing or cutting fruit
- Integrate a drawer with dividers just for cocktail tools—we did this once and it was game-changing
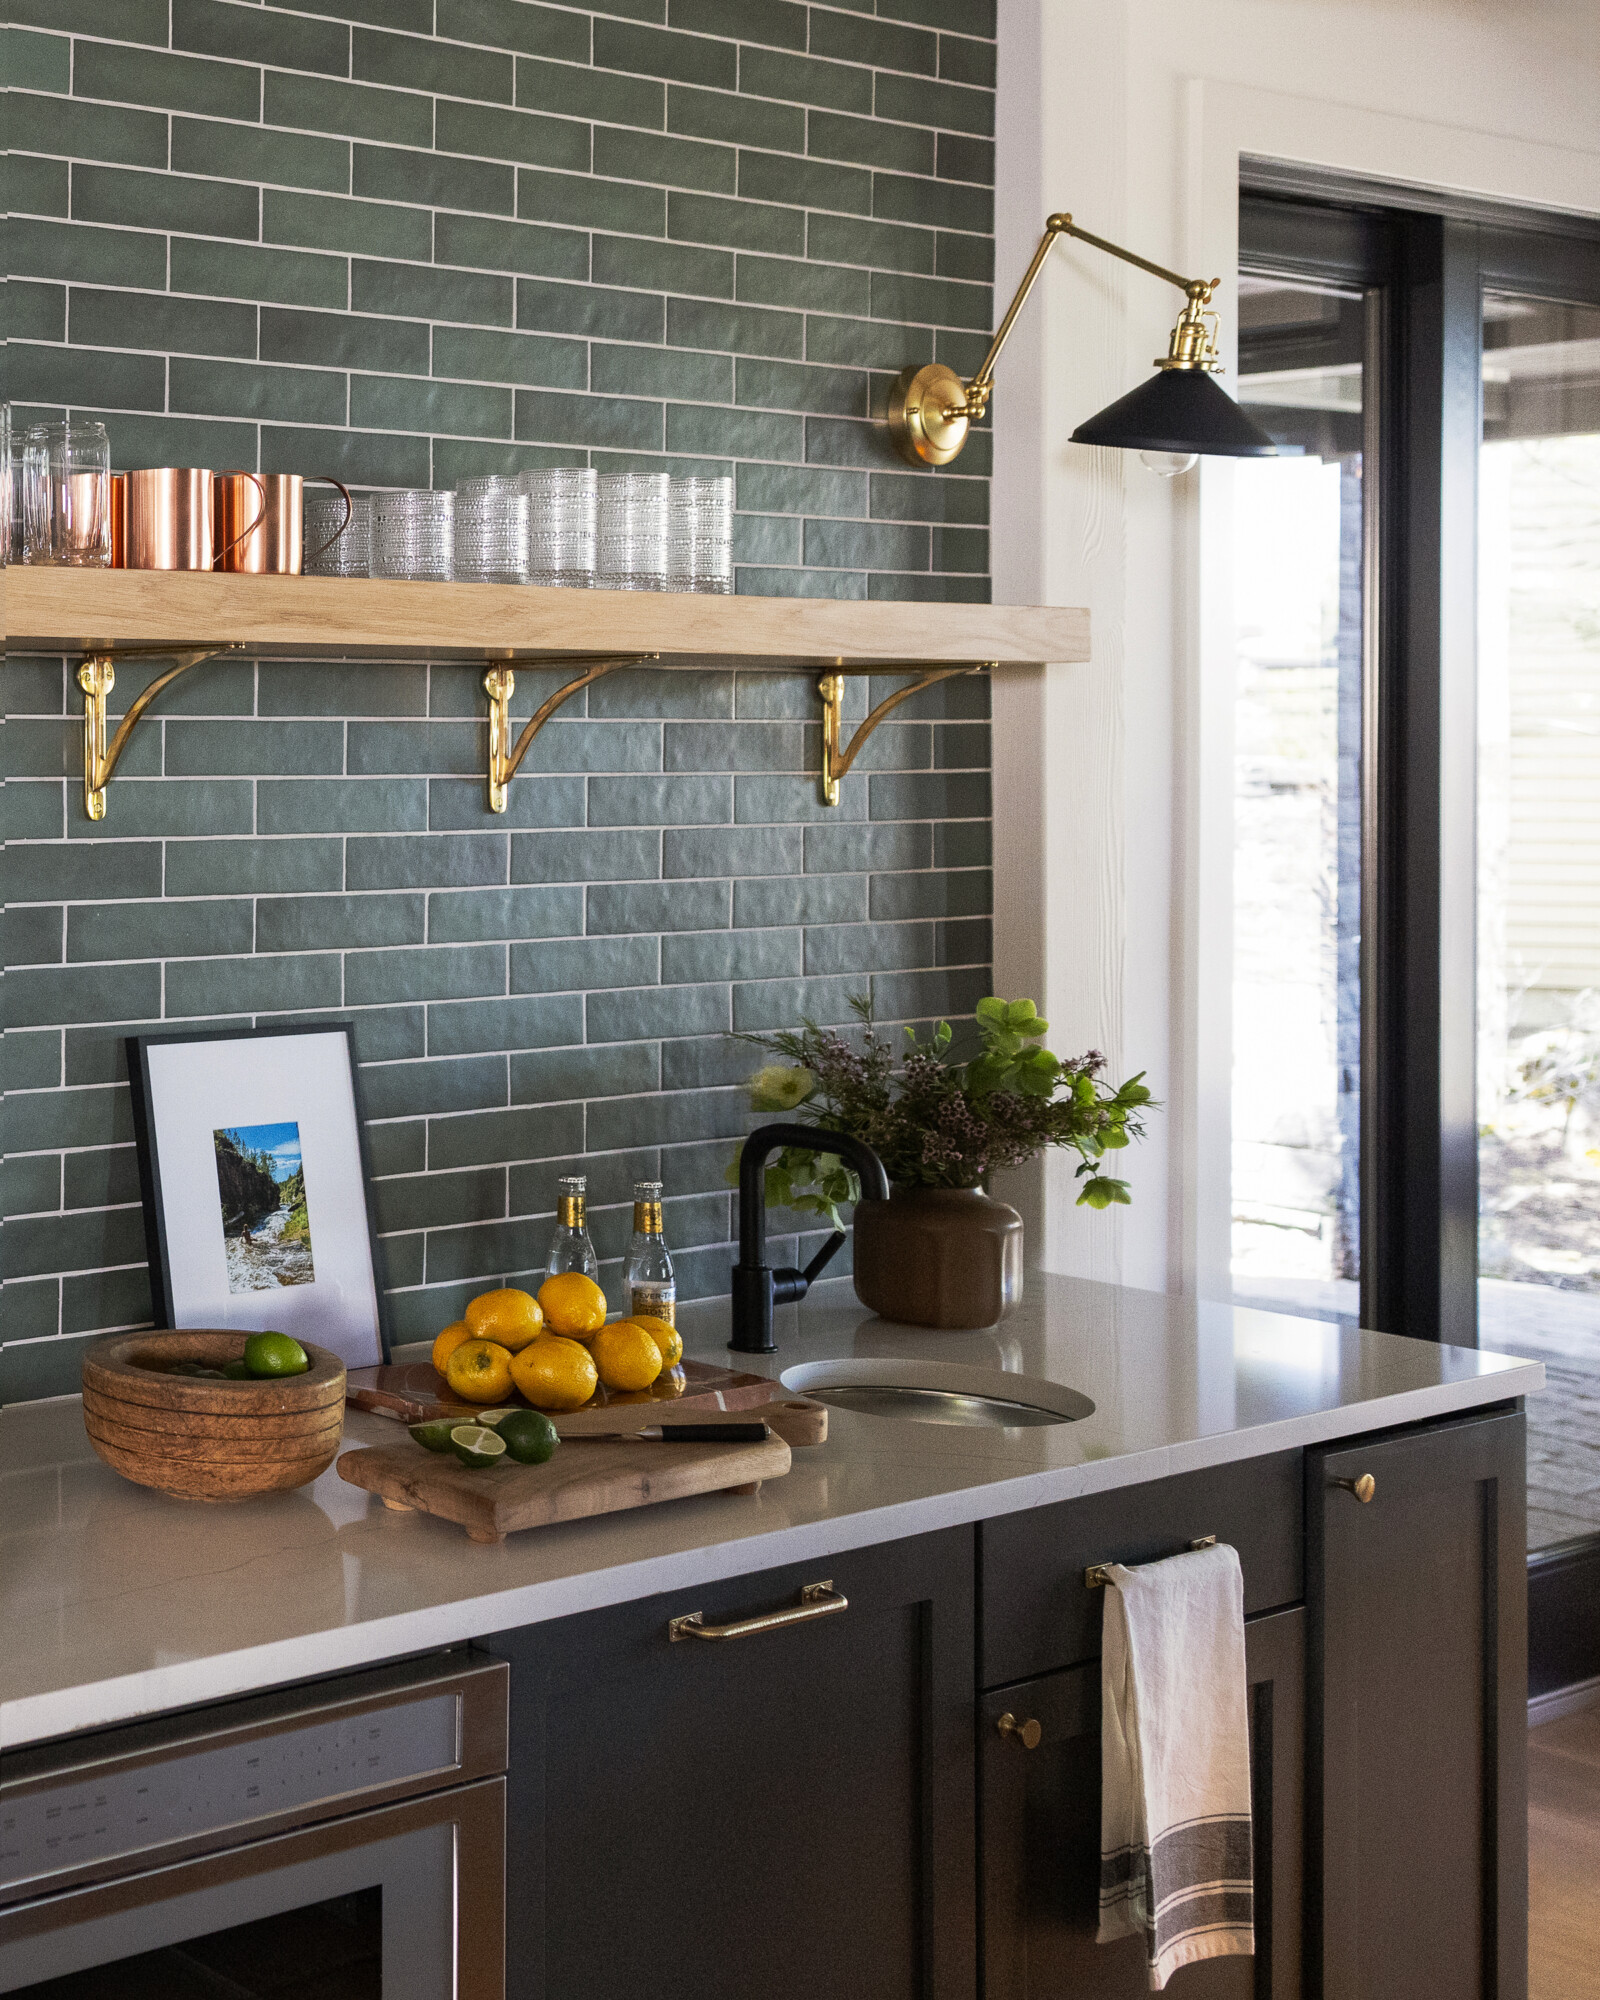
4. Light It Right: Mood & Task Lighting Tips
Lighting is often overlooked, but it makes the biggest impact. In a bar, you want a little drama!
Layer your lighting
- Sconces or picture lights above open shelving = instant charm
- Under cabinet lighting makes glassware sparkle
- Overhead pendants can elevate the entire feel—especially if your bar is more of a focal point
Use dimmable lighting where you can. You want it bright enough for prep, but moody enough to feel like a vibe when the sun goes down.
5. The Finishing Touches: Decor, Barware & Personality
This is the fun part—where personality comes through. Start with a tray to ground the styling (brass, marble, or rattan are all great options), then layer in your essentials: a favorite decanter, cocktail books, glassware, and vintage bar tools. Don’t forget soft elements like a small vase with fresh flowers or a framed piece of art leaned casually against the backsplash. If your space is more coffee bar than cocktail hour, style it with stacked mugs, a beautiful milk frother, and your favorite beans in a glass jar.
Always keep a few seasonal swaps on hand—like linen cocktail napkins in spring or darker-toned glassware for fall. It’s the little things that make it feel like a space you actually want to use.
The goal is to make it feel intentional, not cluttered—collected, not overdone.
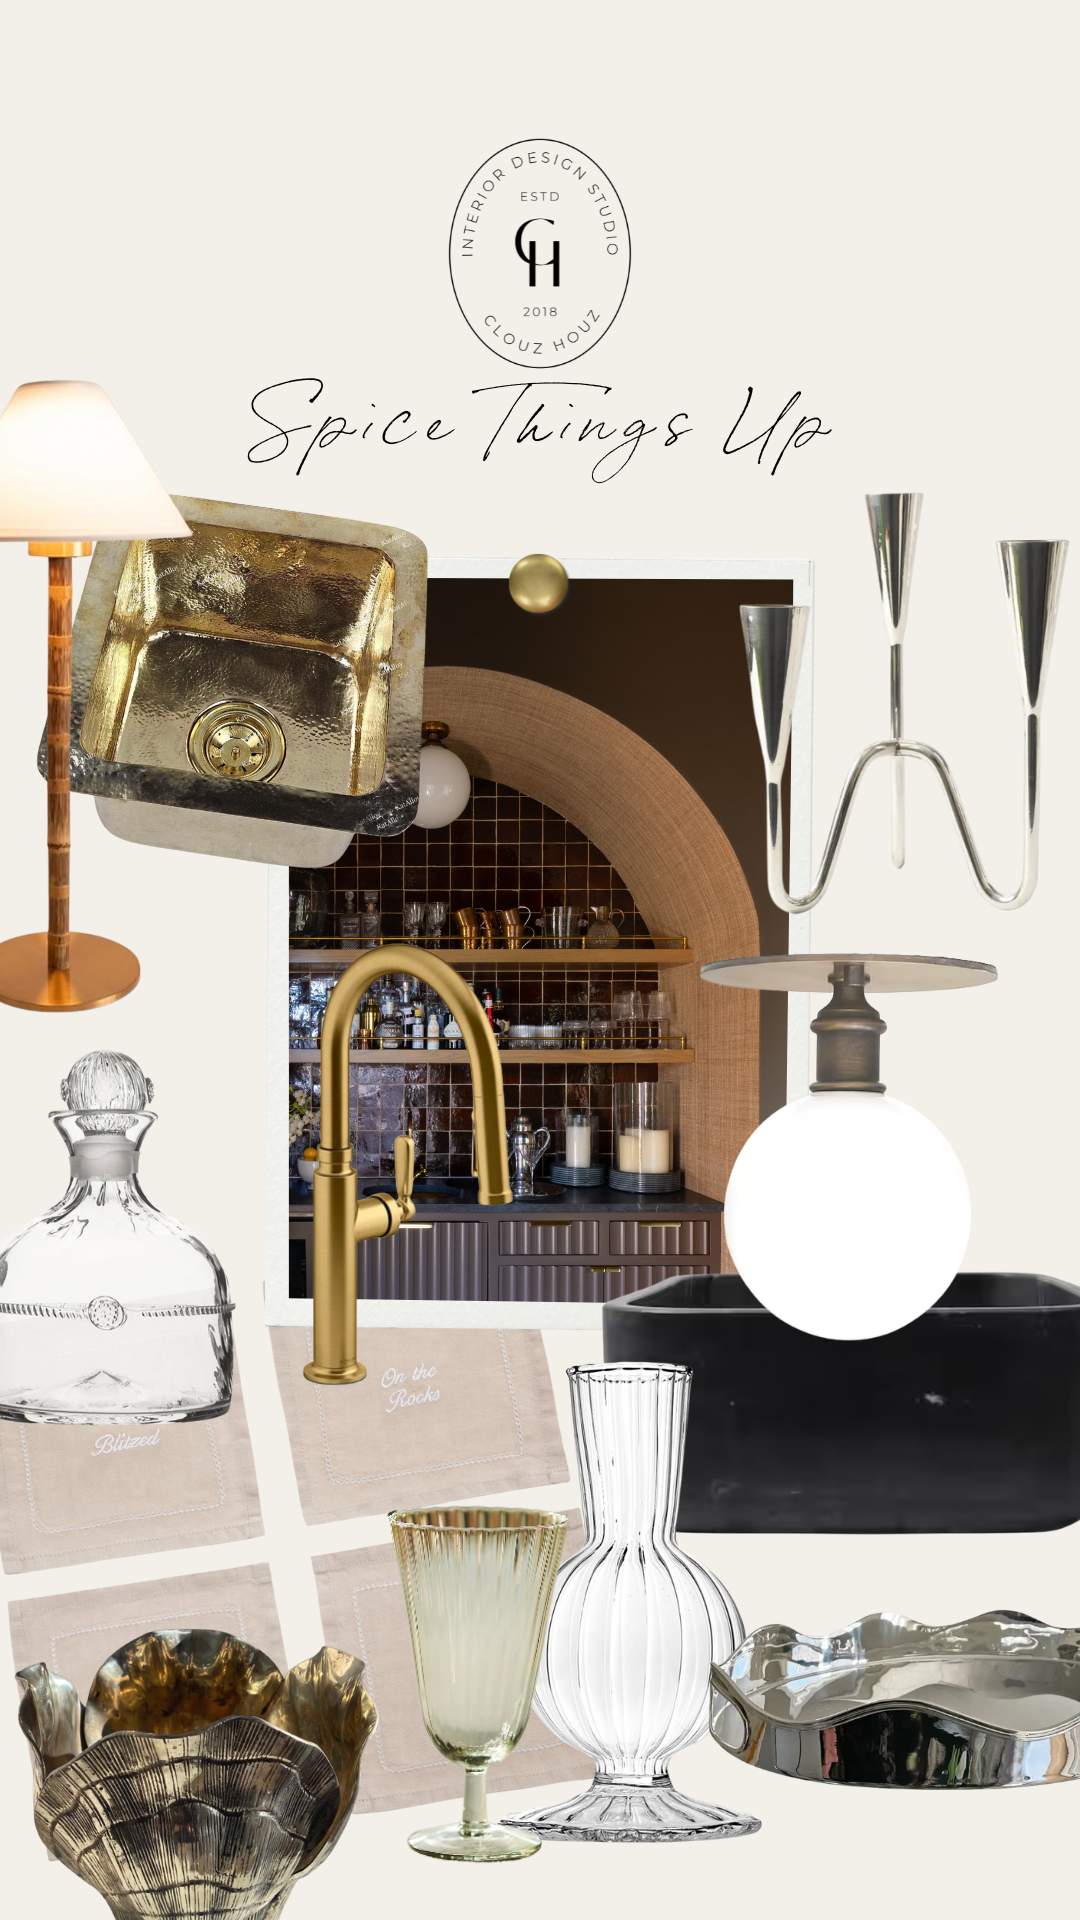
Brass Sink | Cocktail Napkins | Whiskey Decanter | Shell Vase | Brass Faucet | Water Glass | Glass Vase | Scalloped Tray | Ceiling Light | Utility Sink | Candle Holder
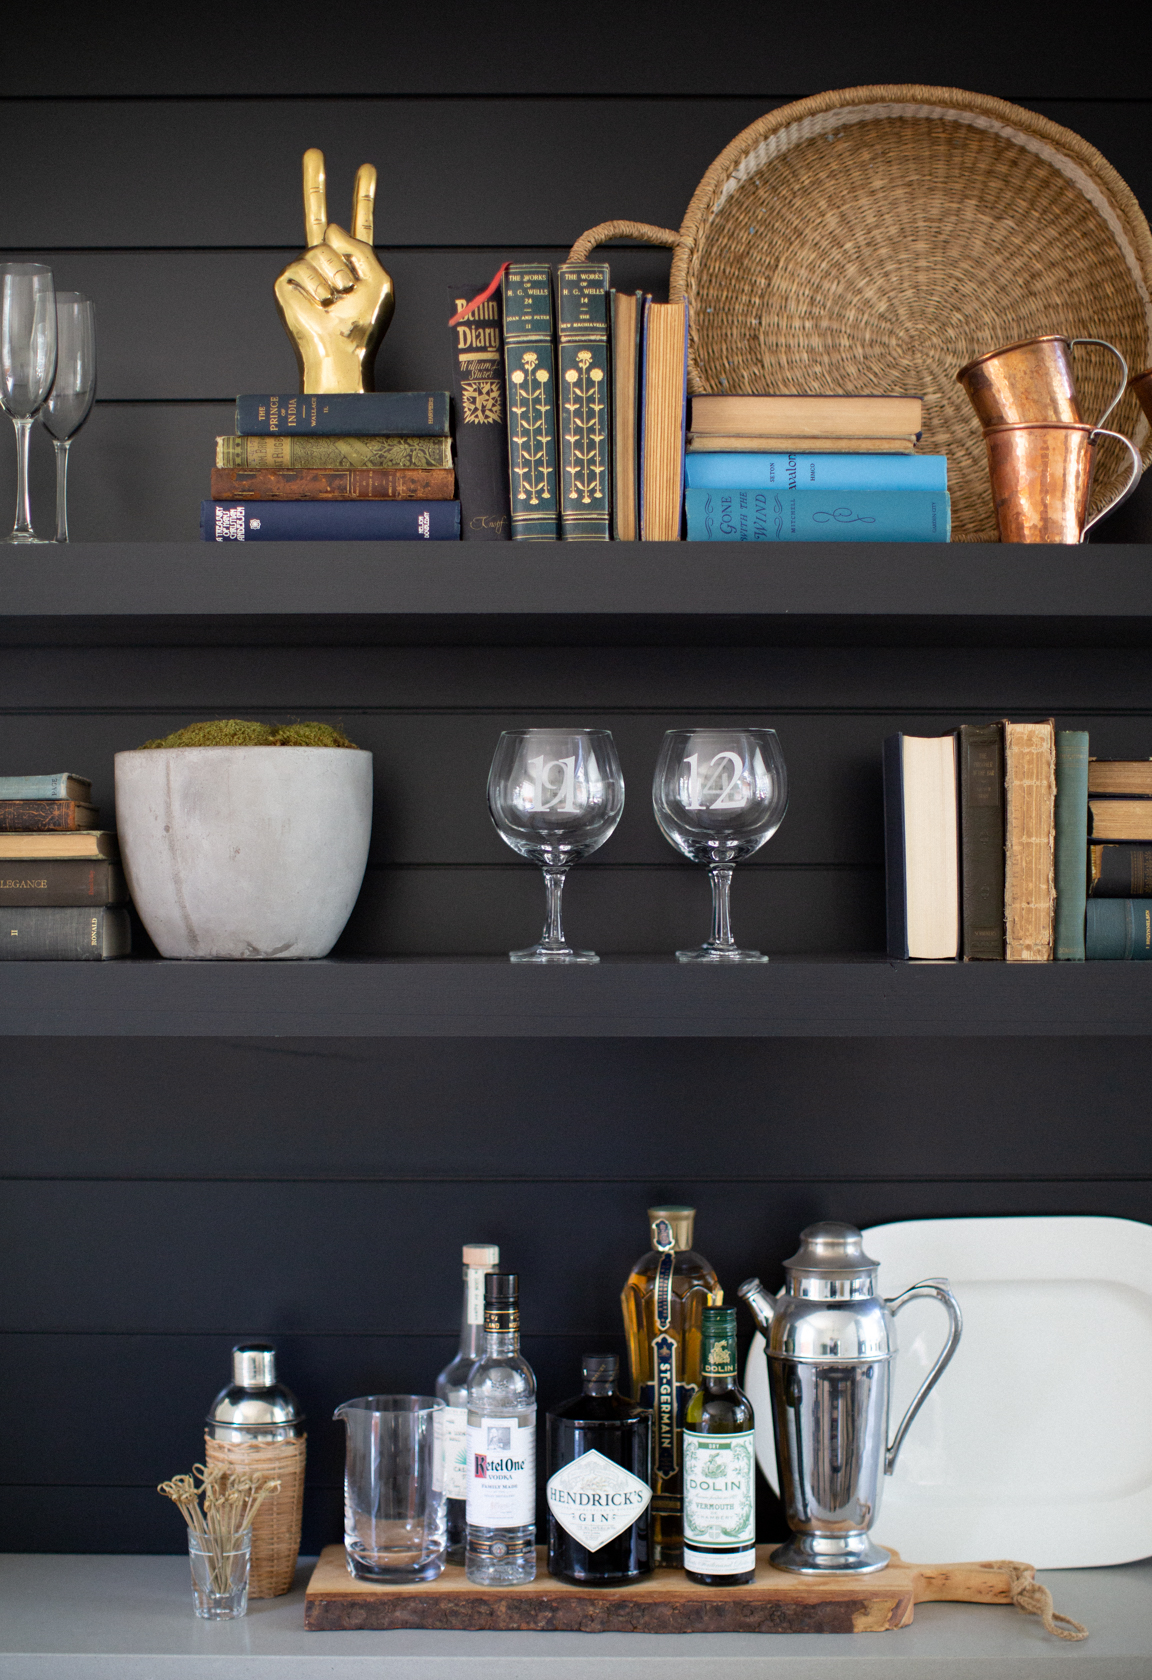
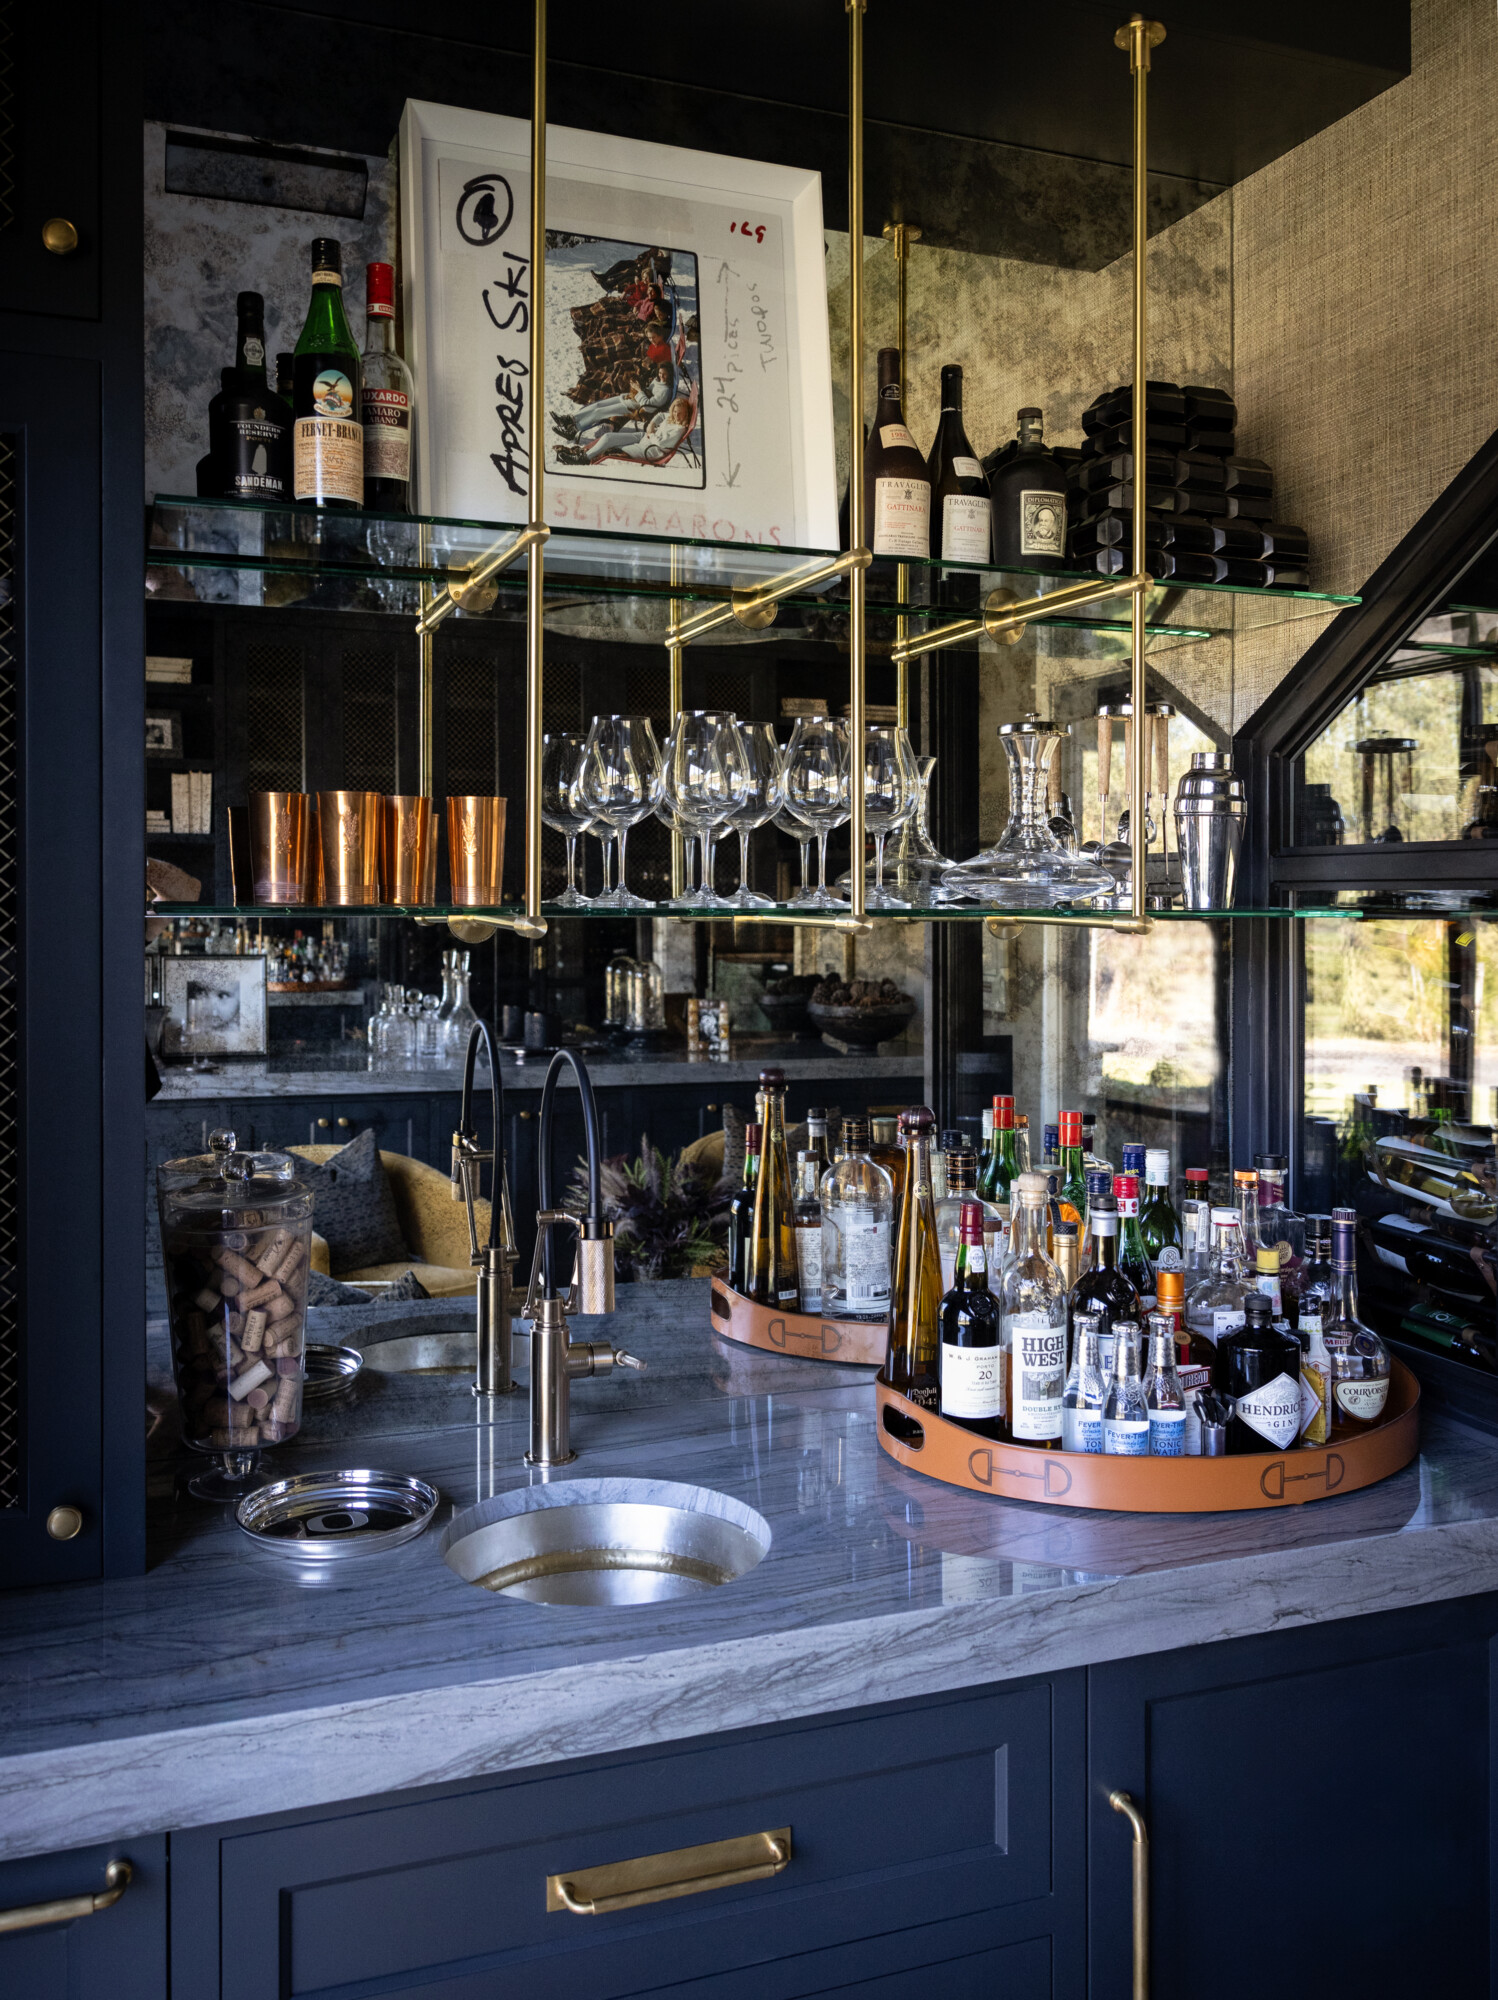
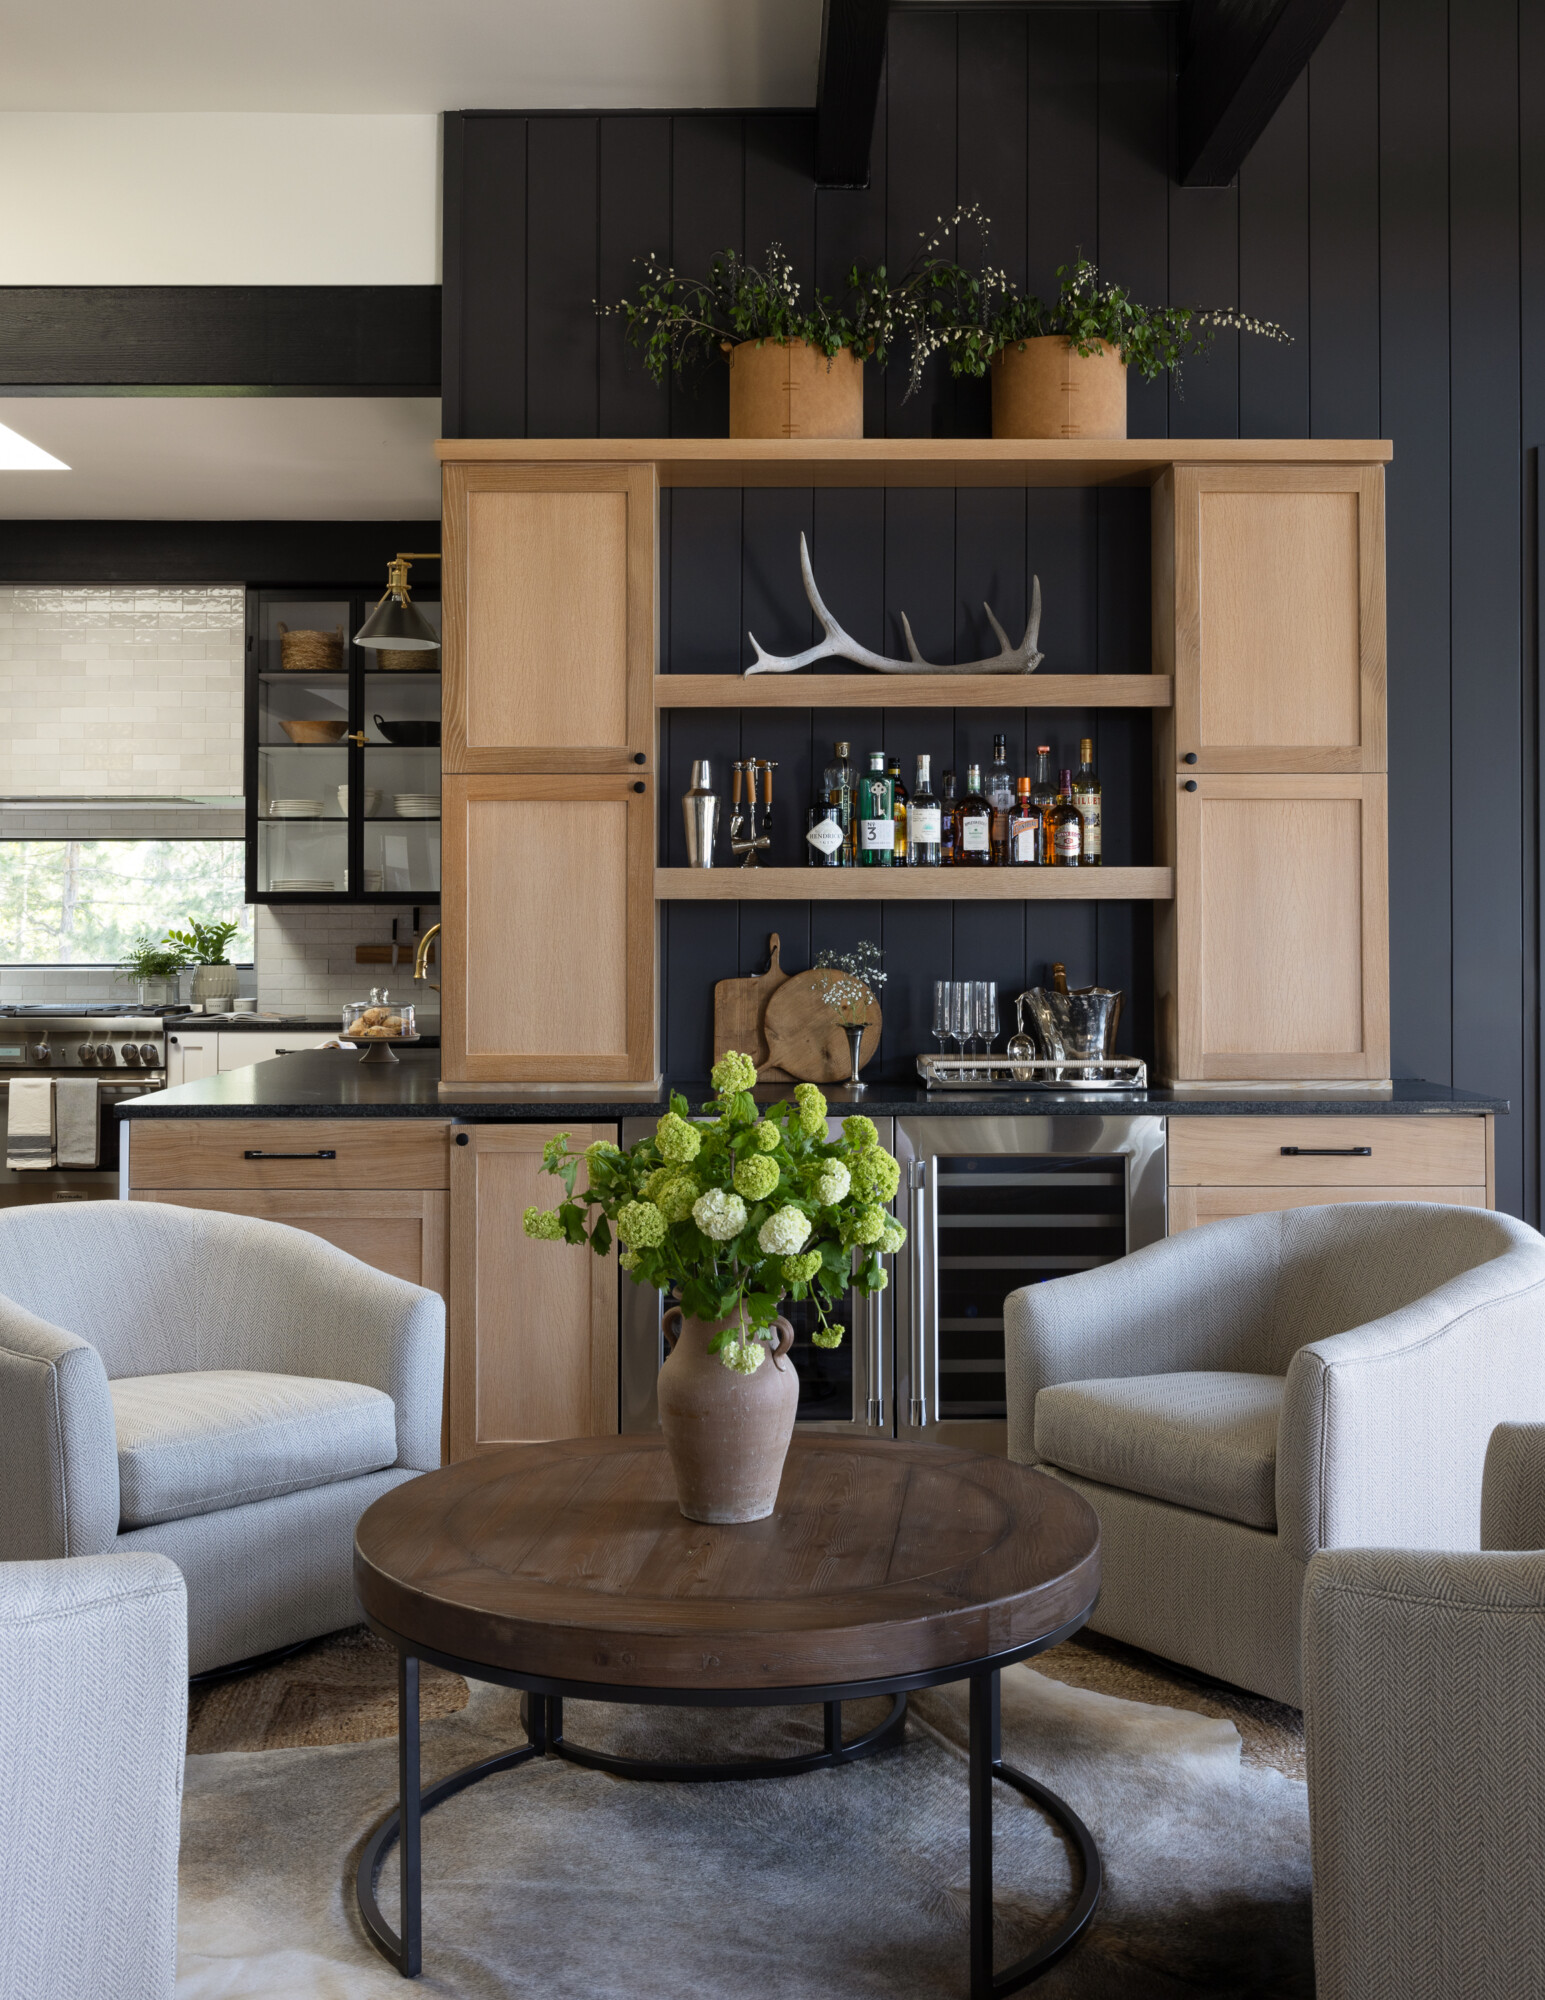
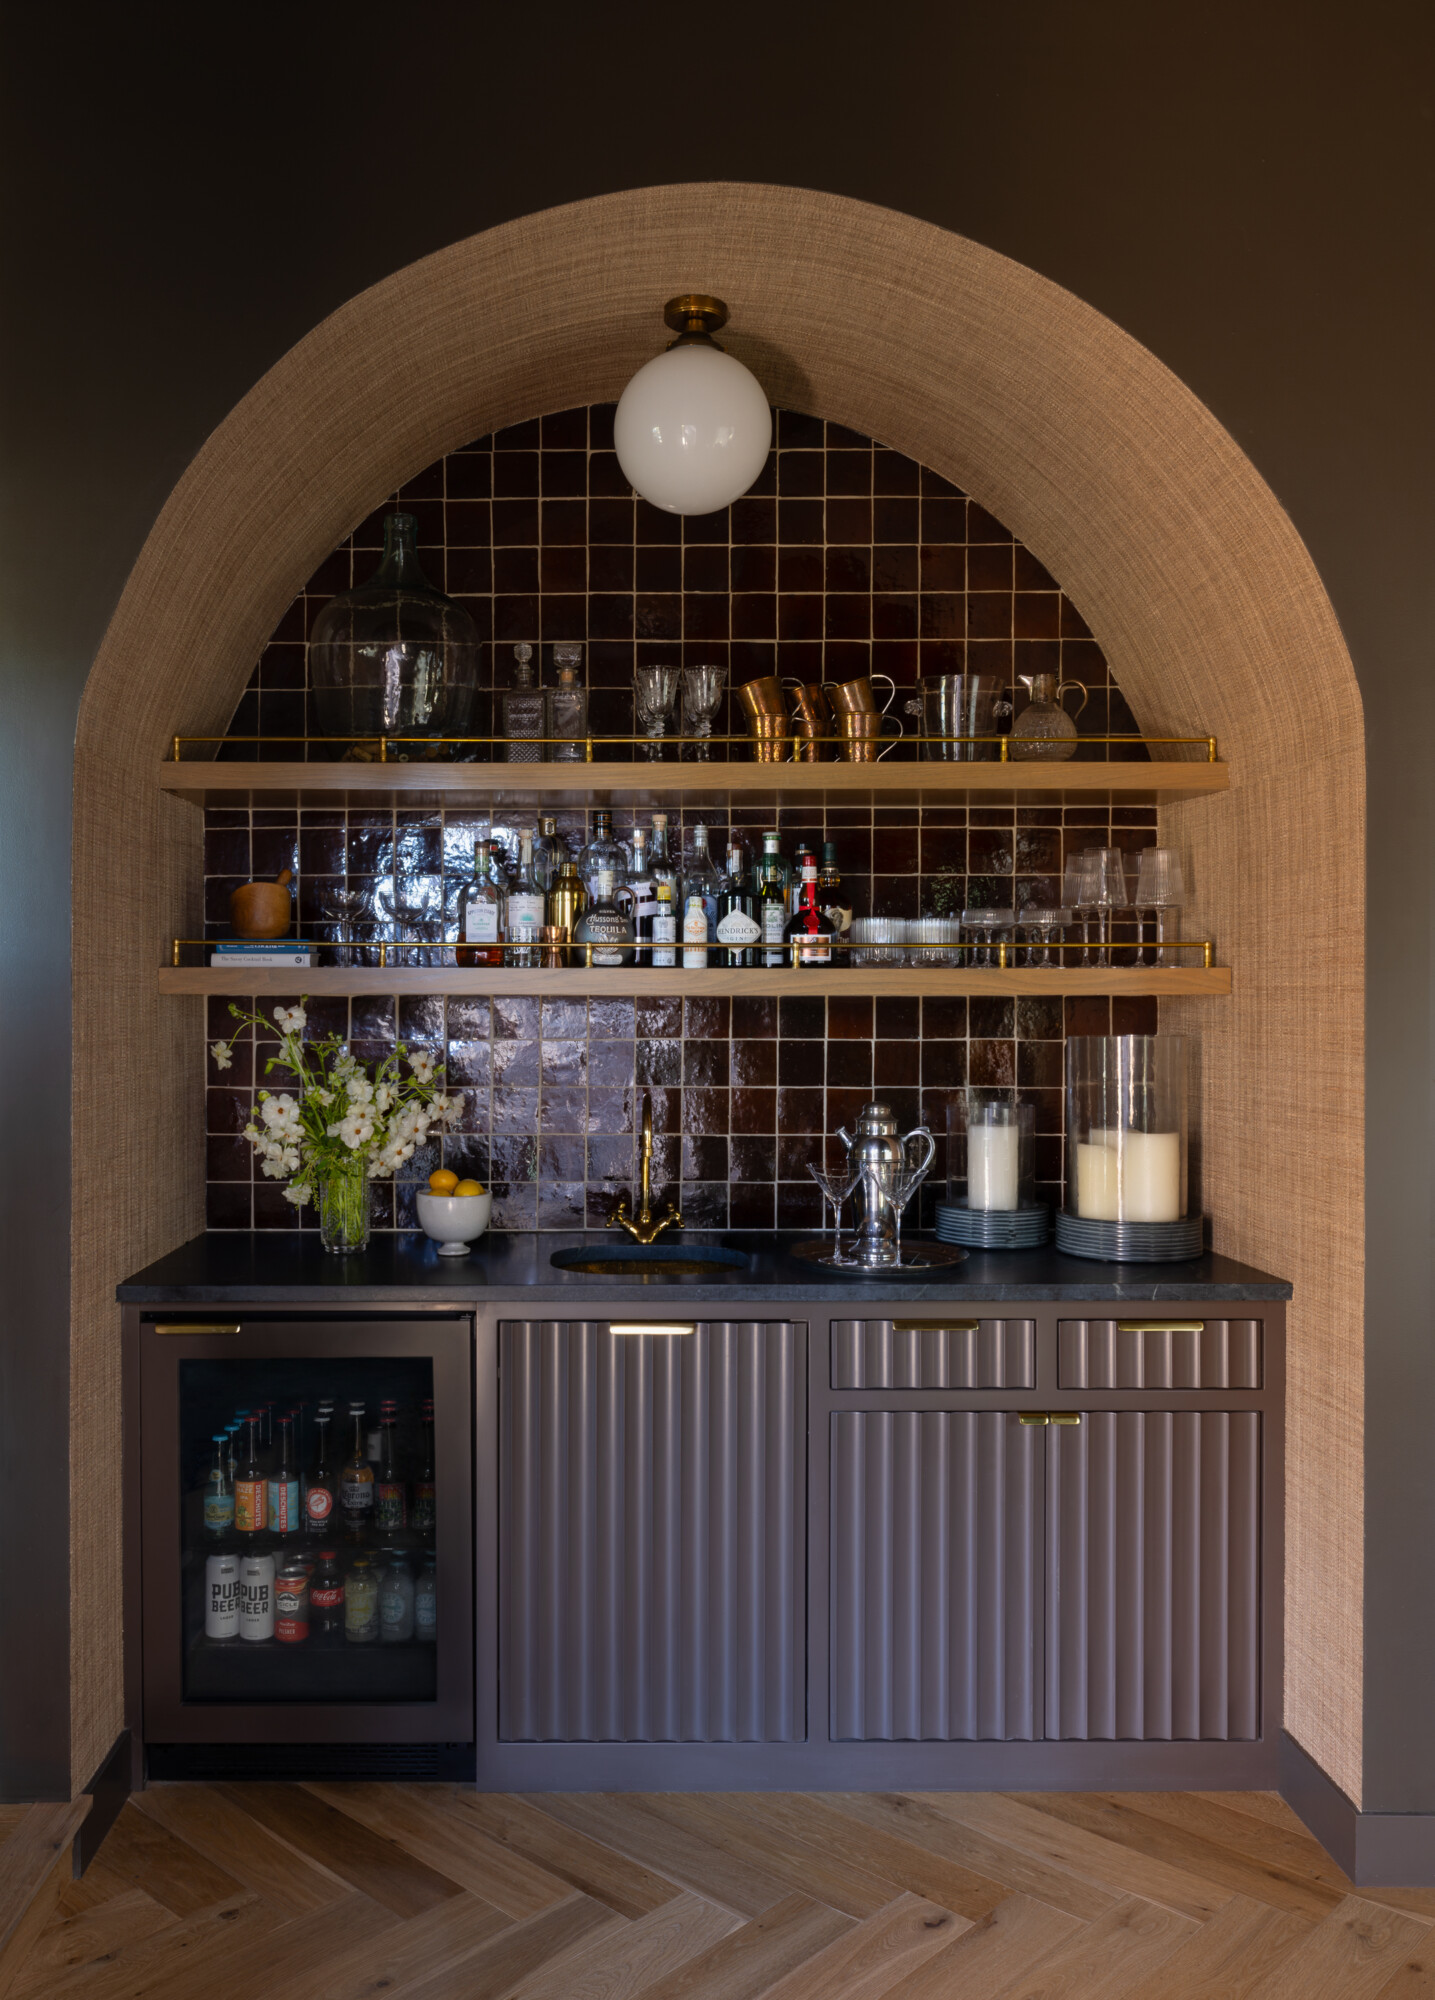
Get Inspired: Favorite Wet & Dry Bar Moments We Love

Looking to Create One of Your Own?
We offer full furnishings and styling services (perfect if you’re adding a bar into an existing space) and design plans for remodels or new builds.
Now is a great time to start planning, especially if you’re hoping to entertain during the holidays or make the most of seasonal hosting.
Tap here to inquire, or browse our portfolio to see other projects we’ve completed with custom bar setups. There’s a reason they become some of our clients’ favorite spots in the whole house!

