en The Fireplace: Before & After
When the Plan Changes … And It’s Better Because of It
This fireplace was never supposed to be the star of the room.
In fact, when we first started renovating 6th Street, our plan was simple: update the surface, modernize the surround, move on. But, as with most old homes, the second you start peeling back layers … you realize the house has its own opinion.
And sometimes, if you’re lucky, it rewards you for listening.
The Original Plan (That Didn’t Last Long)
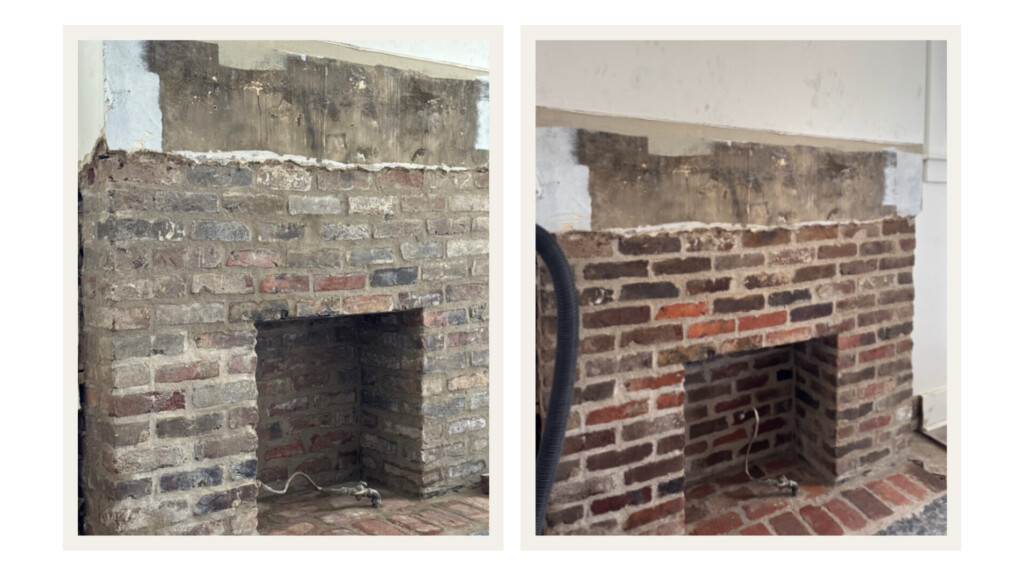
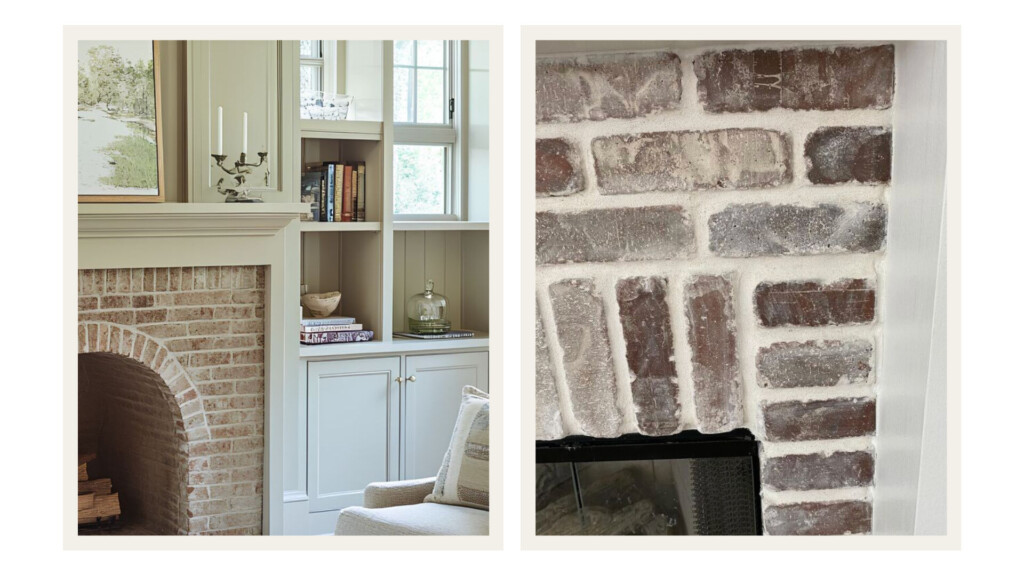
When we started, the fireplace was covered in ceramic (somewhat generic looking) white tile. Our thought was to simply tile over it — quick, clean, updated. But, I really disliked the funky shaped opening — it wasn’t an arch, but it if we were to square it off the opening would be very small. And, the other big bummer was it appeared at one time to be a gas burning fireplace. The gas line ran to it, but was no longer in working order.
So, I asked Derrick to peel back a few of the tiles to see what was underneath the ugly white tiles. Boy oh boy did we discover some magic! It was the original brick to the house (but it was in extreme disrepair — like caving in — literally). And, the foundation under it was falling into the basement. That explained why they had plastered over the original brick, and created that funky shape to the opening to help create “support” for the falling down chimney. We decided to consult a mason, and he basically determined that he could fix it with the original brick and get it back to it’s original shape and function again. I love to be cozy by the fireplace, so this made me very happy.
There’s something about original material (especially brick) that carries weight. It feels grounded. Honest. Earned. Suddenly the goal wasn’t to “update it.” It was: restore it and let it speak. And, having something very old and aged feels beautifully layered amongst all the newness.
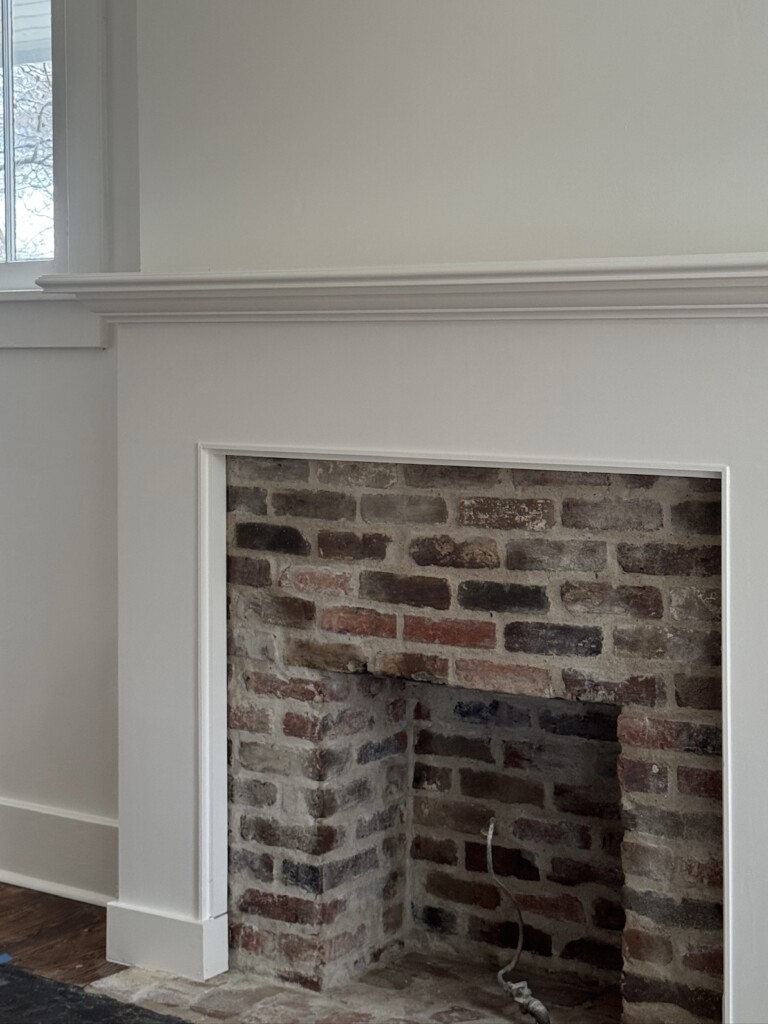
The mason came in to re-build and regrout. He used a lime mortar (which is what they use in historical properties). It felt authentic to this 1920’s bungalow. He over grouted the brick to give it that old world feel, and it was perfect. For. A. Day. When he came back, he used a cleaner to get the bricks more “pristine” looking since he thought that was what I wanted. And literally, while he was scrubbing, I said, “Ricky, will this change the look because I love the haze they have.” Then he said, “Allison, that’s just dust sticking to the brick.” And I said, “I love them looking imperfect.” LOL. But it was too late, he had washed away the patina I loved.
I’ll be honest … I was devastated. So close, yet so far. Isn’t that underlying current to all projects?!
The Brick Debate
Natural Red vs. Limewashed — And How To Decide
Once the brick was cleaned, the entire feel shifted.
It was richer. Redder. Crisper. More traditional. And so many of you messaged saying you loved it! You said it felt classic and timeless, and that maybe this was the right move. And you weren’t wrong. Natural brick has weight to it; it grounds a room, it leans historic. If you’re designing around darker woods, layered antiques, or deeper textiles, that richness can be absolutely beautiful.
But here’s the part people don’t talk about enough: brick doesn’t live in isolation. It lives in context.
When I stepped back and looked at the bigger picture: the furniture we had already sourced, the lighter palette I’ve been building in this room, the softness I envisioned, the red brick started to feel just a touch too heavy for the direction we were heading.
That doesn’t make it wrong. It just makes it wrong for this room.
So, I asked myself a few questions that I think are helpful if you’re debating this in your own home:
- What is the overall mood I’m trying to create? Grounded and moody, or airy and layered?
- Are the undertones of my brick fighting or supporting the rest of the space?
- Am I preserving character, or overpowering the room?
- If I live with it for a few weeks, does it still feel aligned?
And here’s the biggest one:
Am I reacting emotionally in the moment? Or designing intentionally for the long term?
That’s where the idea of a lime grout wash came back into the conversation. Not painted. Not opaque. Just softened. More on that decision next.
The Solution
A Soft Lime Wash (Not a Do-Over)
Ricky (best mason and nicest guy, btw) suggested we take the lime mortar he used for grouting and water it down. Similar to what he did on the brick kitchen floors, but much more diluted and brushed on imperfectly. The goal isn’t to “cover” the brick. It’s to soften the contrast, bring back a bit of that dusty, old-world feel, and let the texture stay visible. He told us that we could do it and get it to the perfect amount. So, we dove in and went for it.
CH Tip: If you’re considering this in your own home, here’s the key: test it first. Dilute more than you think. Step back often. You can always add — it’s much harder to subtract. Brick is extremely porous so it soaks whatever you put on it right up!
The Hearth & The Mantle
Editing Back to Let the Good Stuff Shine
When we ripped up the old fireplace tile, we uncovered an original stone hearth underneath — another one of those little renovation rewards. It has wear, variation, history … and there’s just no new material that can replicate that kind of character. We’re polishing it up and leaving it exposed exactly as it is.
The mantle got a similar treatment. We stripped it down, removed some of the extra detailing that was making it feel a bit fussy, and repainted it Sherwin Williams Alabaster. Originally, I thought I would paint it a slight accent color. But, in the end, I kept it the color of our walls for a subtle difference by changing it to a satin sheen instead of eggshell. It still feels traditional, just quieter and more intentional.
What’s Next
Furnishings + Window Coverings
Our window coverings just arrived, which feels like a turning point. Softening the perimeter of a room changes everything. I cannot wait to layer!!
We also added subtle mud-in can lights above the fireplace to highlight art (no overhead lighting in here). I’ve learned I much prefer living rooms that rely on lamps and accent lighting. It feels more intimate.
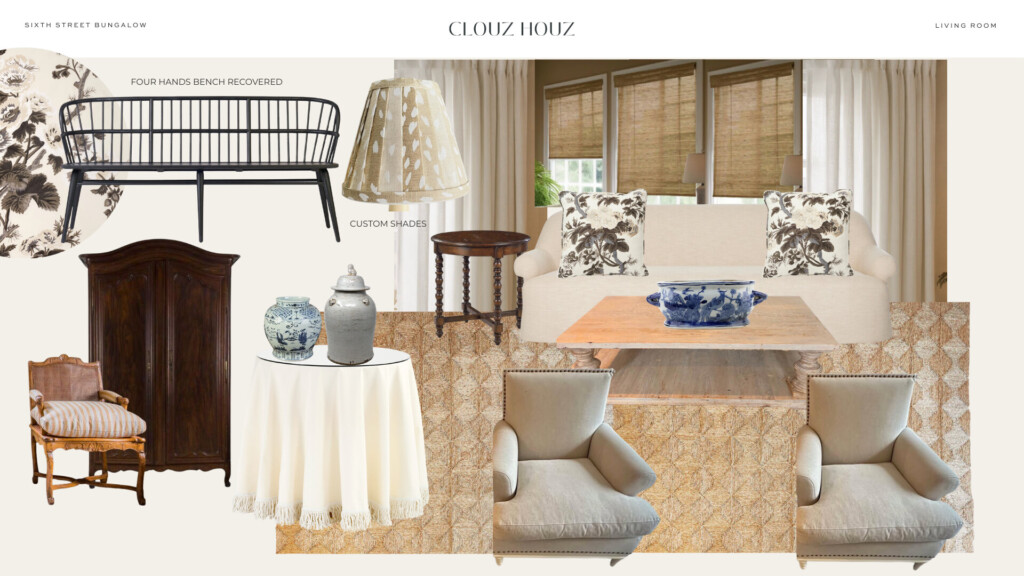
Now we get to do the fun part — bringing in the furnishings we’ve sourced and watching the vision finally click into place.
More to come as we finish pulling this room together! Make sure you’re following us on Instagram — we post new content every day.

